Context: This guide covers the process of submitting a contribution via file upload in the Wrkr Portal.
Glossary
- Interactive Demo
- Written steps: File upload and approval process only
- Written steps: Full end-to-end setup and file upload process
Interactive Demo
Note: Make the demo full-screen for a better experience. You can mute/un-mute narration to suit your preferences.
Written steps: File upload and approval process only
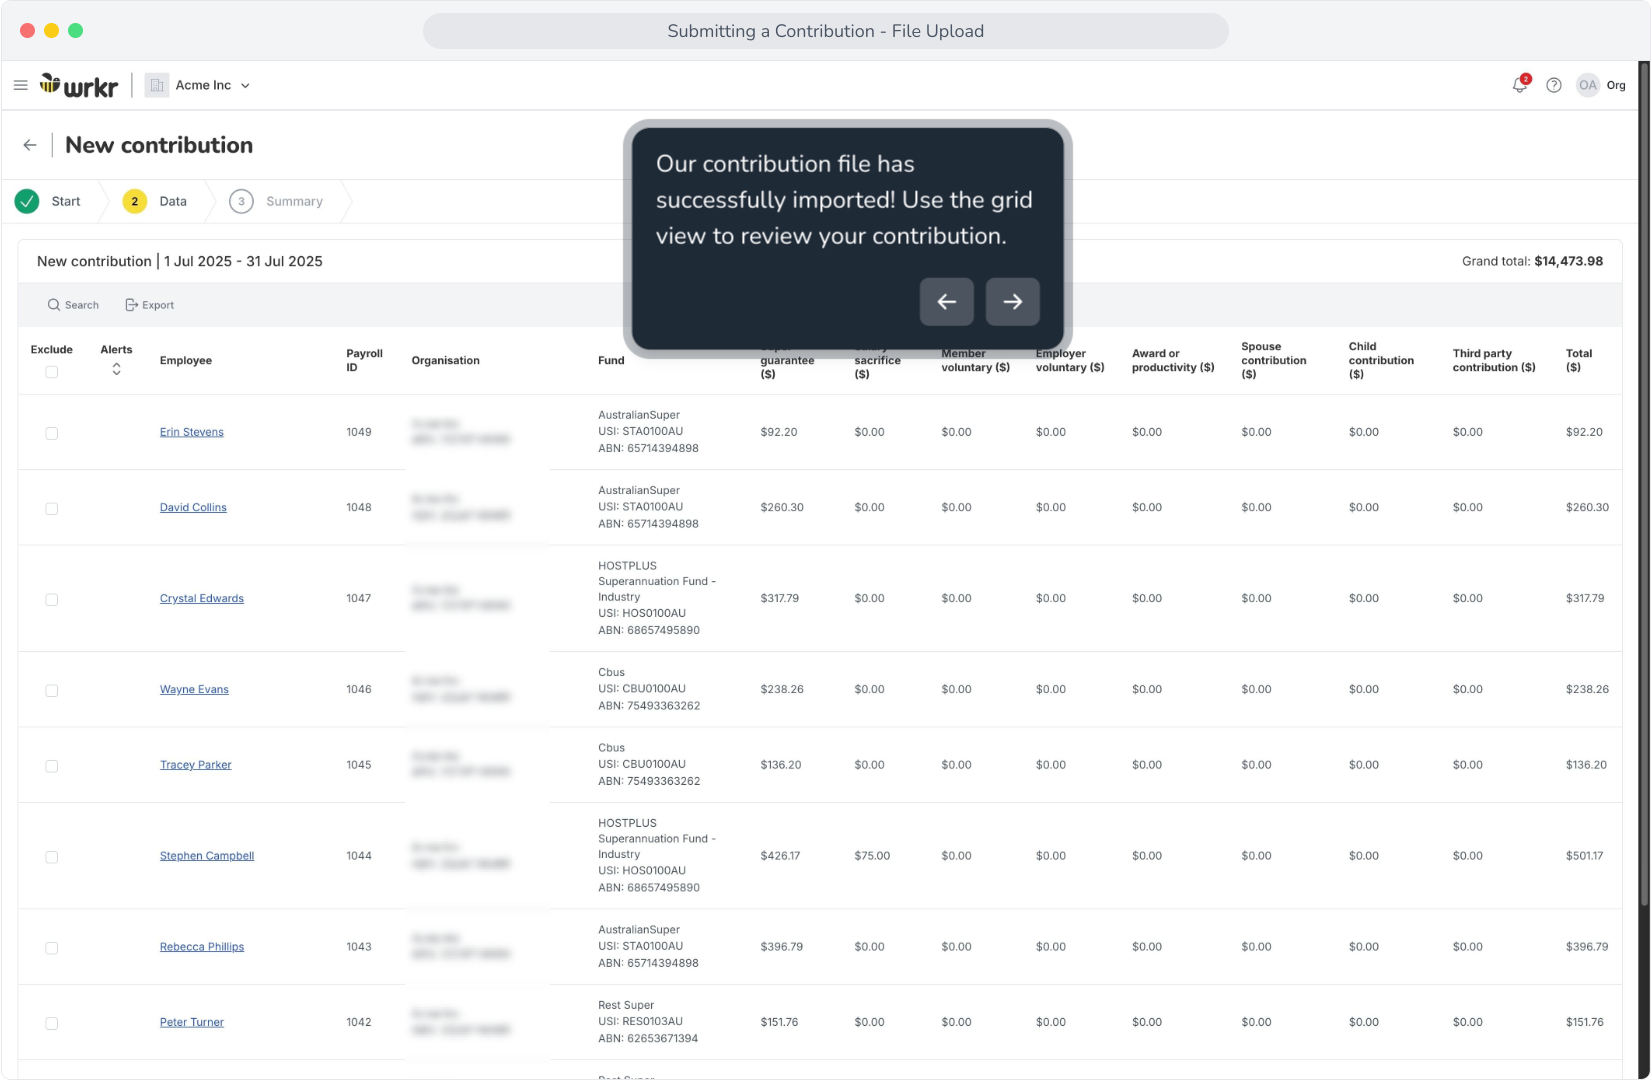
1. Our contribution file has successfully imported! Use the grid view to review your contribution.
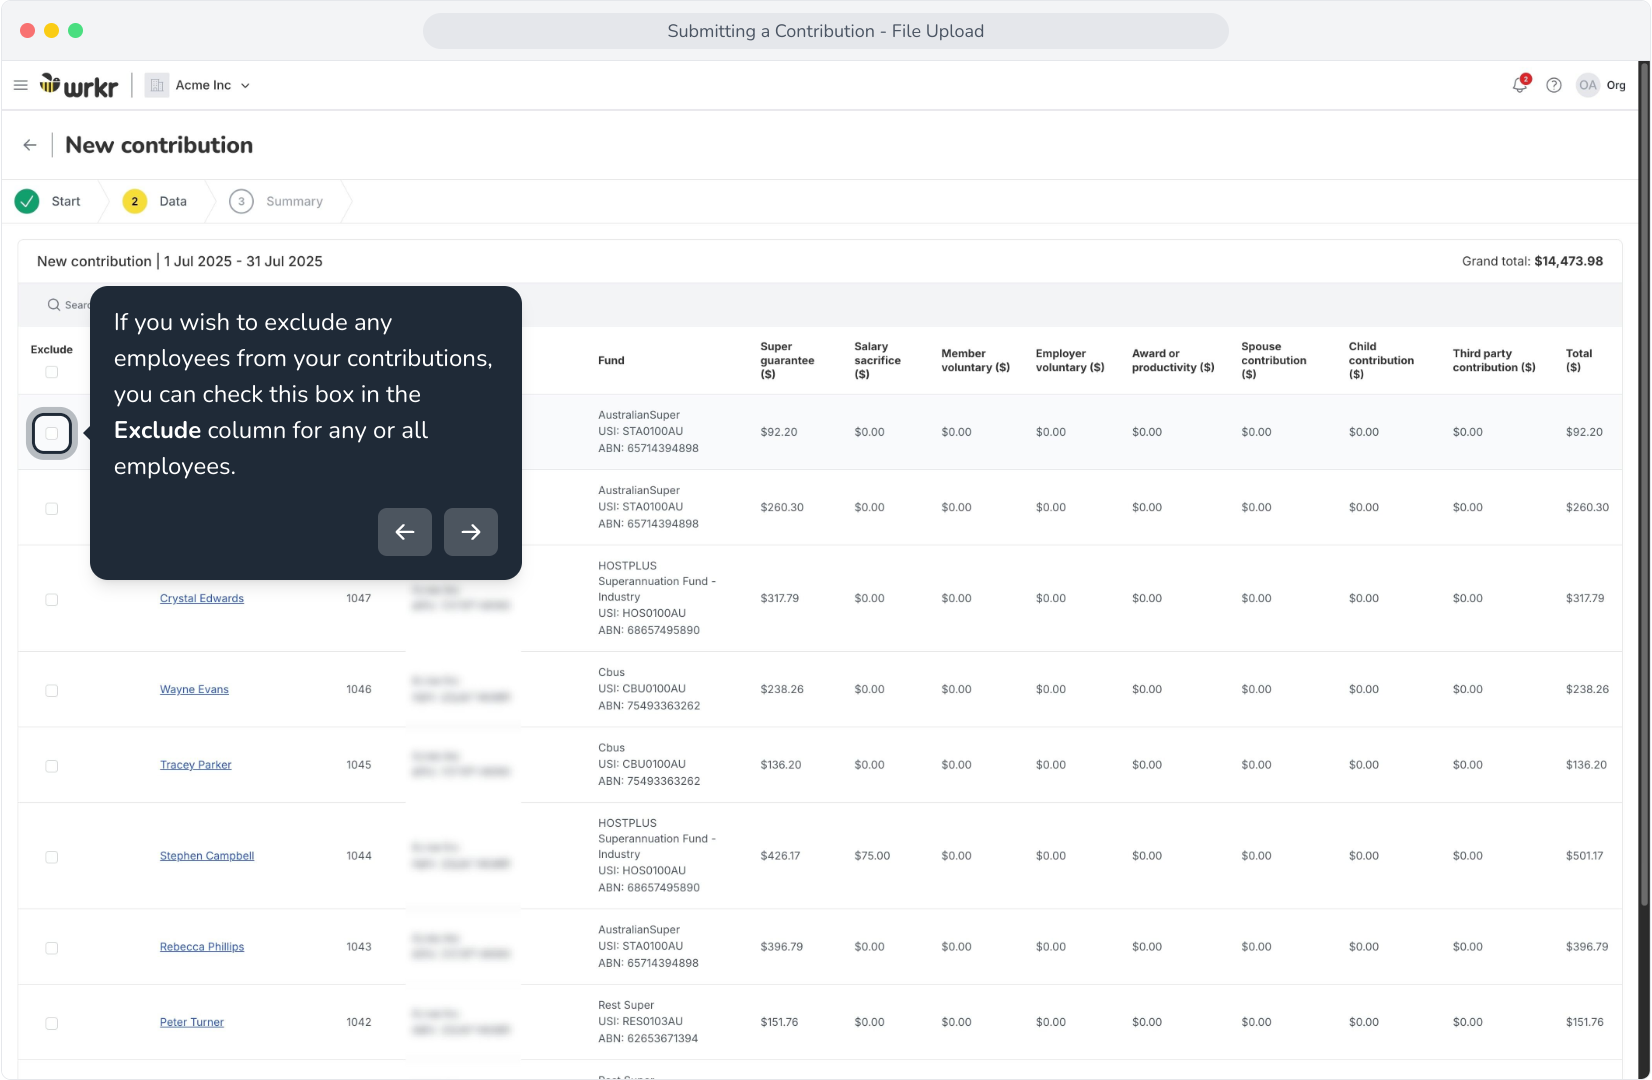
2. If you wish to exclude any employees from your contributions, you can check this box in the Exclude column for any or all employees.
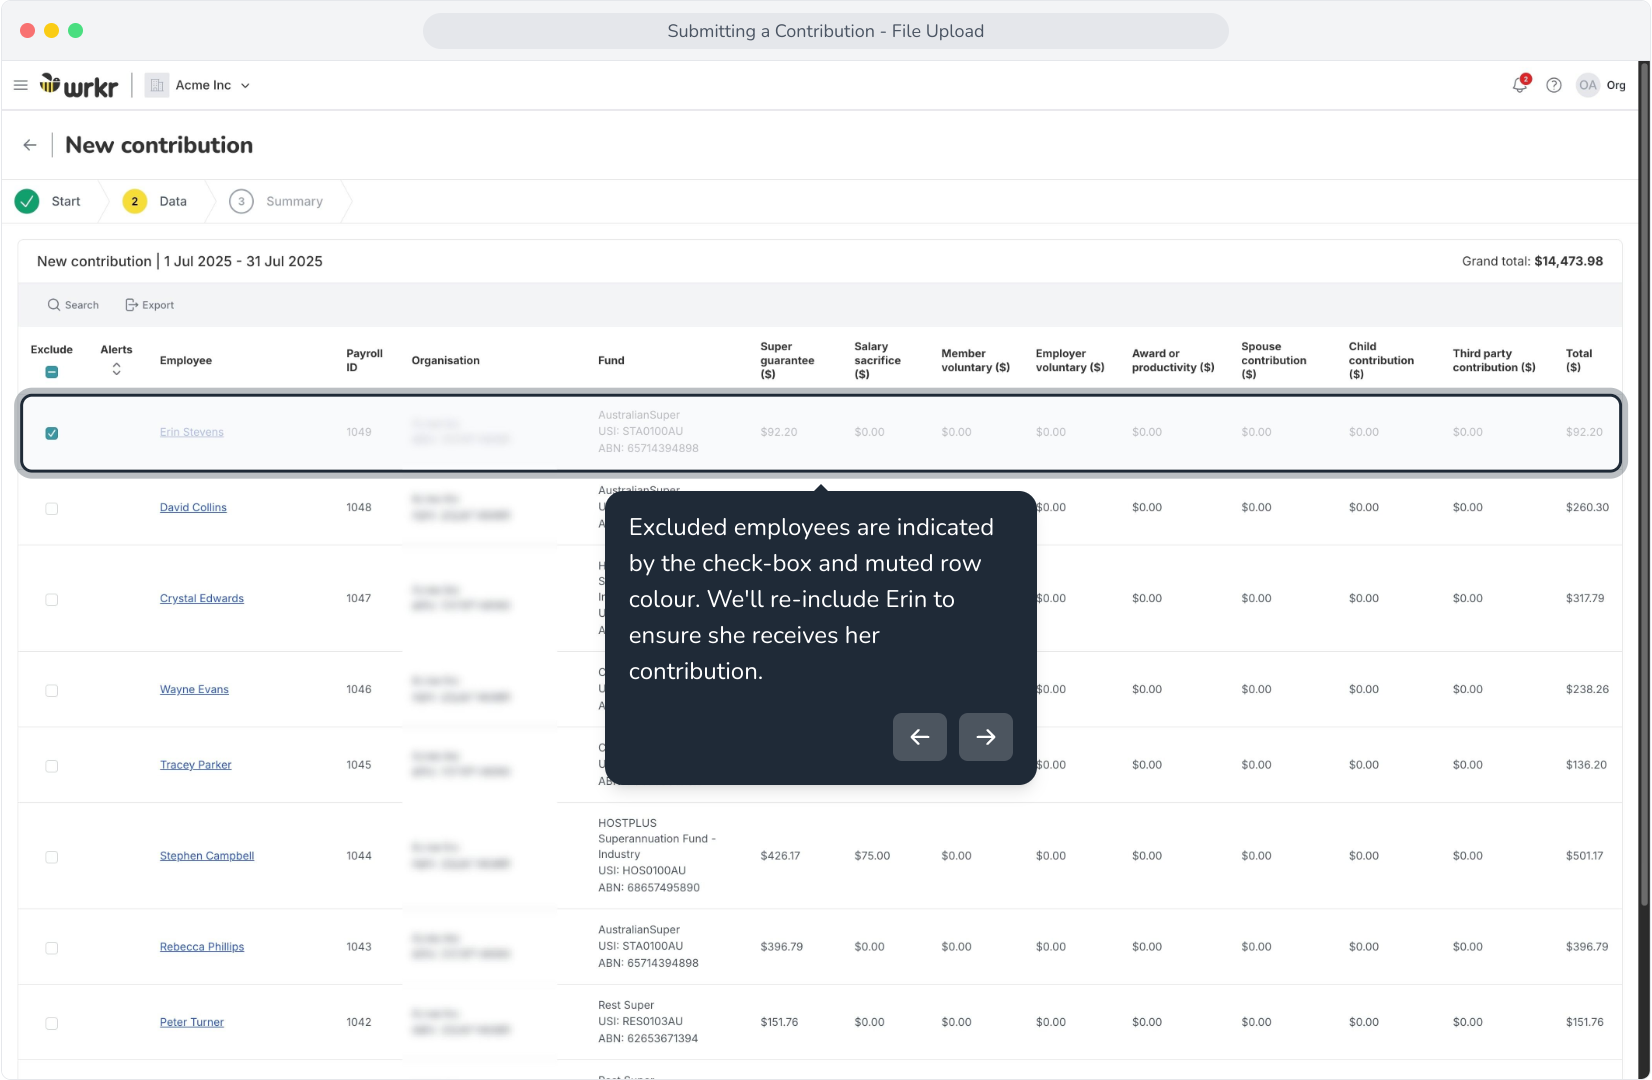
3. Excluded employees are indicated by the check-box and muted row colour. We'll re-include Erin to ensure she receives her contribution.
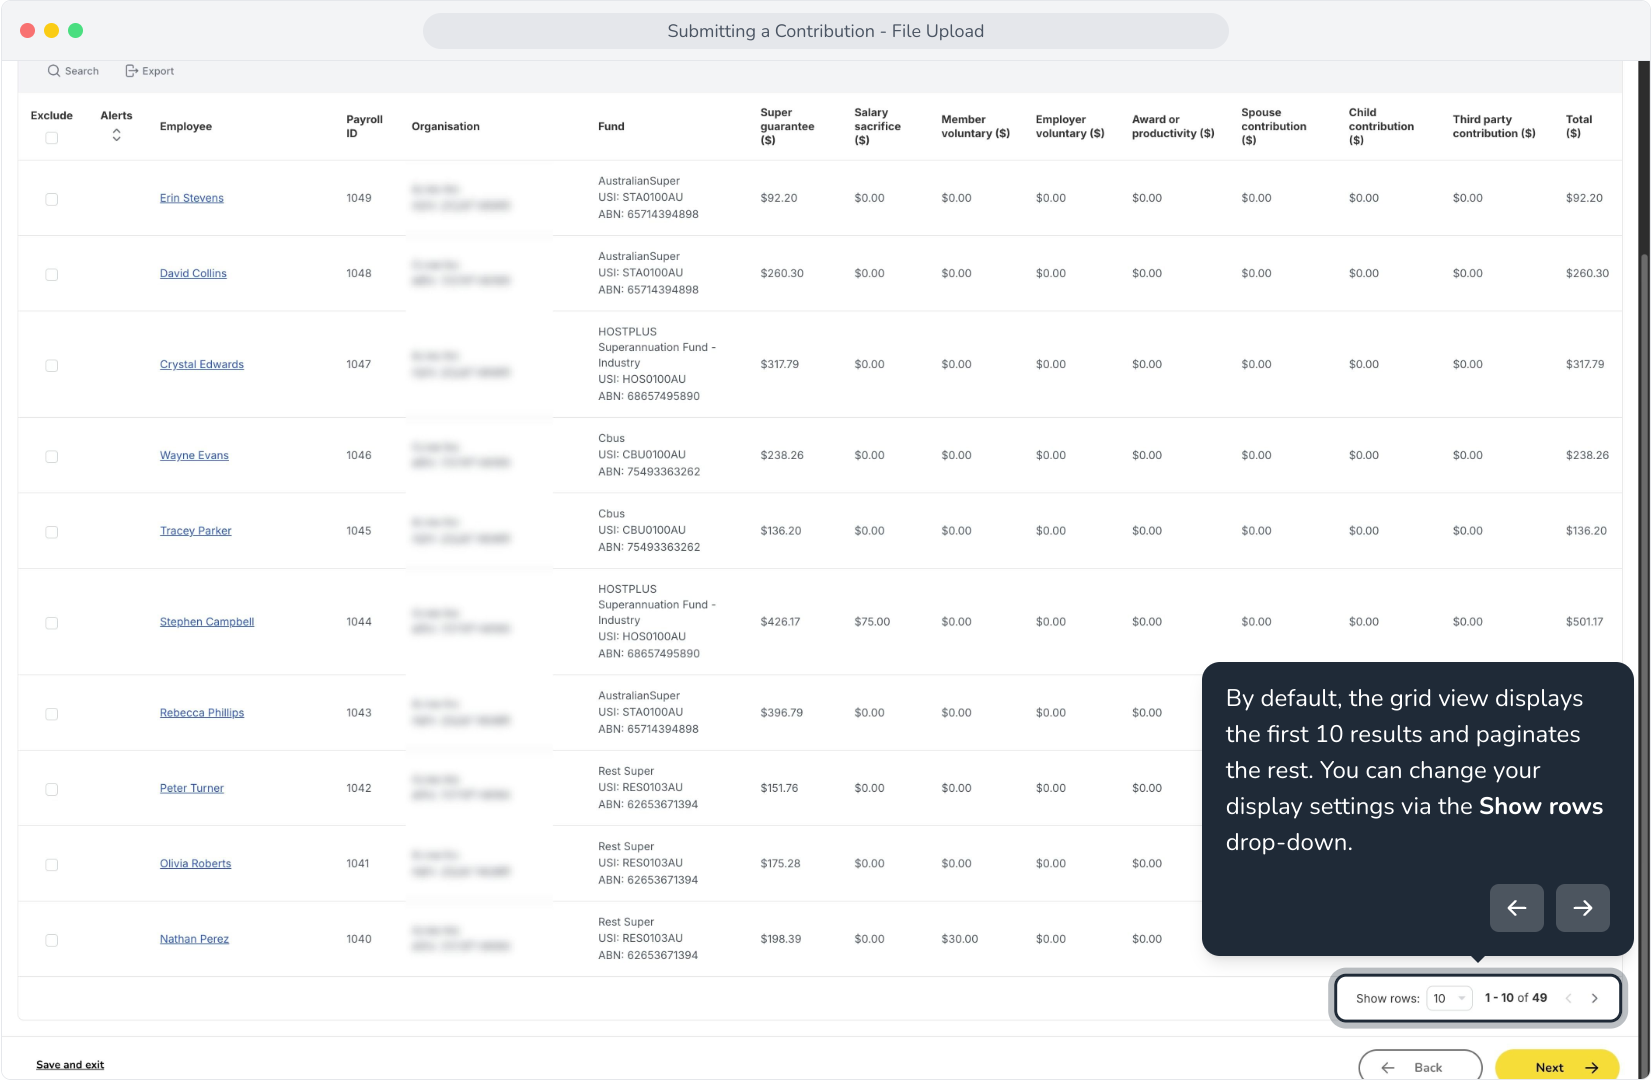
4. By default, the grid view displays the first 10 results and paginates the rest. You can change your display settings via the Show rows drop-down.
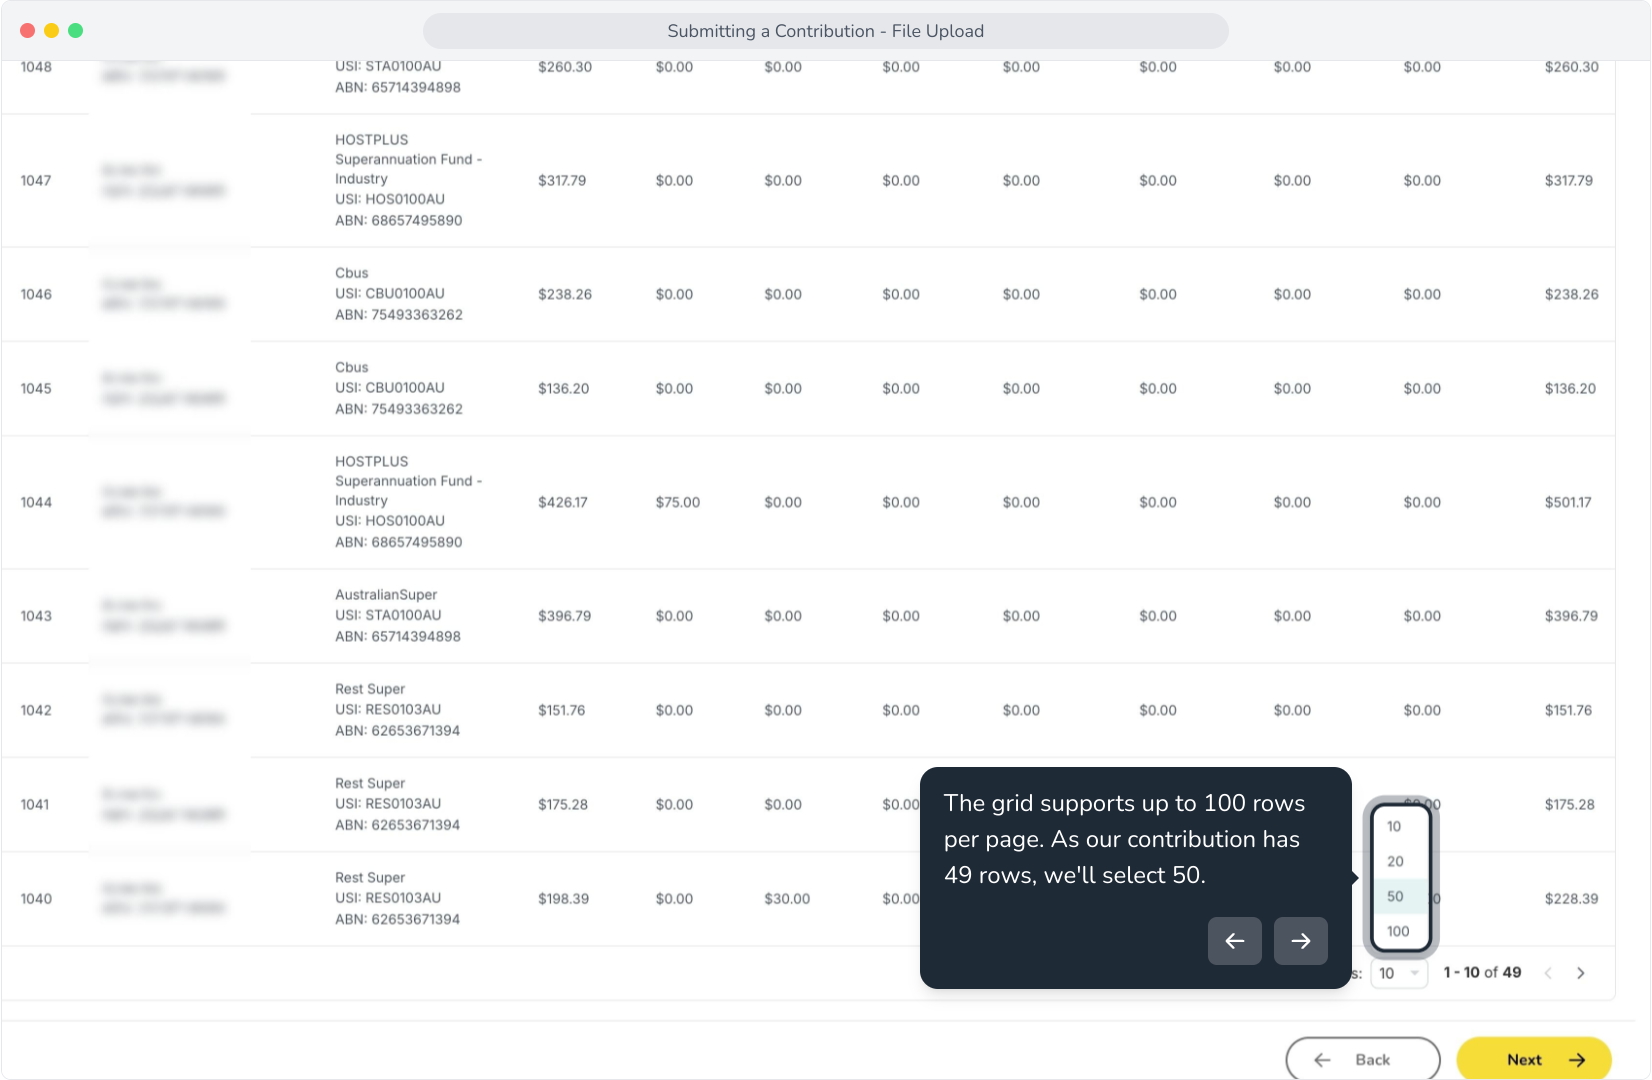
5. The grid supports up to 100 rows per page. As our contribution has 49 rows, we'll select 50.
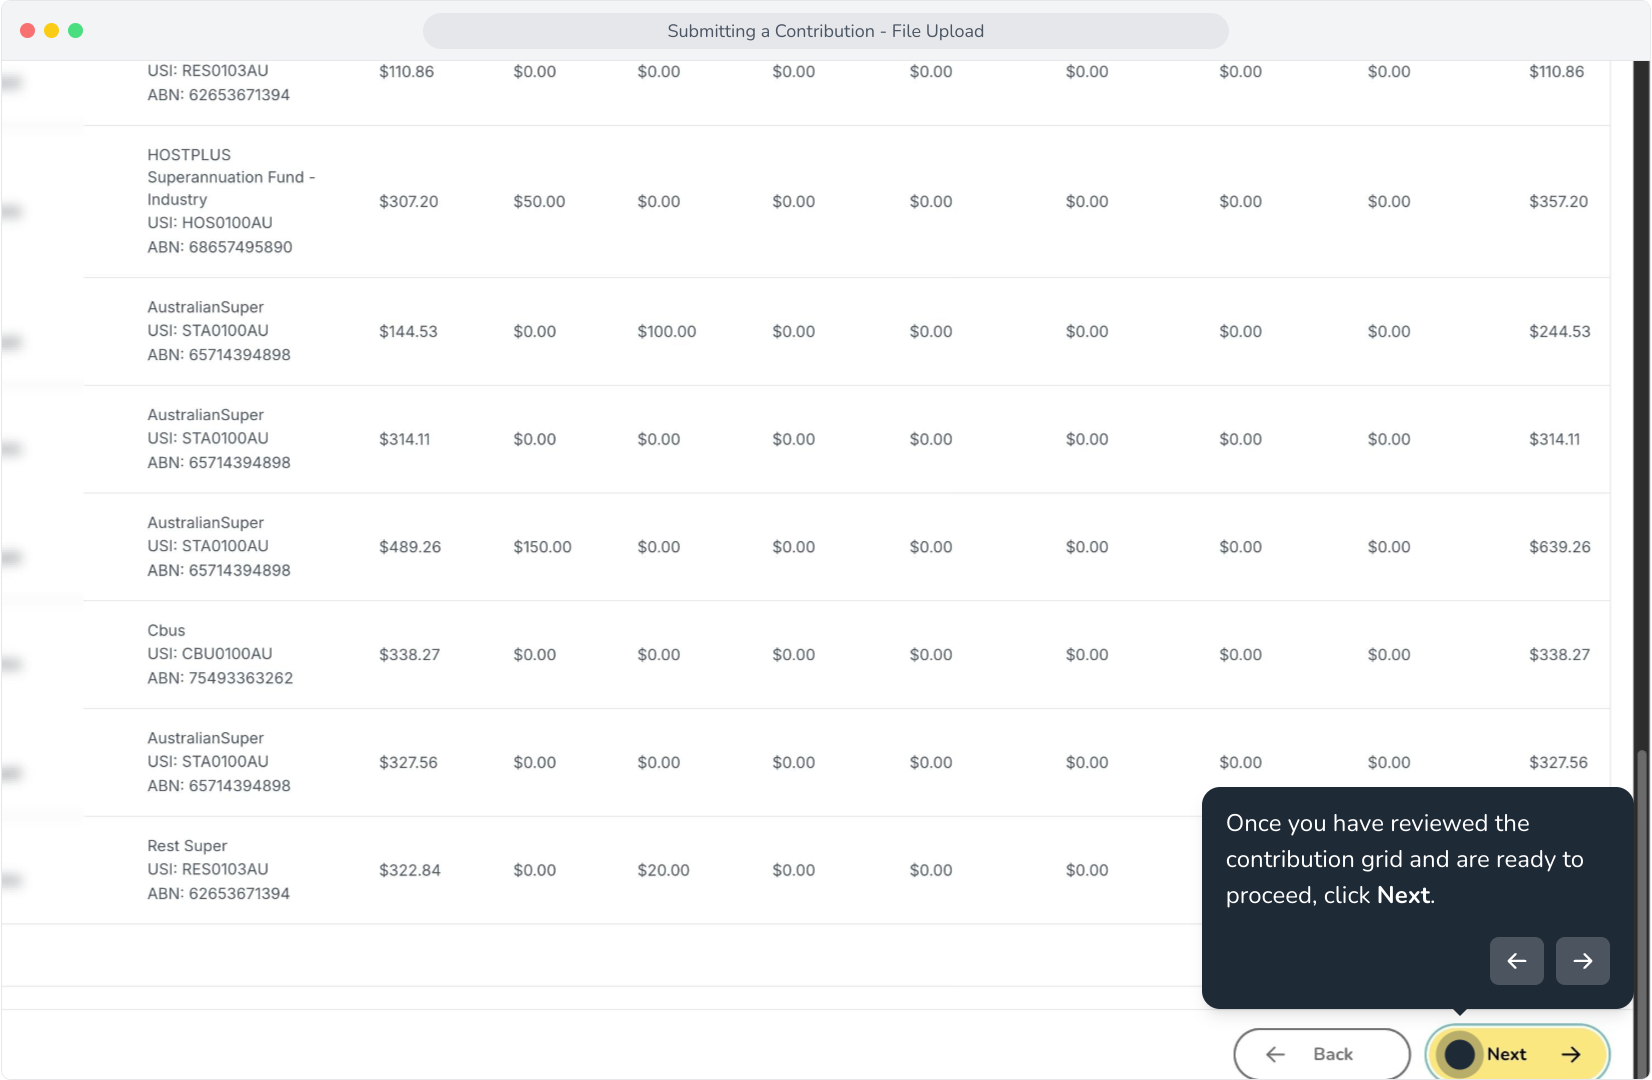
6. Once you have reviewed the contribution grid and are ready to proceed, click Next.
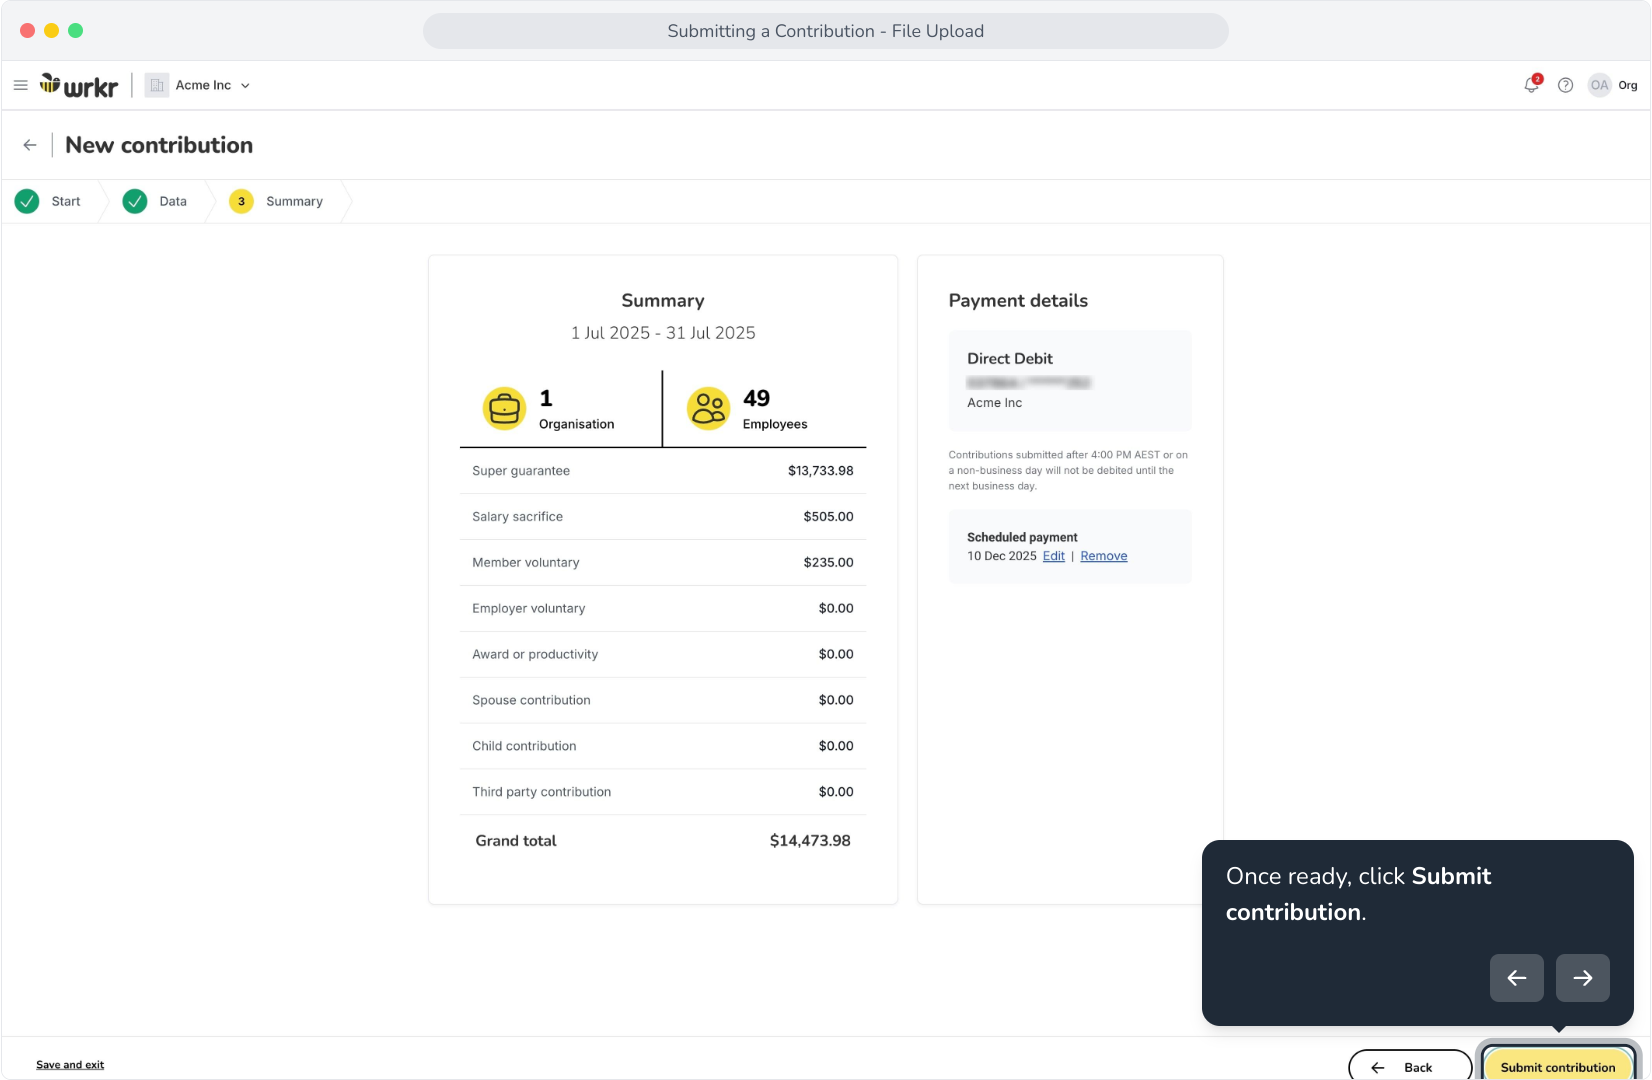
7 We are now taken to the Summary screen to review the contribution summary before we submit.
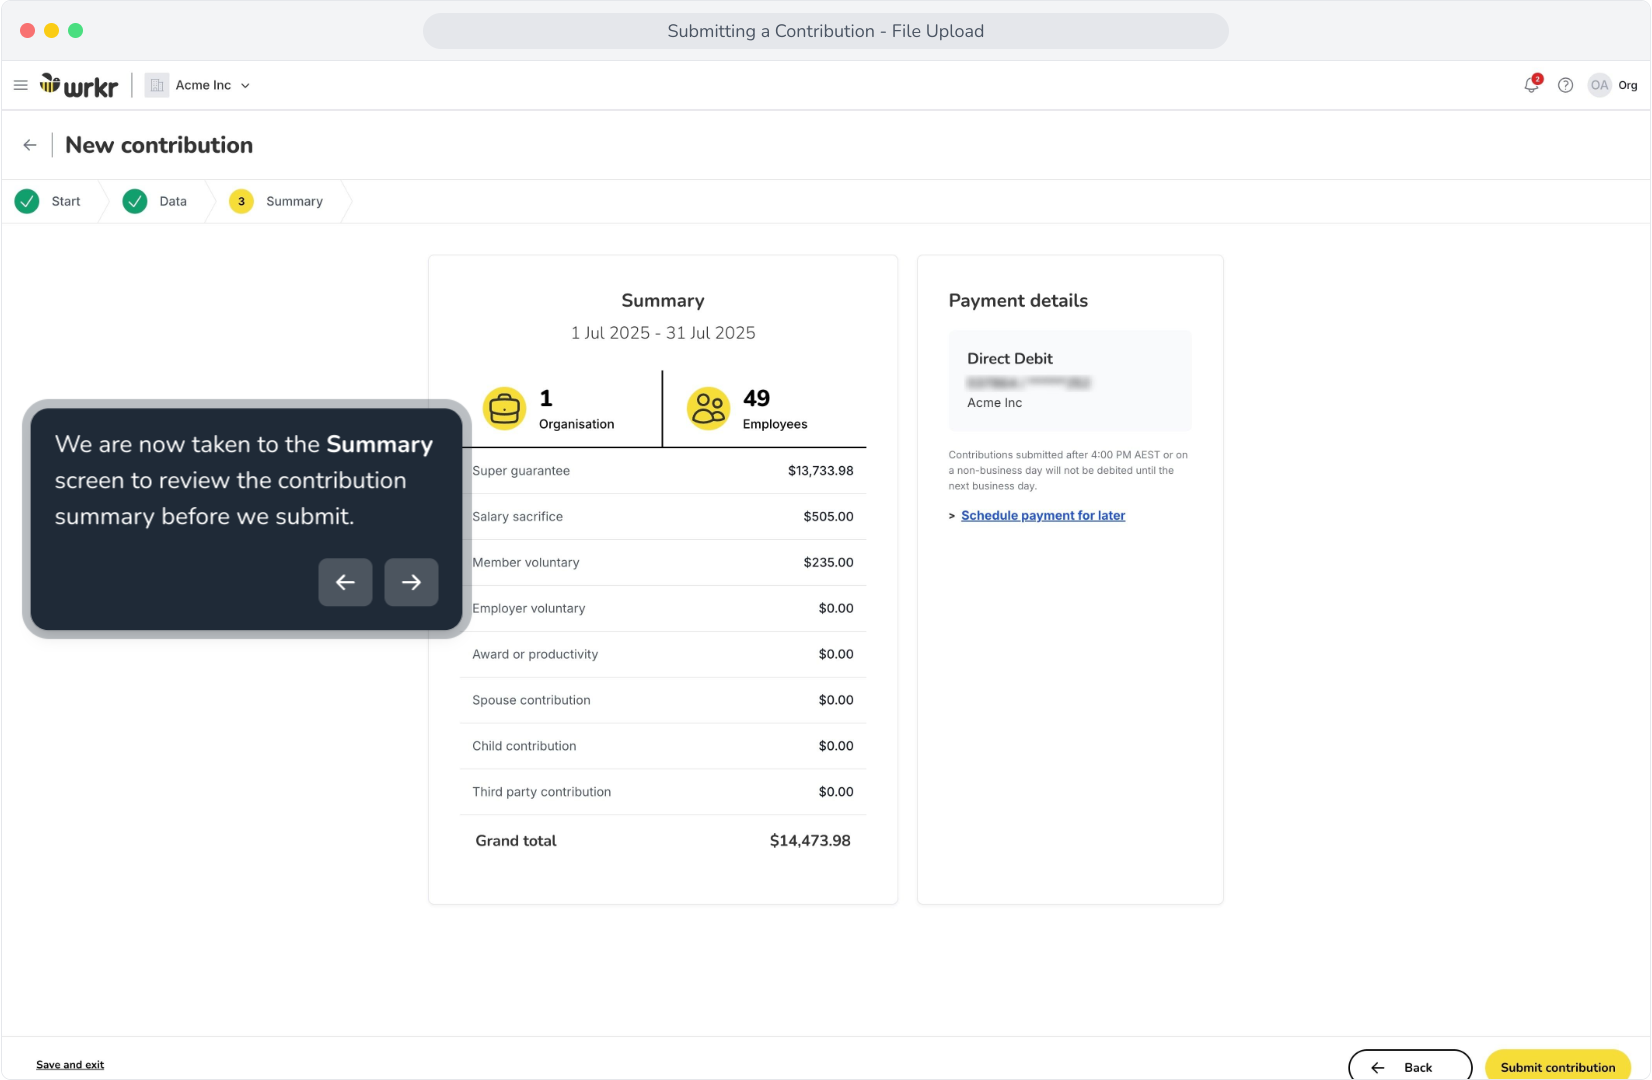
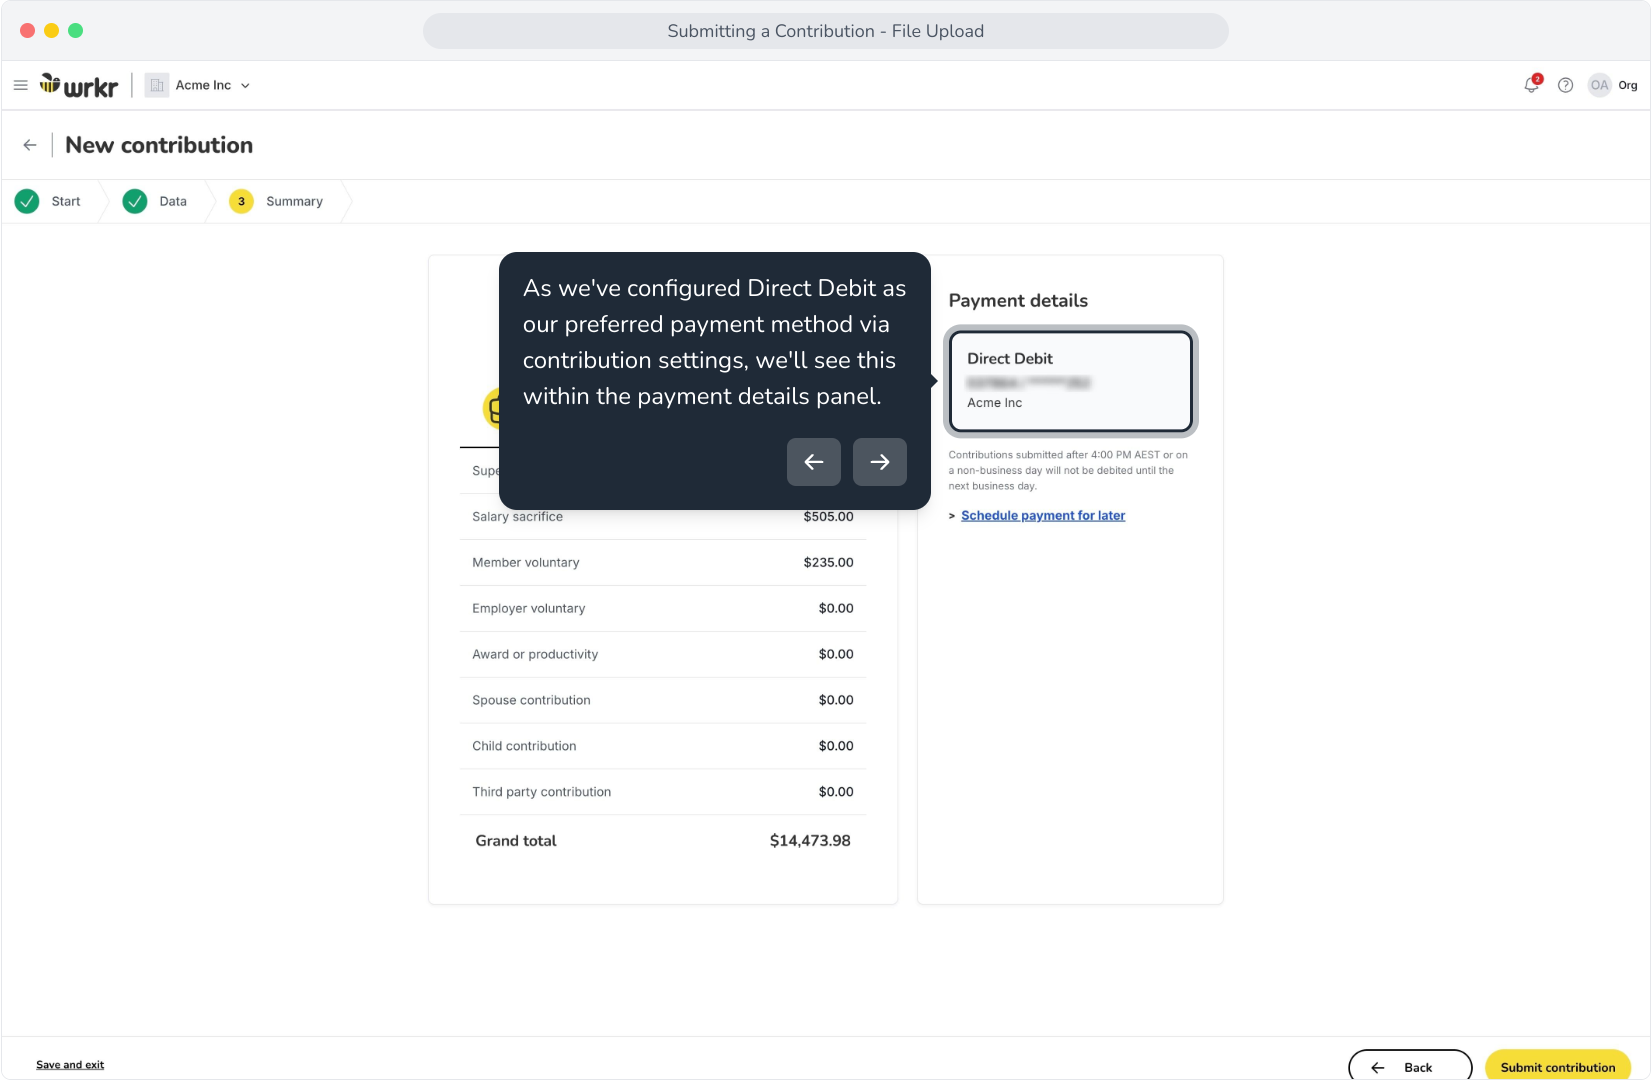
8. As we've configured Direct Debit as our preferred payment method via contribution settings, we'll see this within the payment details panel.
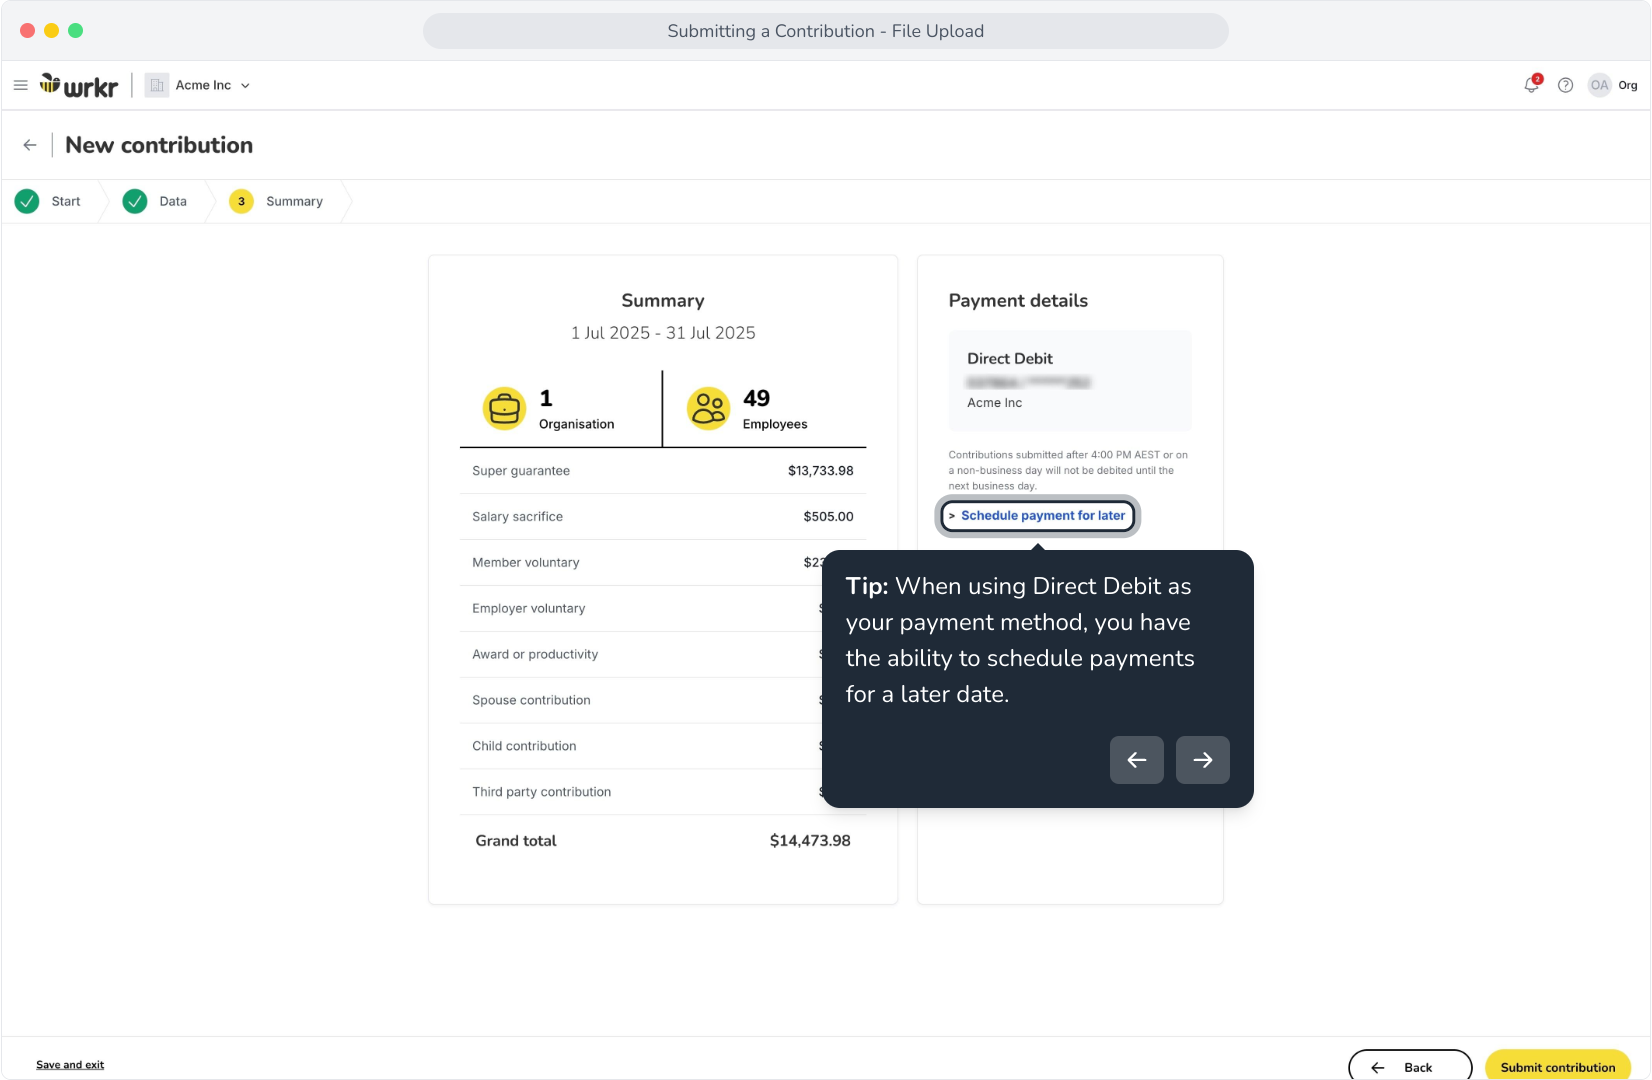
9. Tip: When using Direct Debit as your payment method, you have the ability to schedule payments for a later date.
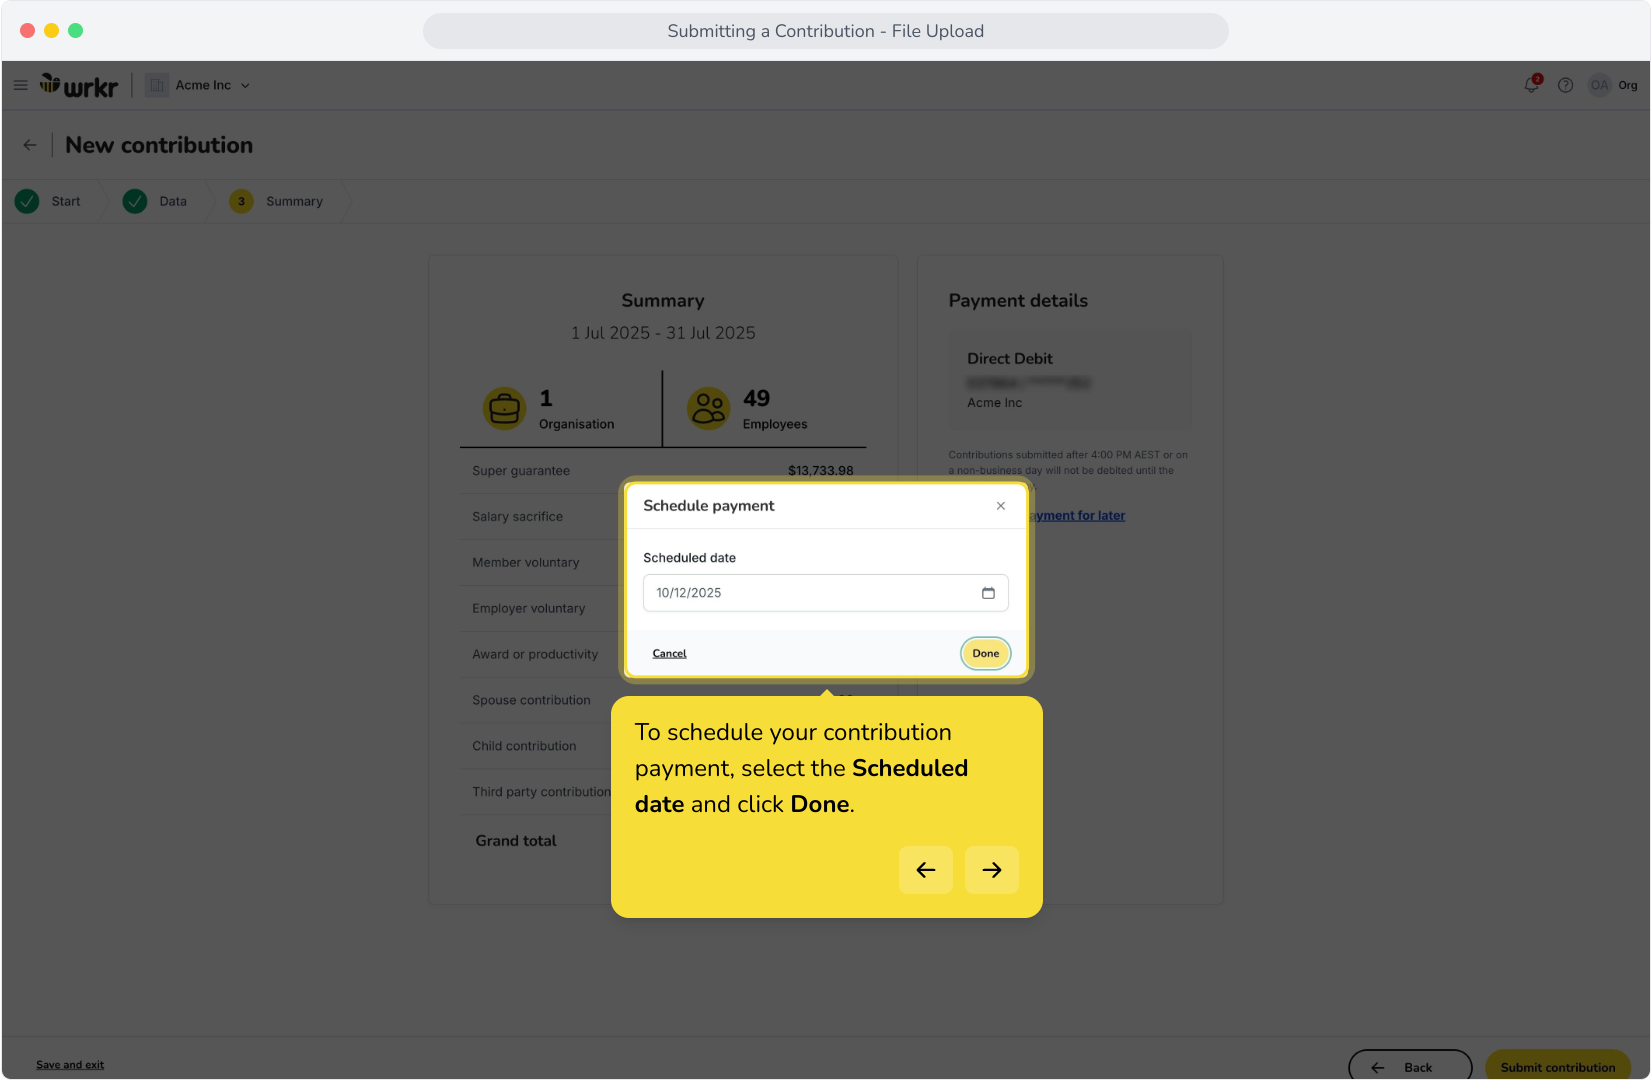
10 To schedule your contribution payment, select the Scheduled date and click Done.
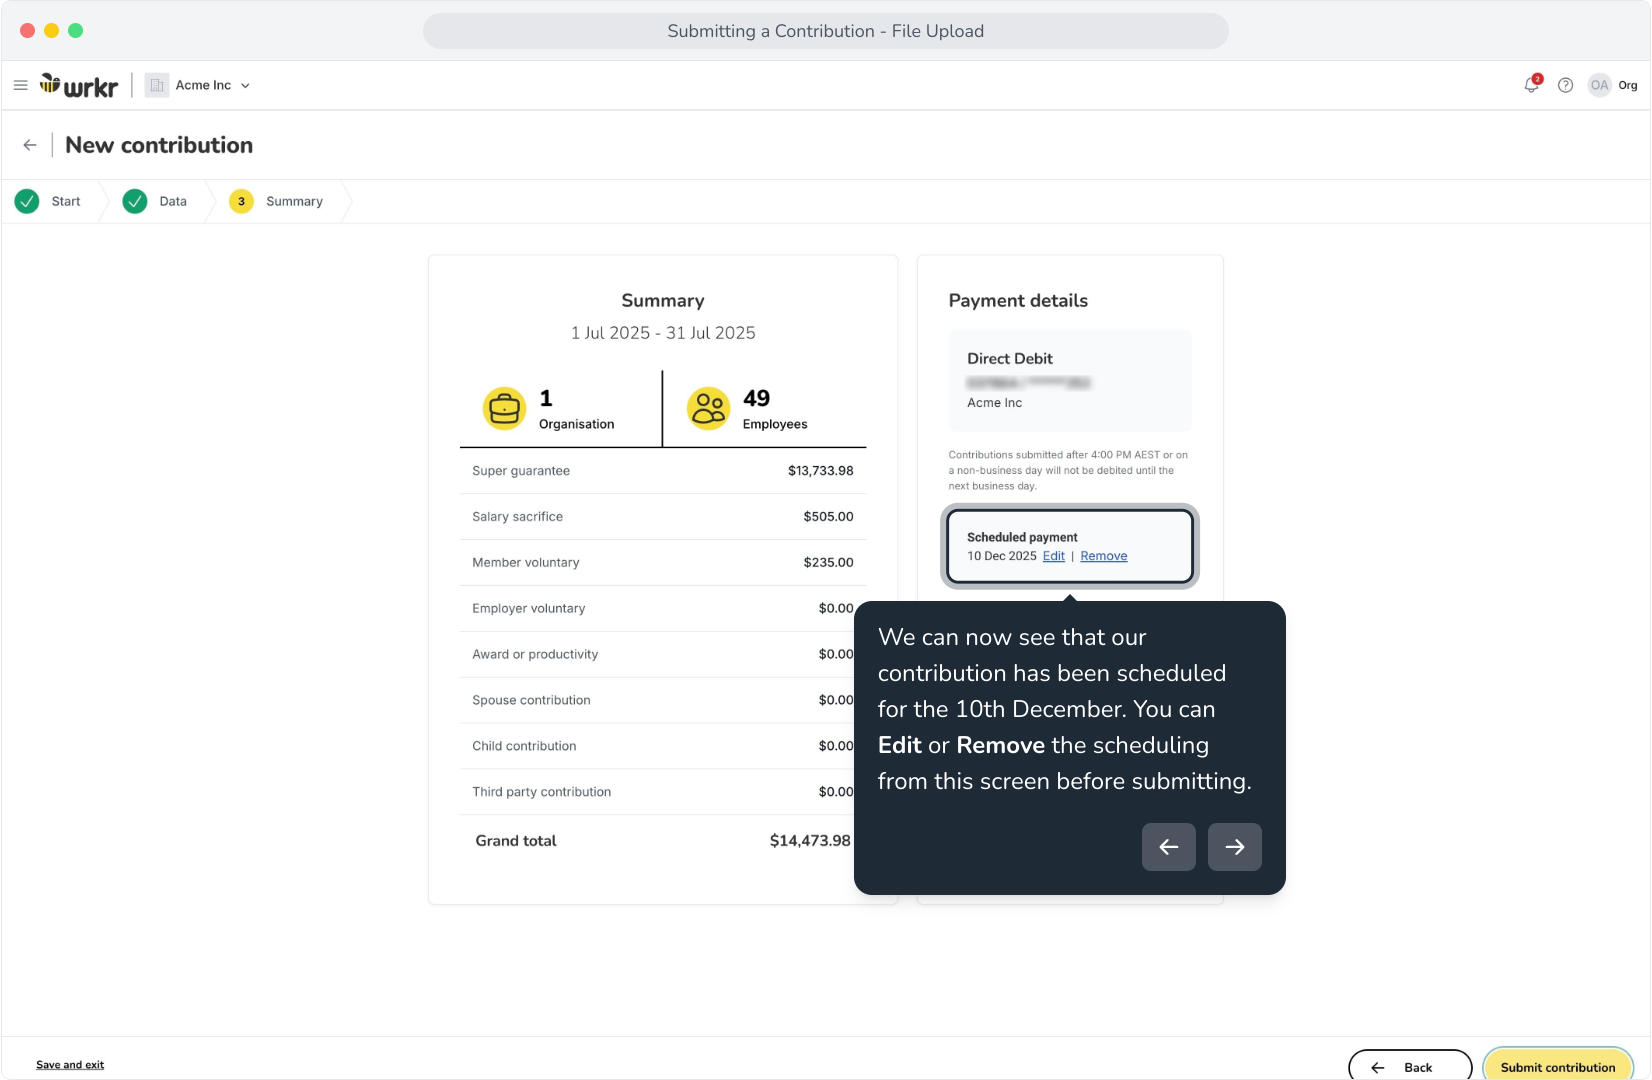
11. We can now see that our contribution has been scheduled for the 10th December. You can Edit or Remove the scheduling from this screen before submitting.
12. Once ready, click Submit contribution.
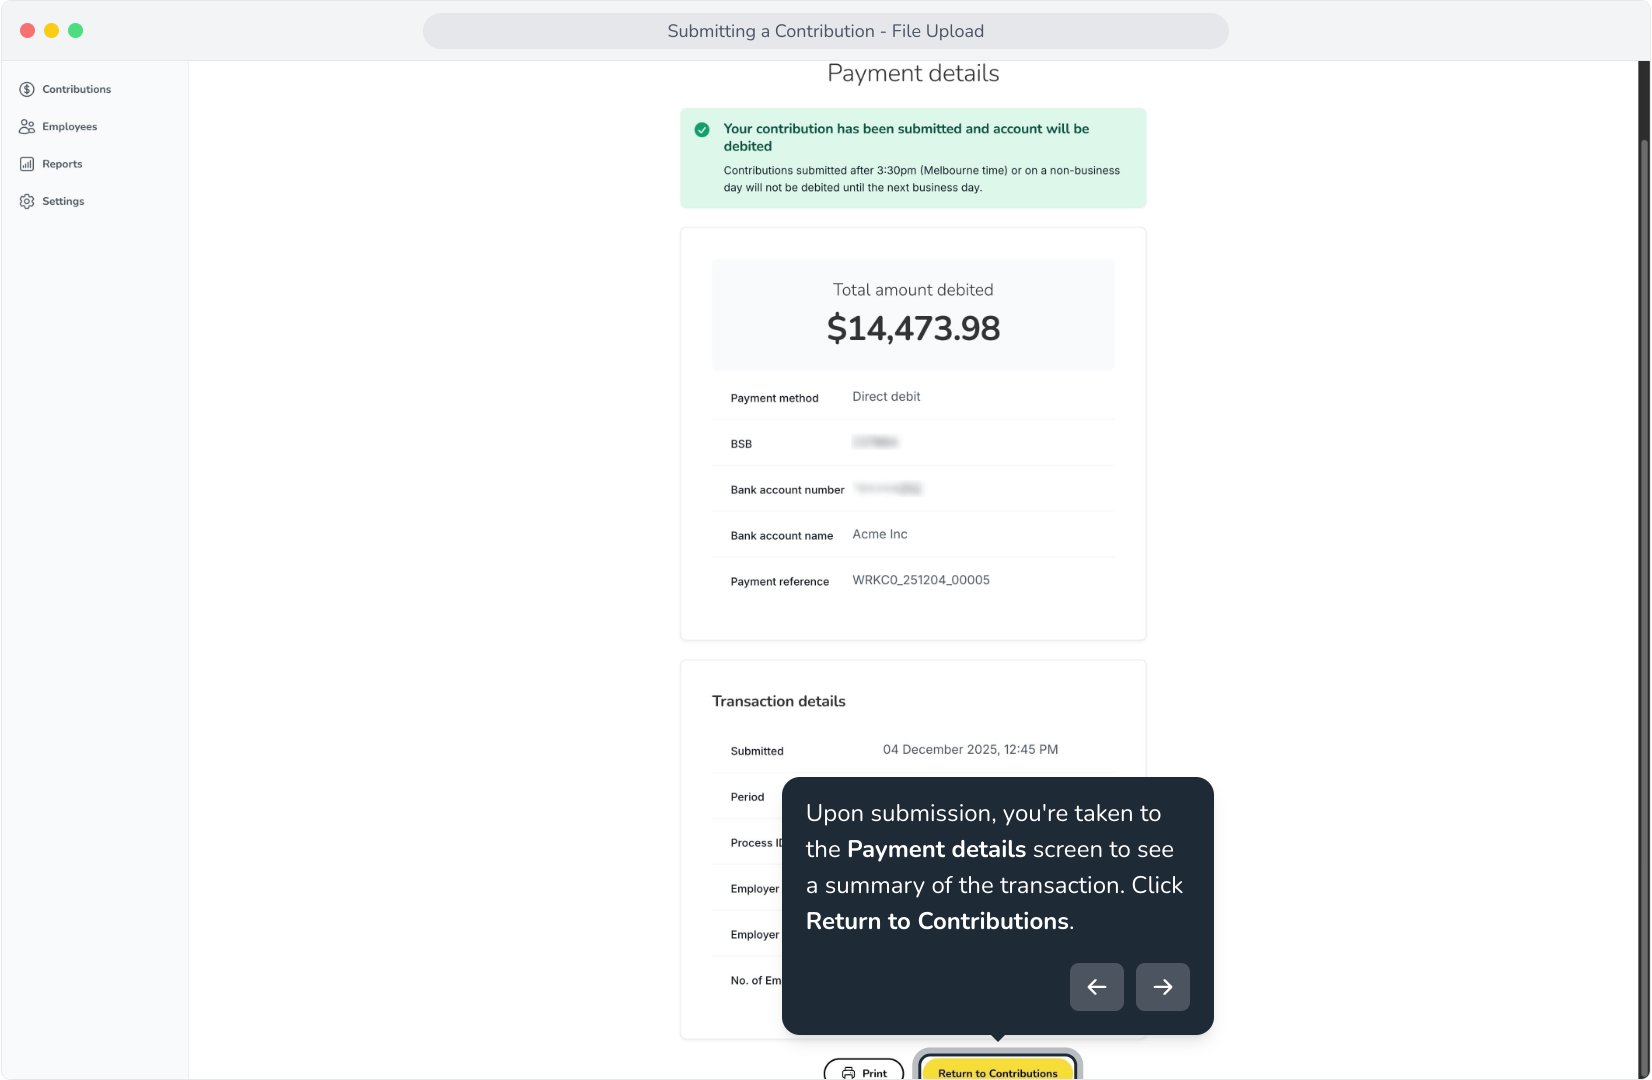
13. Upon submission, you're taken to the Payment details screen to see a summary of the transaction. Click Return to Contributions.
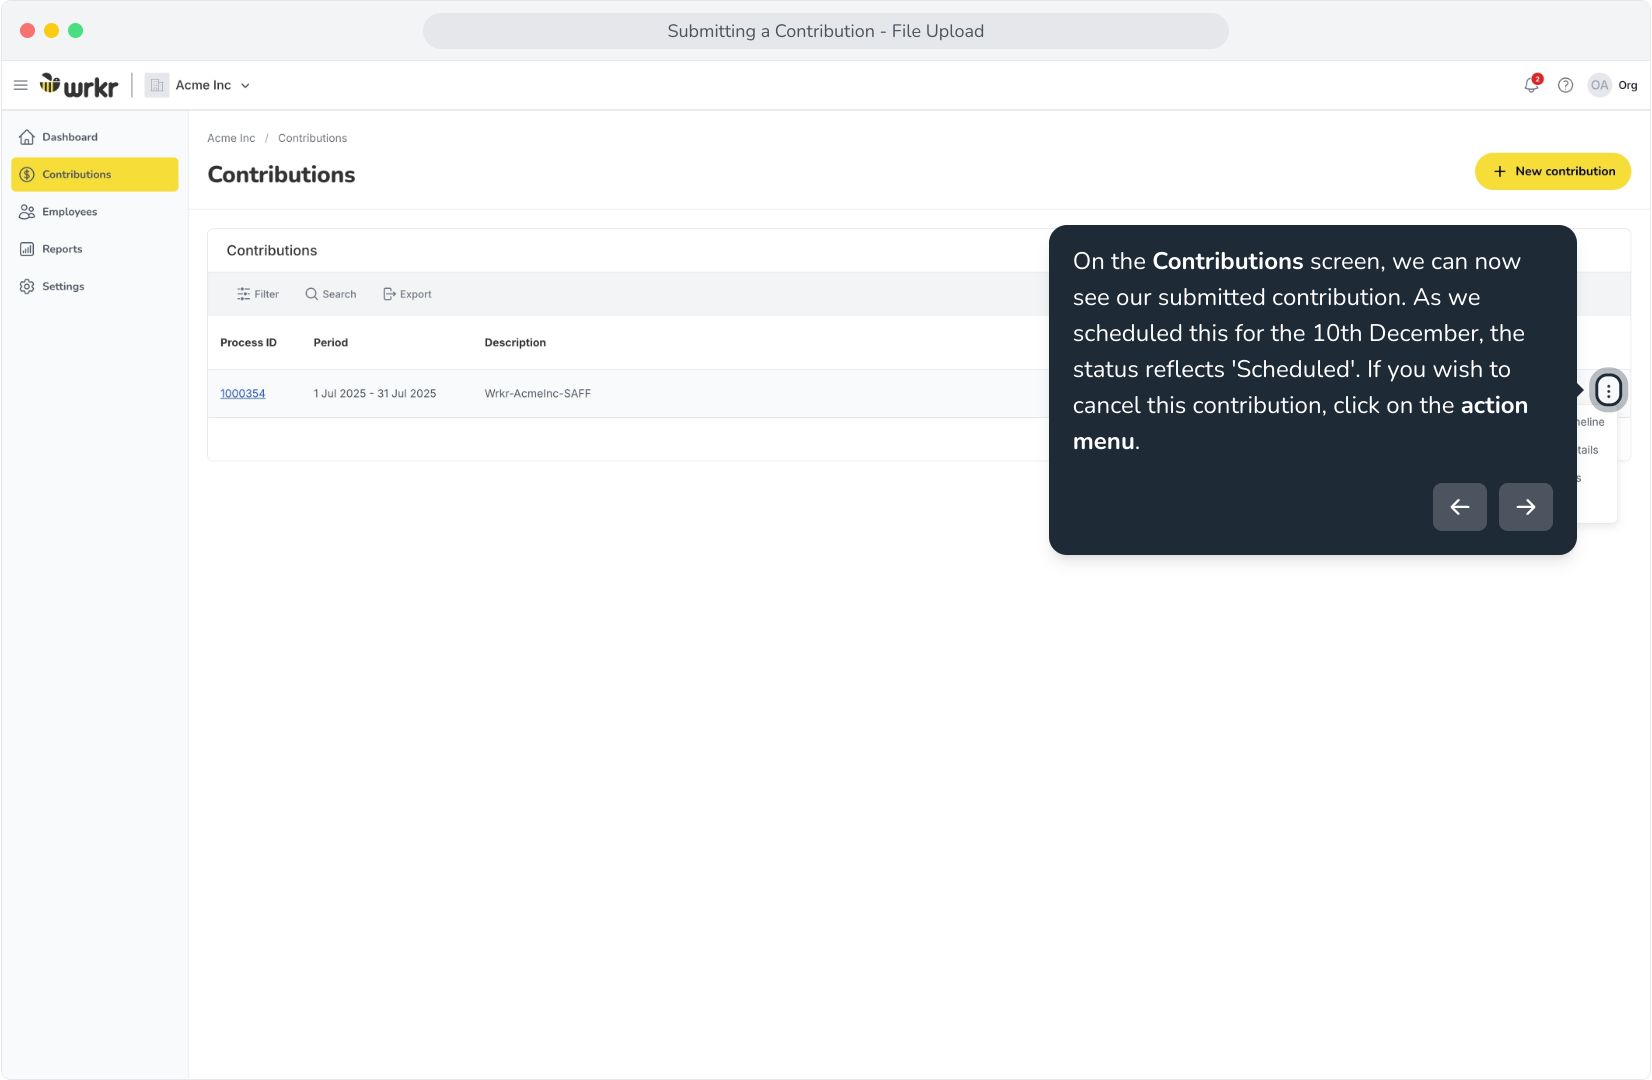
14.. On the Contributions screen, we can now see our submitted contribution. As we scheduled this for the 10th December, the status reflects 'Scheduled'. If you wish to cancel this contribution, click on the action menu.
Written steps: Full end-to-end setup and file upload process
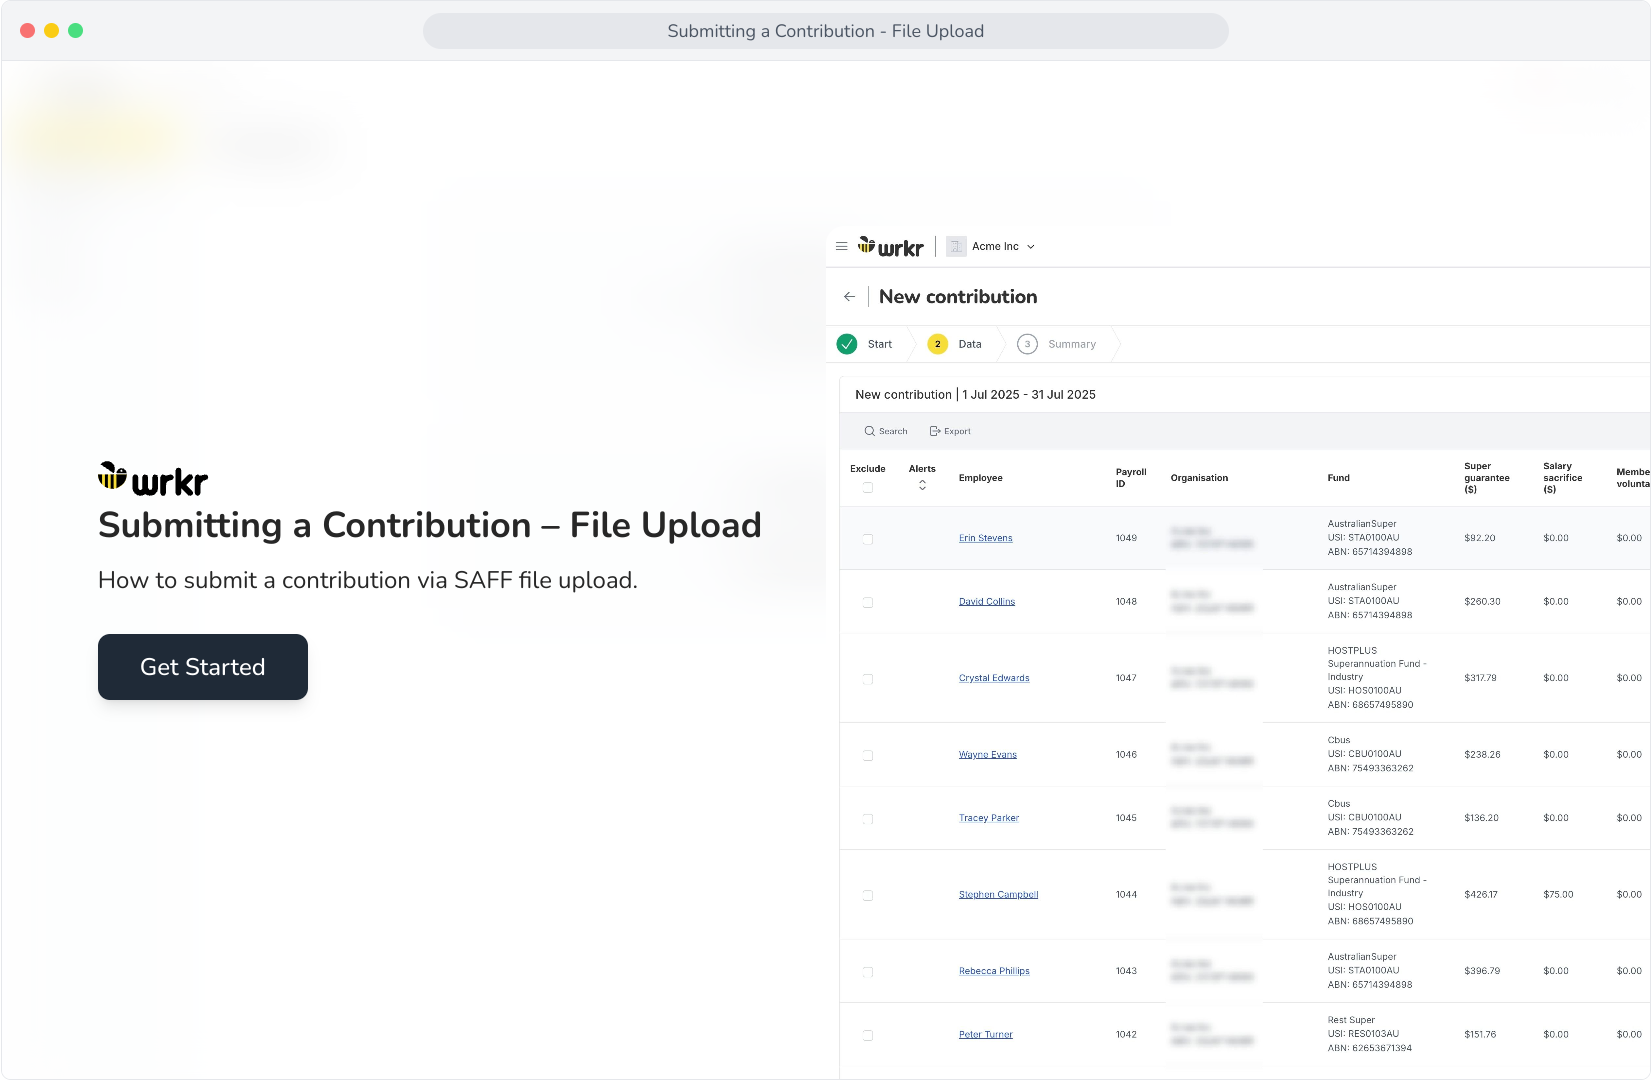
1. Submitting a Contribution – File Upload
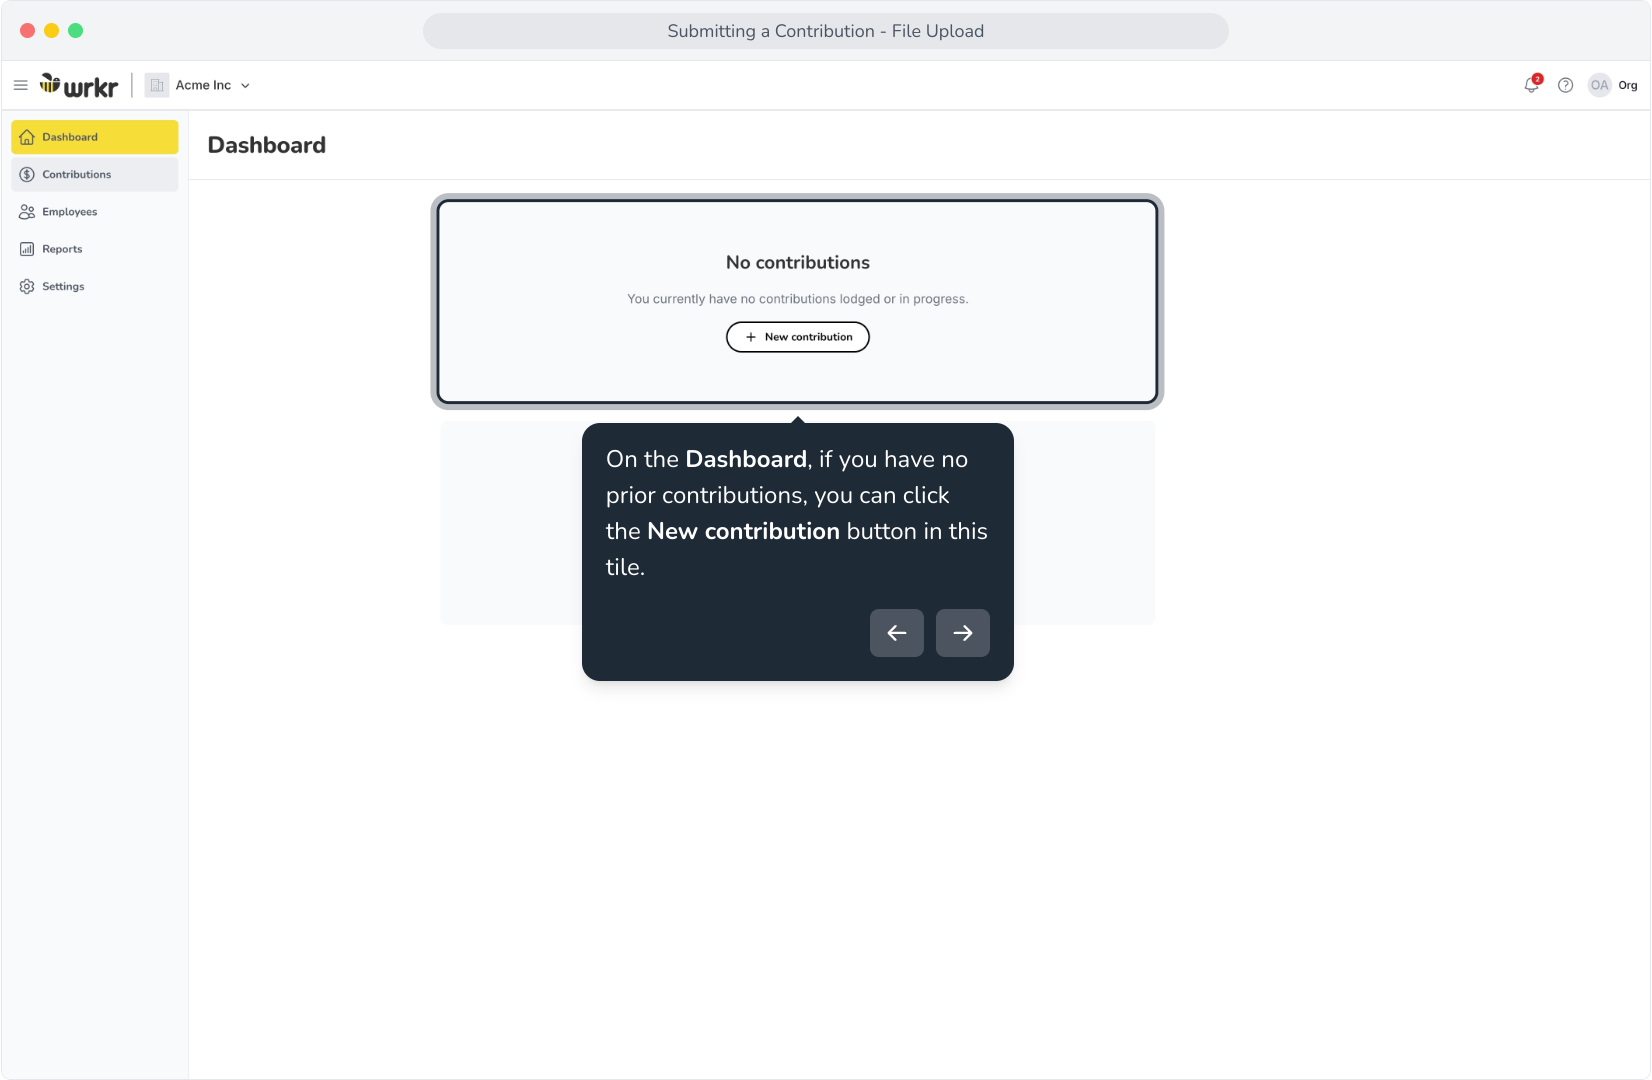
2. On the Dashboard, if you have no prior contributions, you can click the New contribution button in this tile.
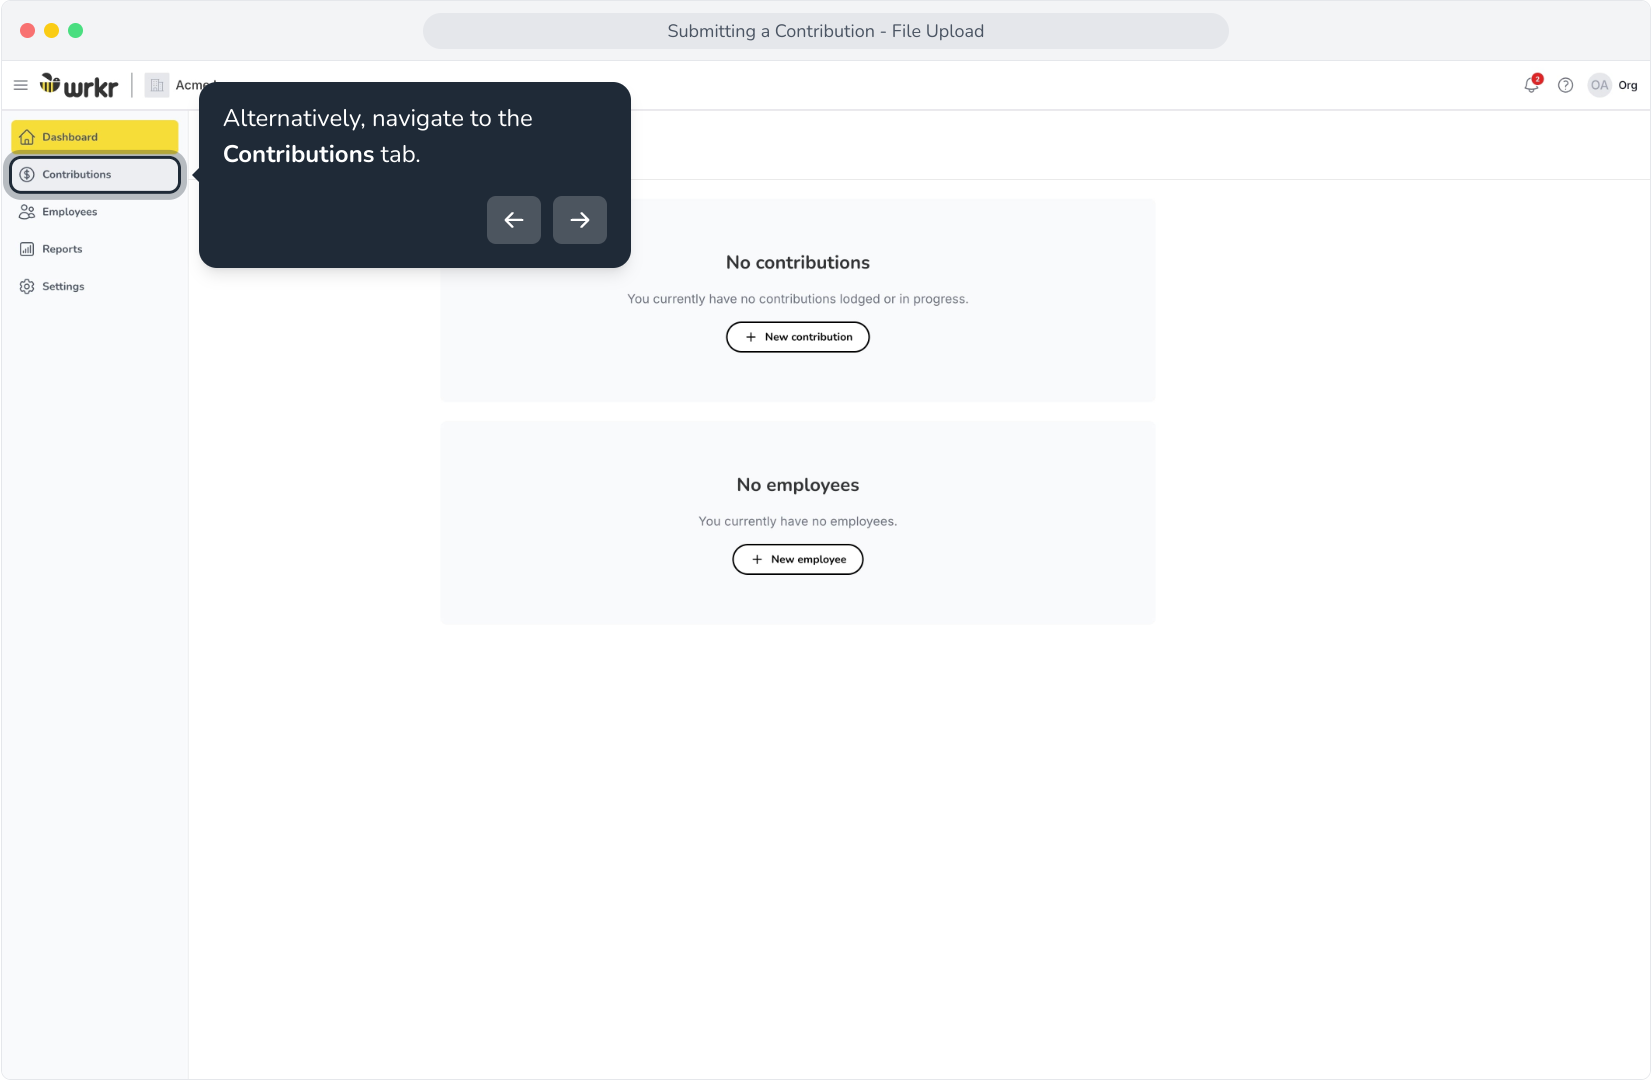
3. Alternatively, navigate to the Contributions tab.
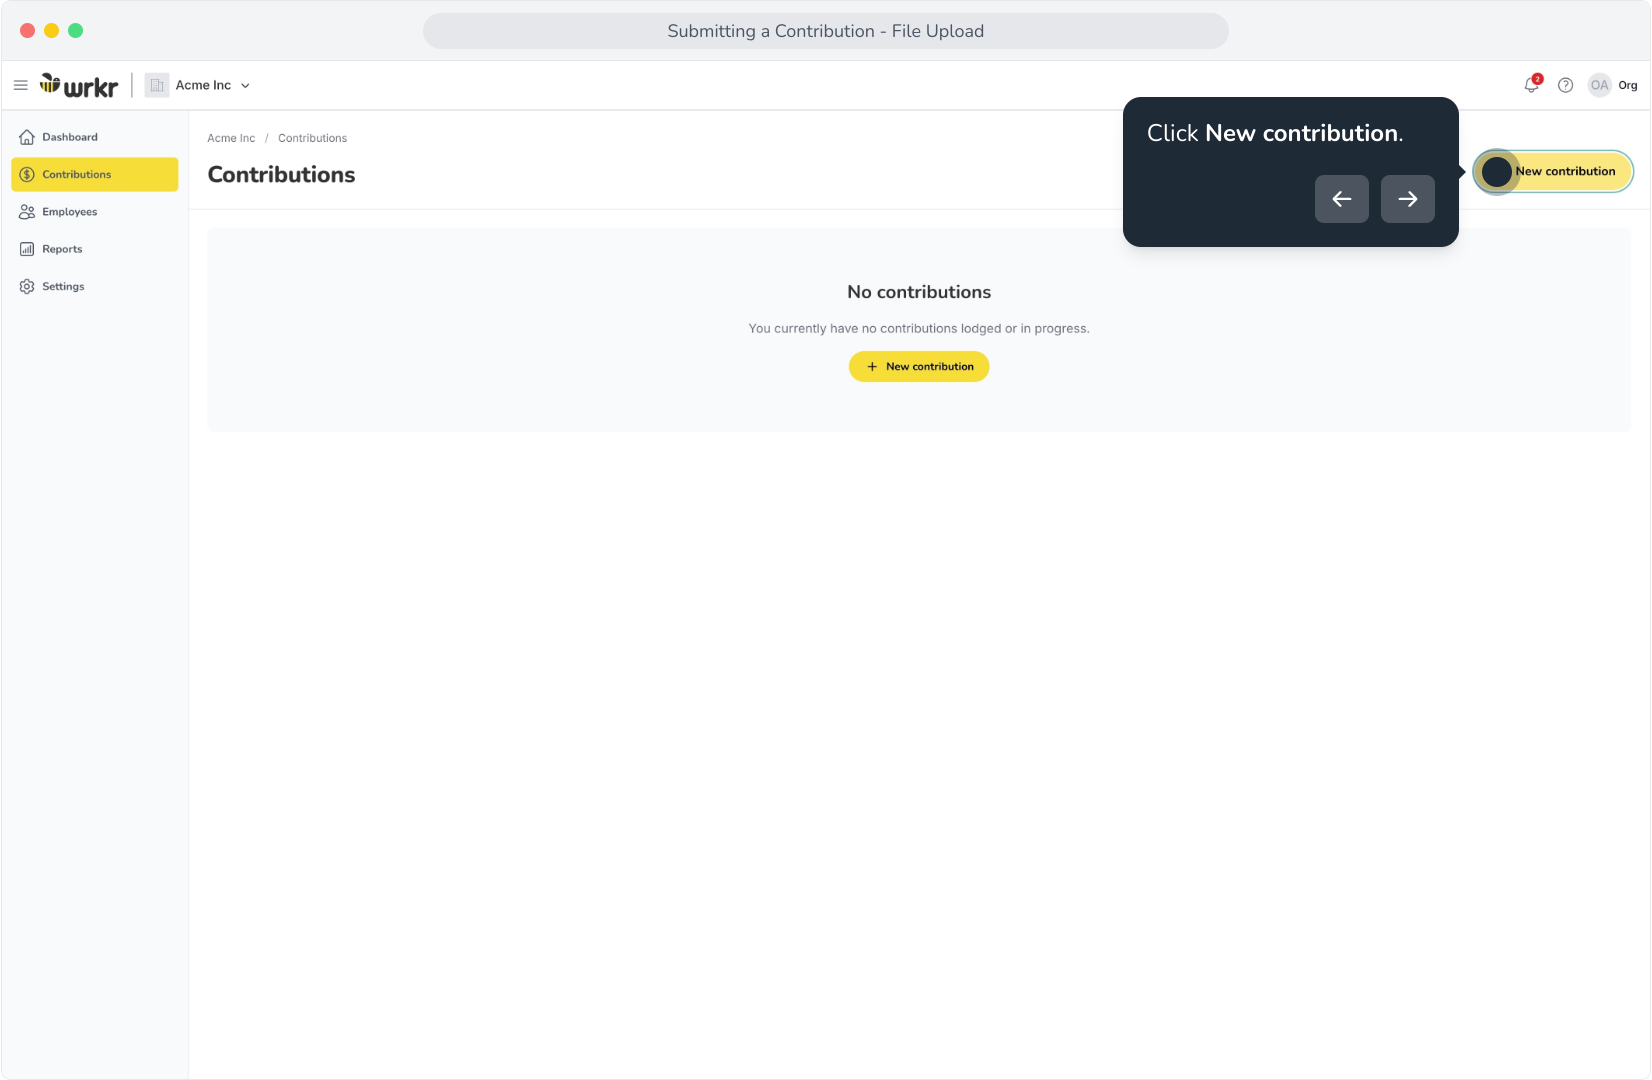
4. Click New contribution.
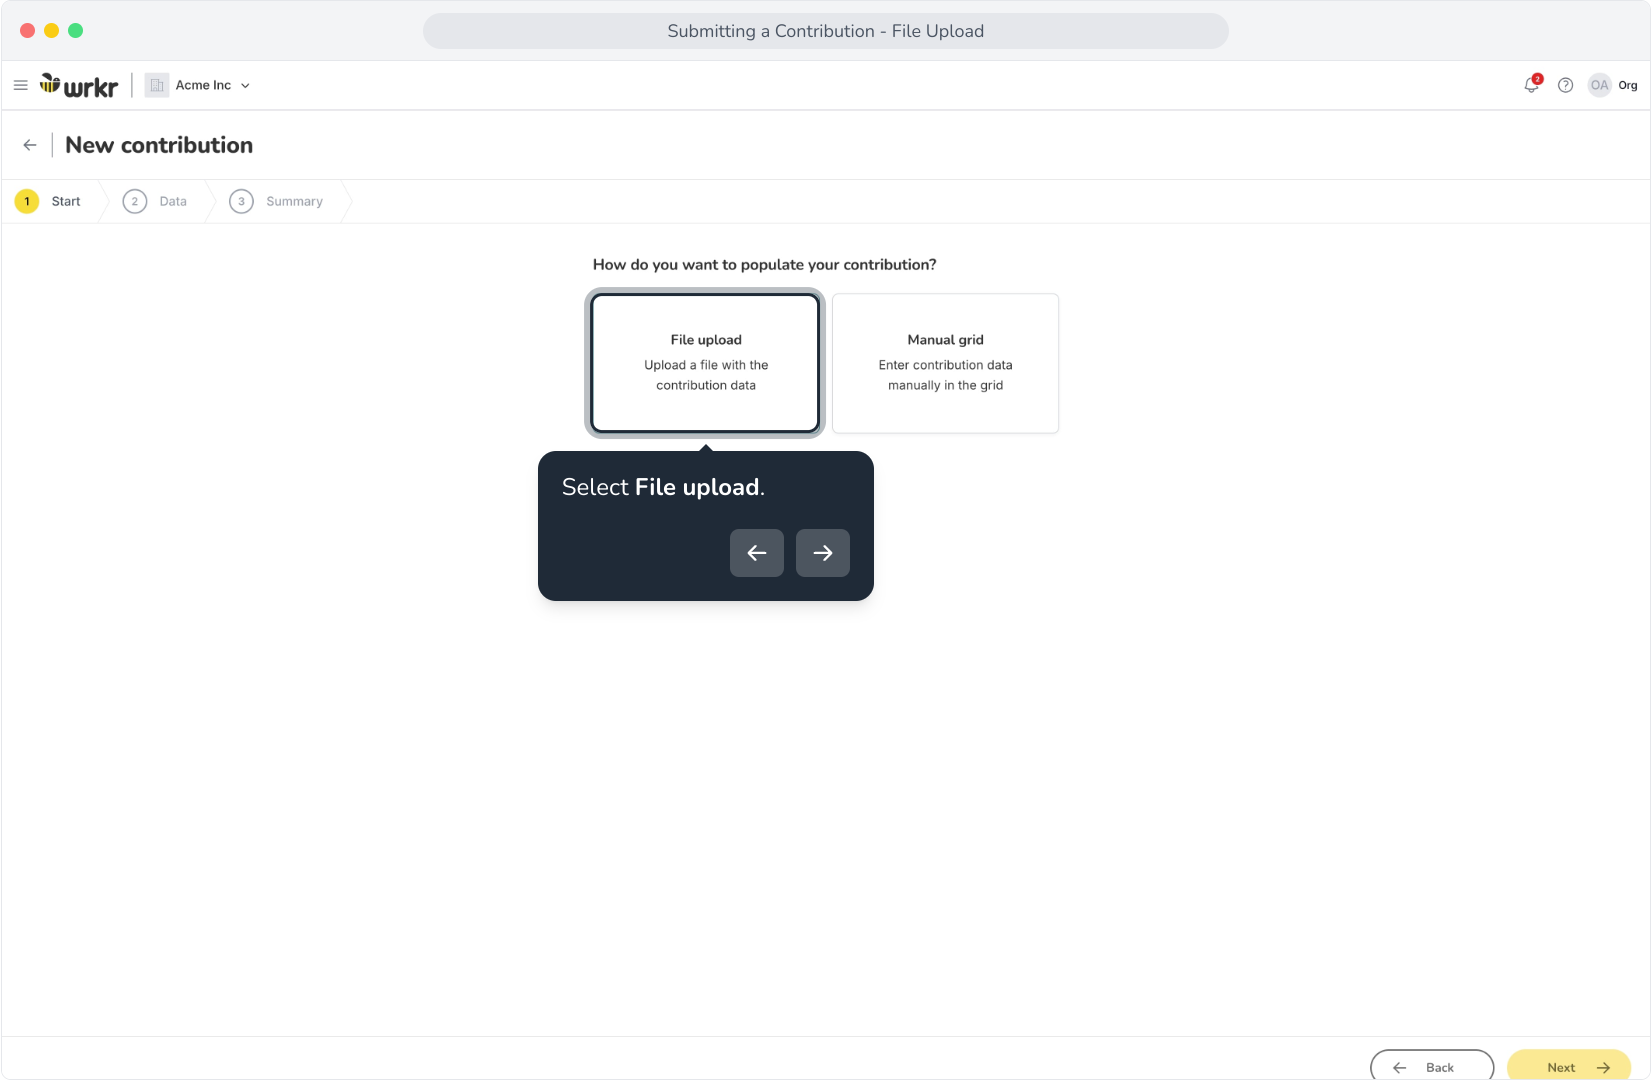
5. Select File upload.
6. If you haven't set up your contribution period and frequency, you can do so by clicking Set up contribution period.
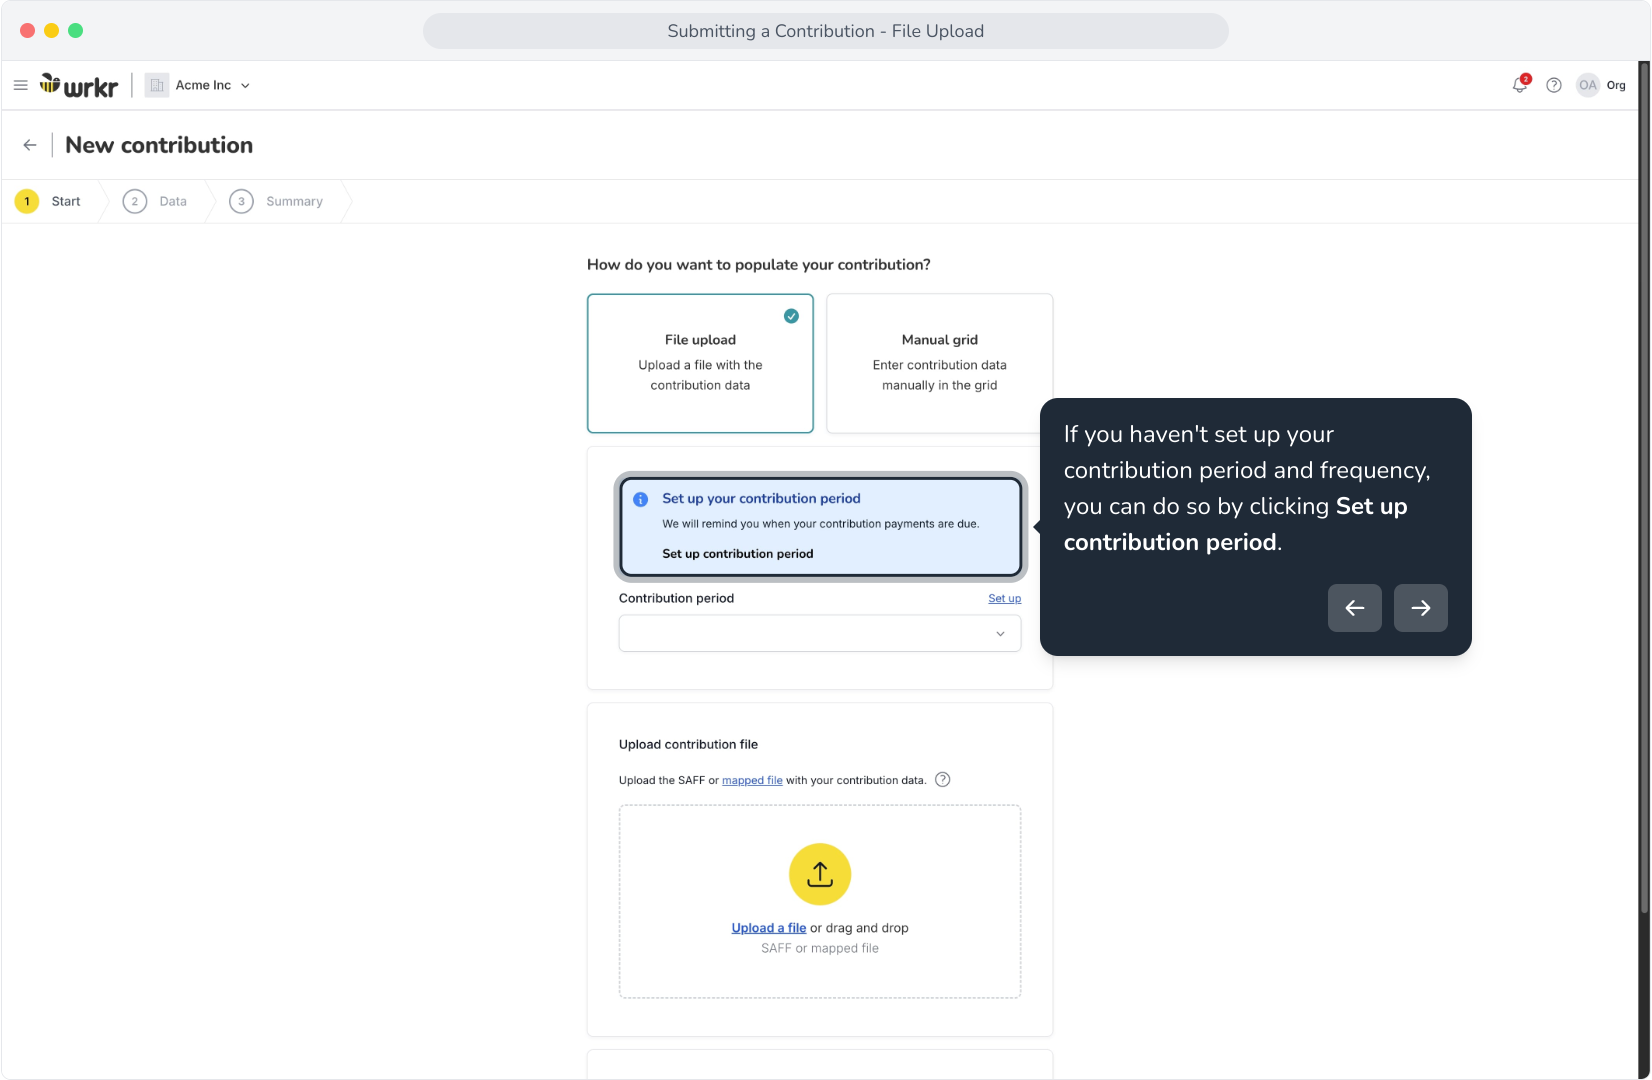
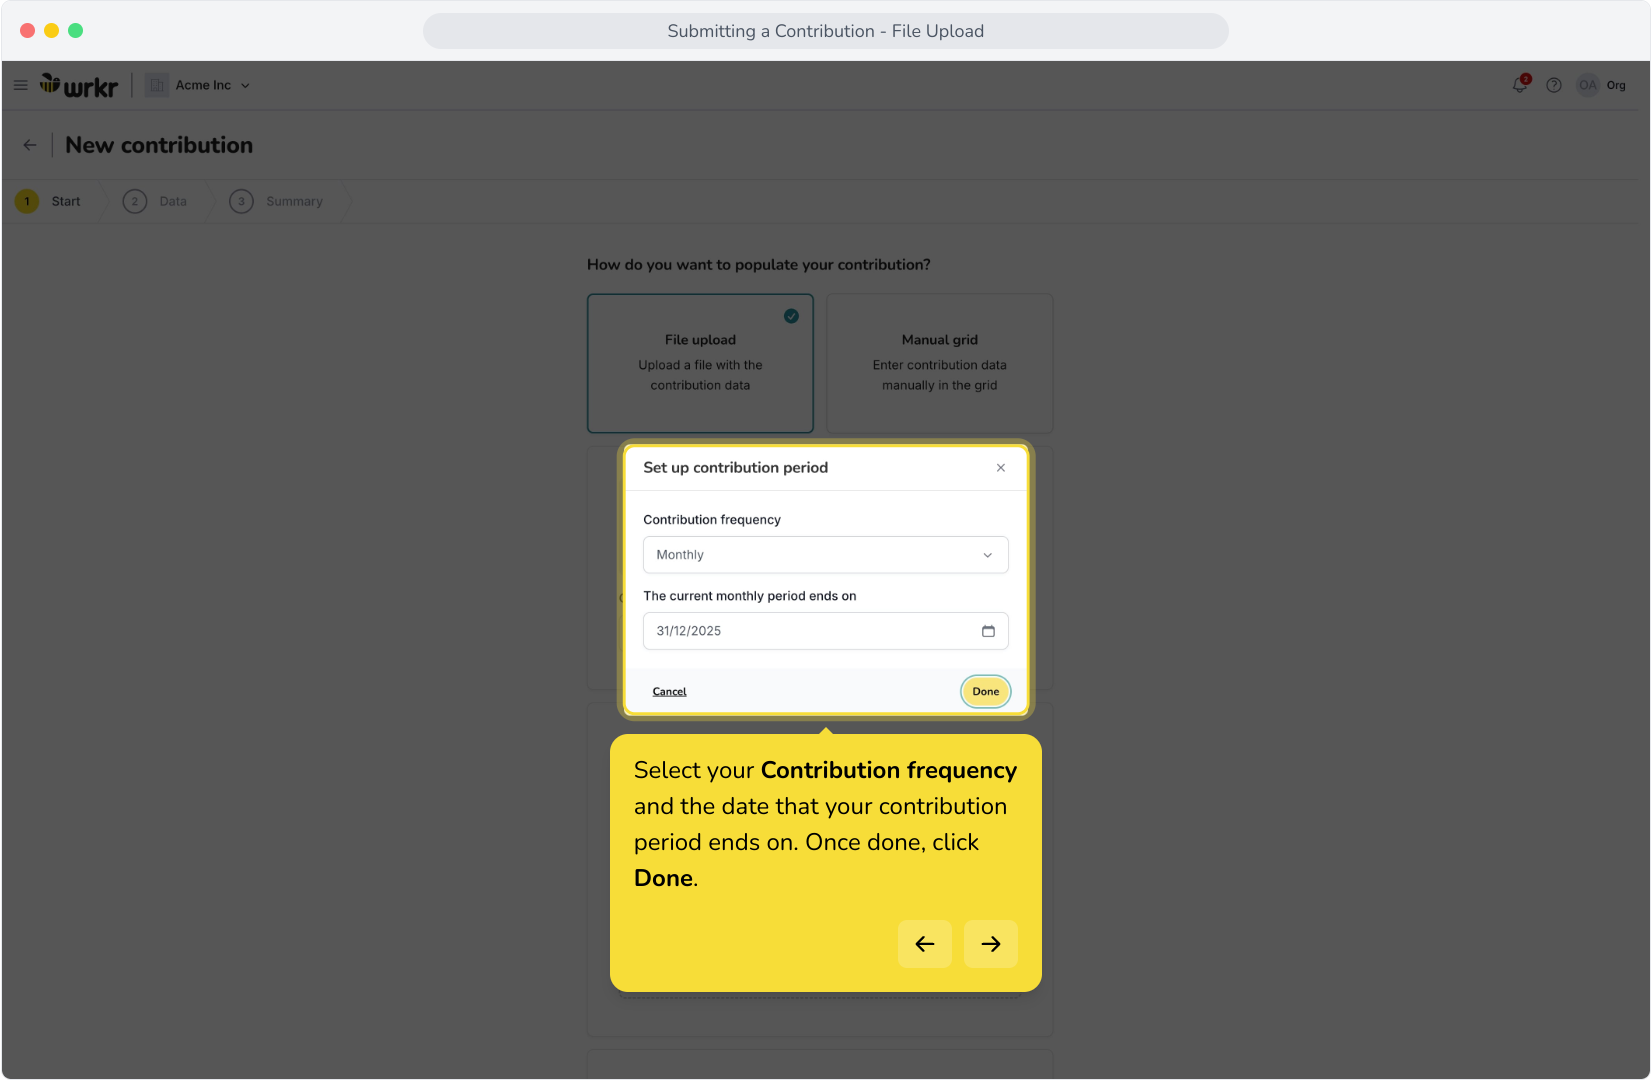
7. Select your Contribution frequency and the date that your contribution period ends on. Once done, click Done.
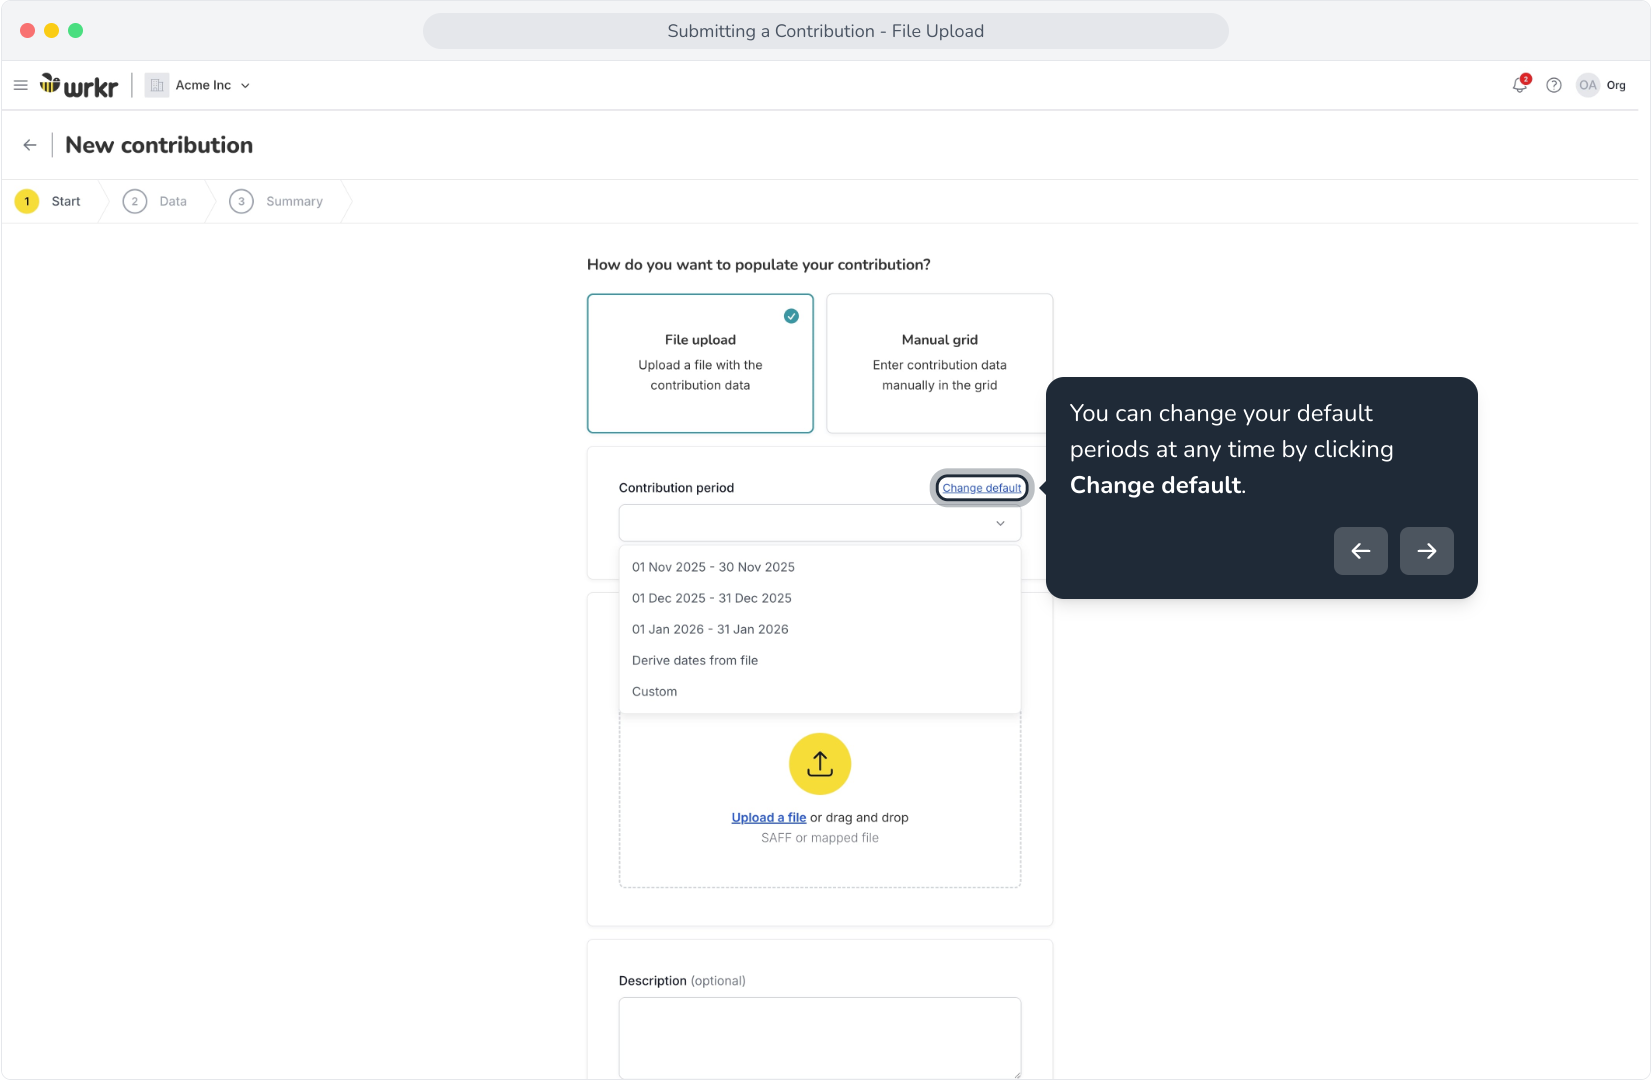
8. You can change your default periods at any time by clicking Change default.
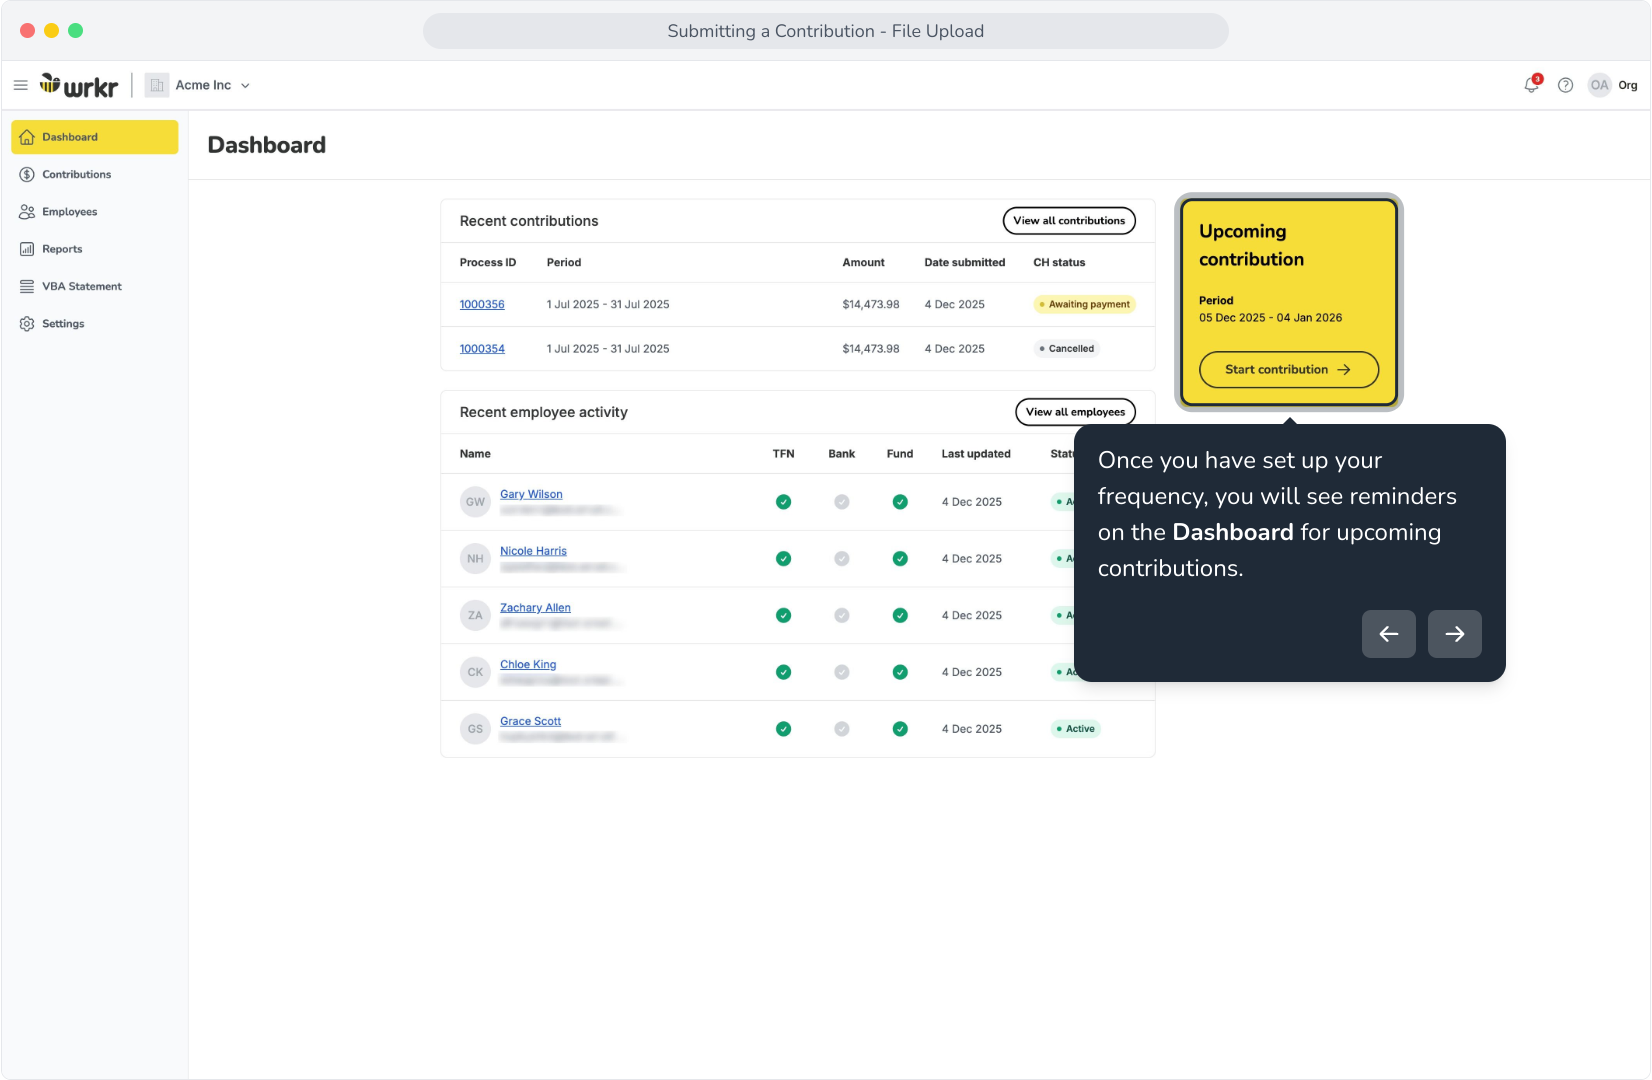
9. Once you have set up your frequency, you will see reminders on the Dashboard for upcoming contributions.
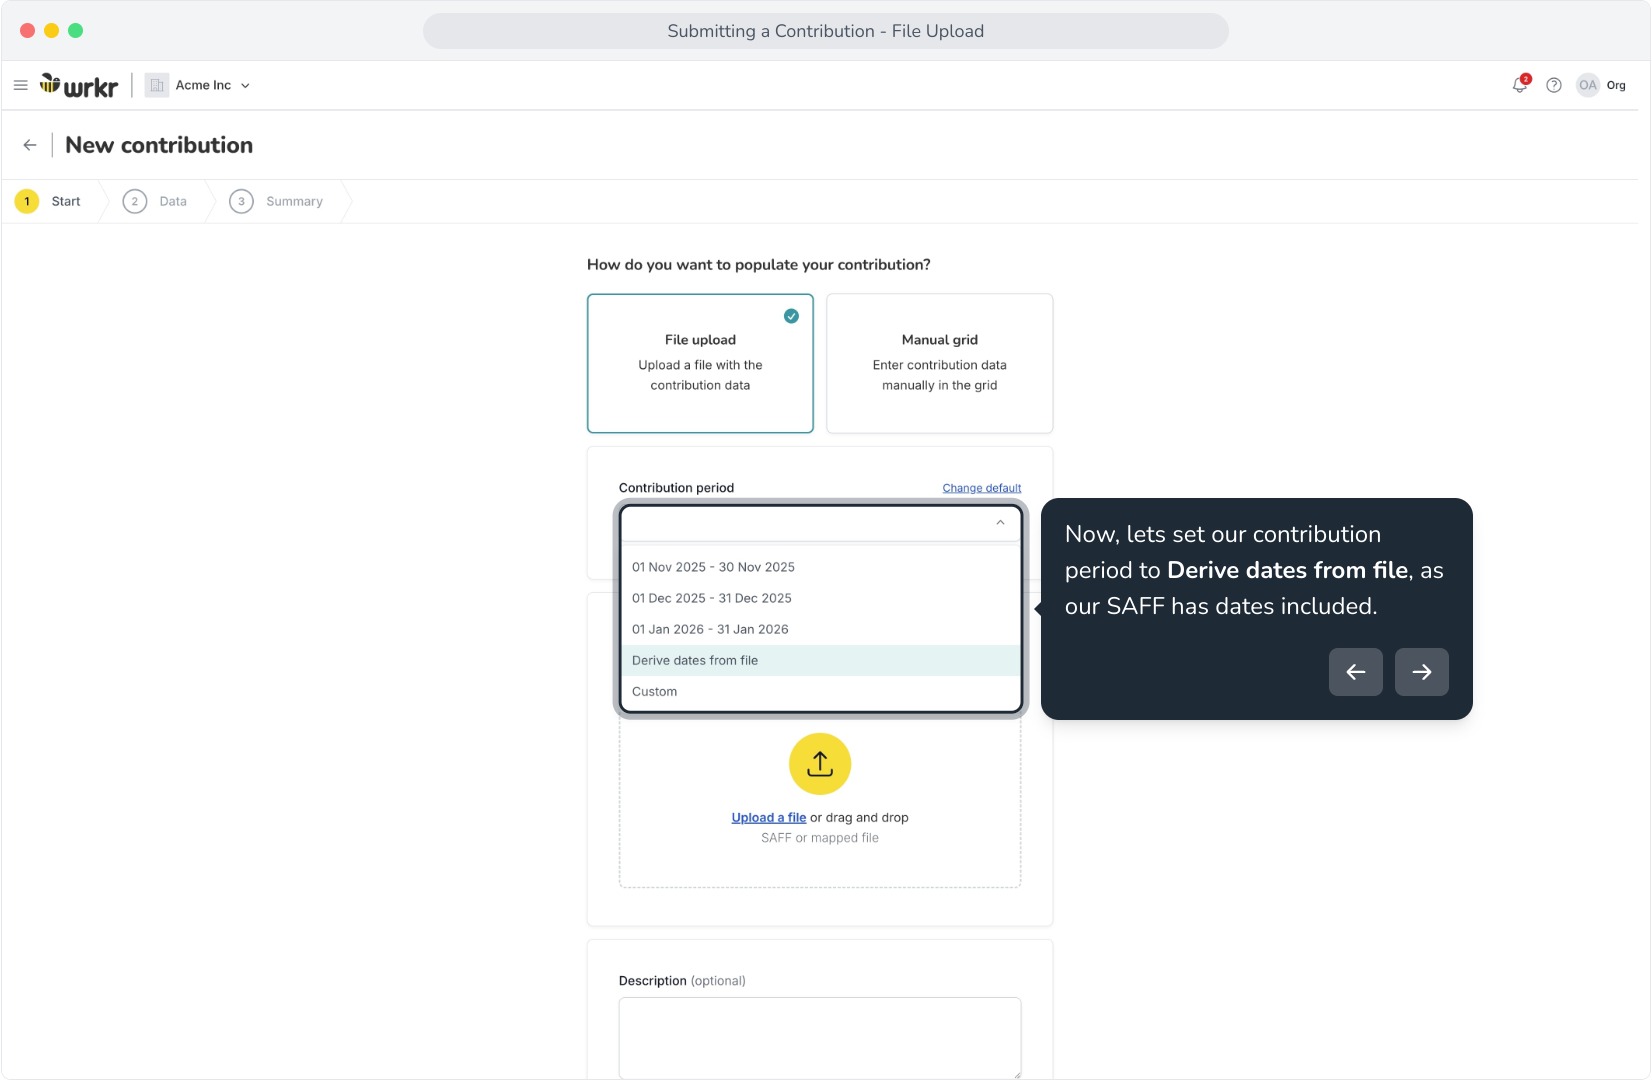
10. Now, lets set our contribution period to Derive dates from file, as our SAFF has dates included.
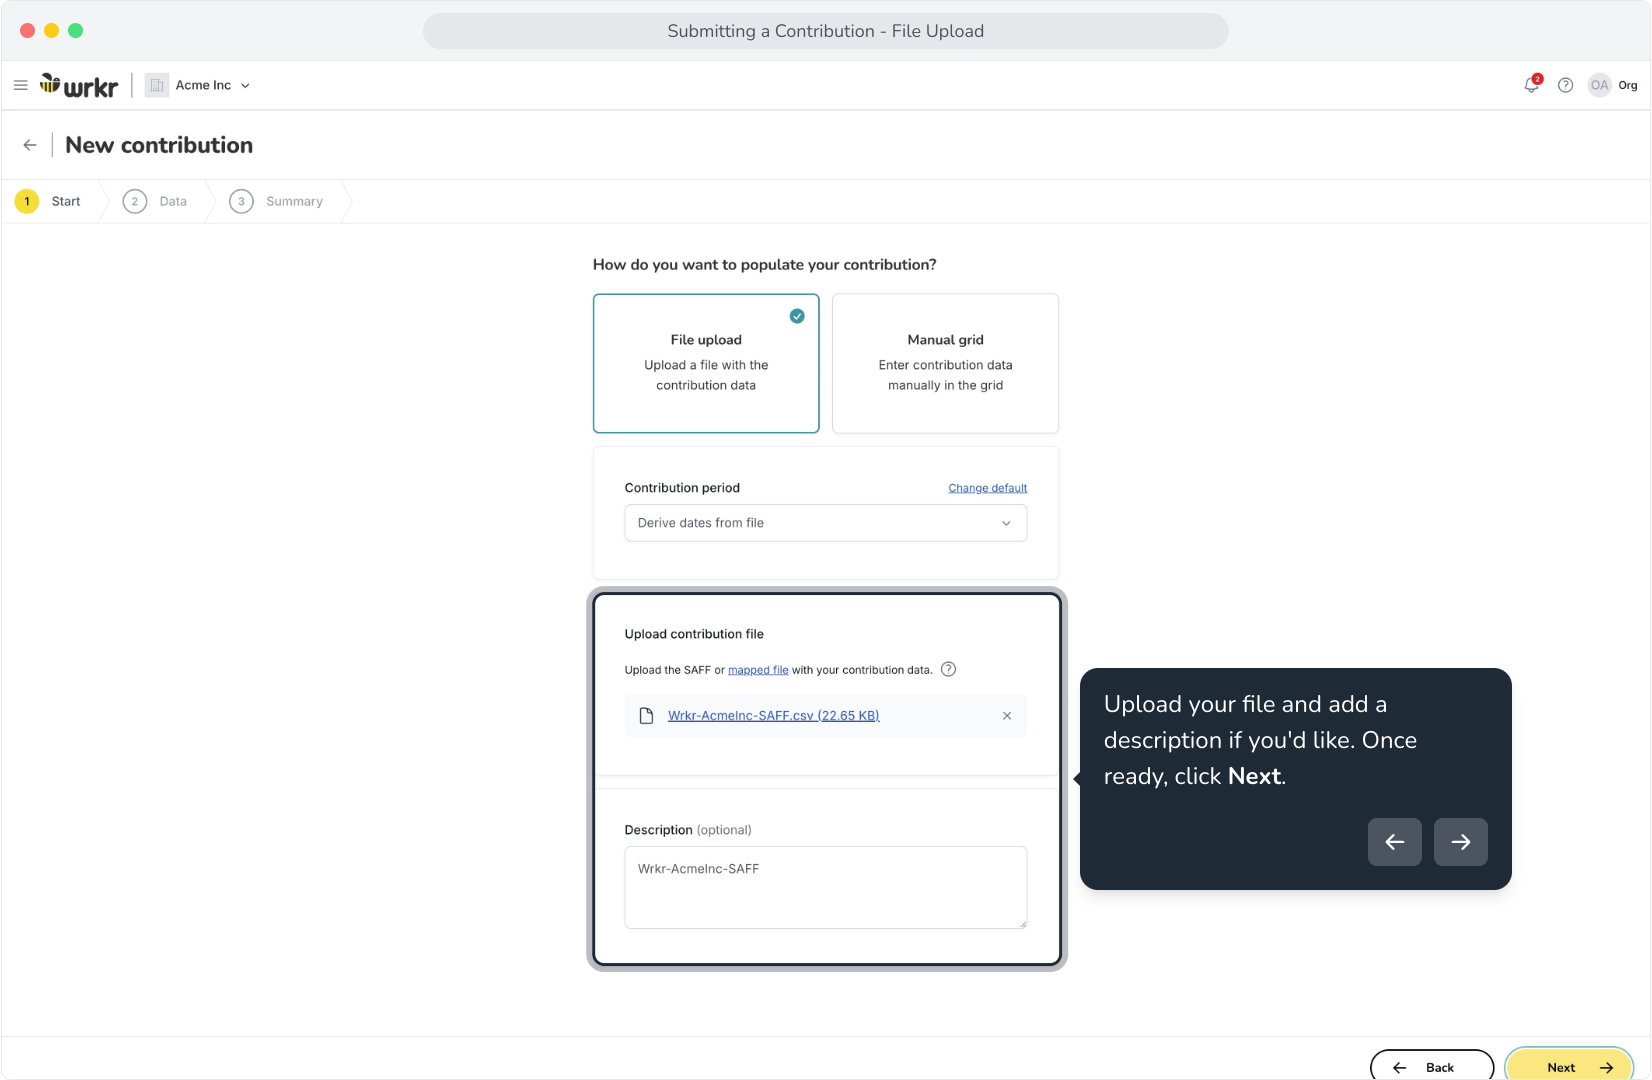
11. Upload your file and add a description if you'd like. Once ready, click Next.
12. Our contribution file has successfully imported! Use the grid view to review your contribution.
13. If you wish to exclude any employees from your contributions, you can check this box in the Exclude column for any or all employees.
14. Excluded employees are indicated by the check-box and muted row colour. We'll re-include Erin to ensure she receives her contribution.
15. By default, the grid view displays the first 10 results and paginates the rest. You can change your display settings via the Show rows drop-down.
16. The grid supports up to 100 rows per page. As our contribution has 49 rows, we'll select 50.
17. Once you have reviewed the contribution grid and are ready to proceed, click Next.
18. We are now taken to the Summary screen to review the contribution summary before we submit.
19. As we've configured Direct Debit as our preferred payment method via contribution settings, we'll see this within the payment details panel.
20. Tip: When using Direct Debit as your payment method, you have the ability to schedule payments for a later date.
21. To schedule your contribution payment, select the Scheduled date and click Done.
22. We can now see that our contribution has been scheduled for the 10th December. You can Edit or Remove the scheduling from this screen before submitting.
23. Once ready, click Submit contribution.
24. Upon submission, you're taken to the Payment details screen to see a summary of the transaction. Click Return to Contributions.
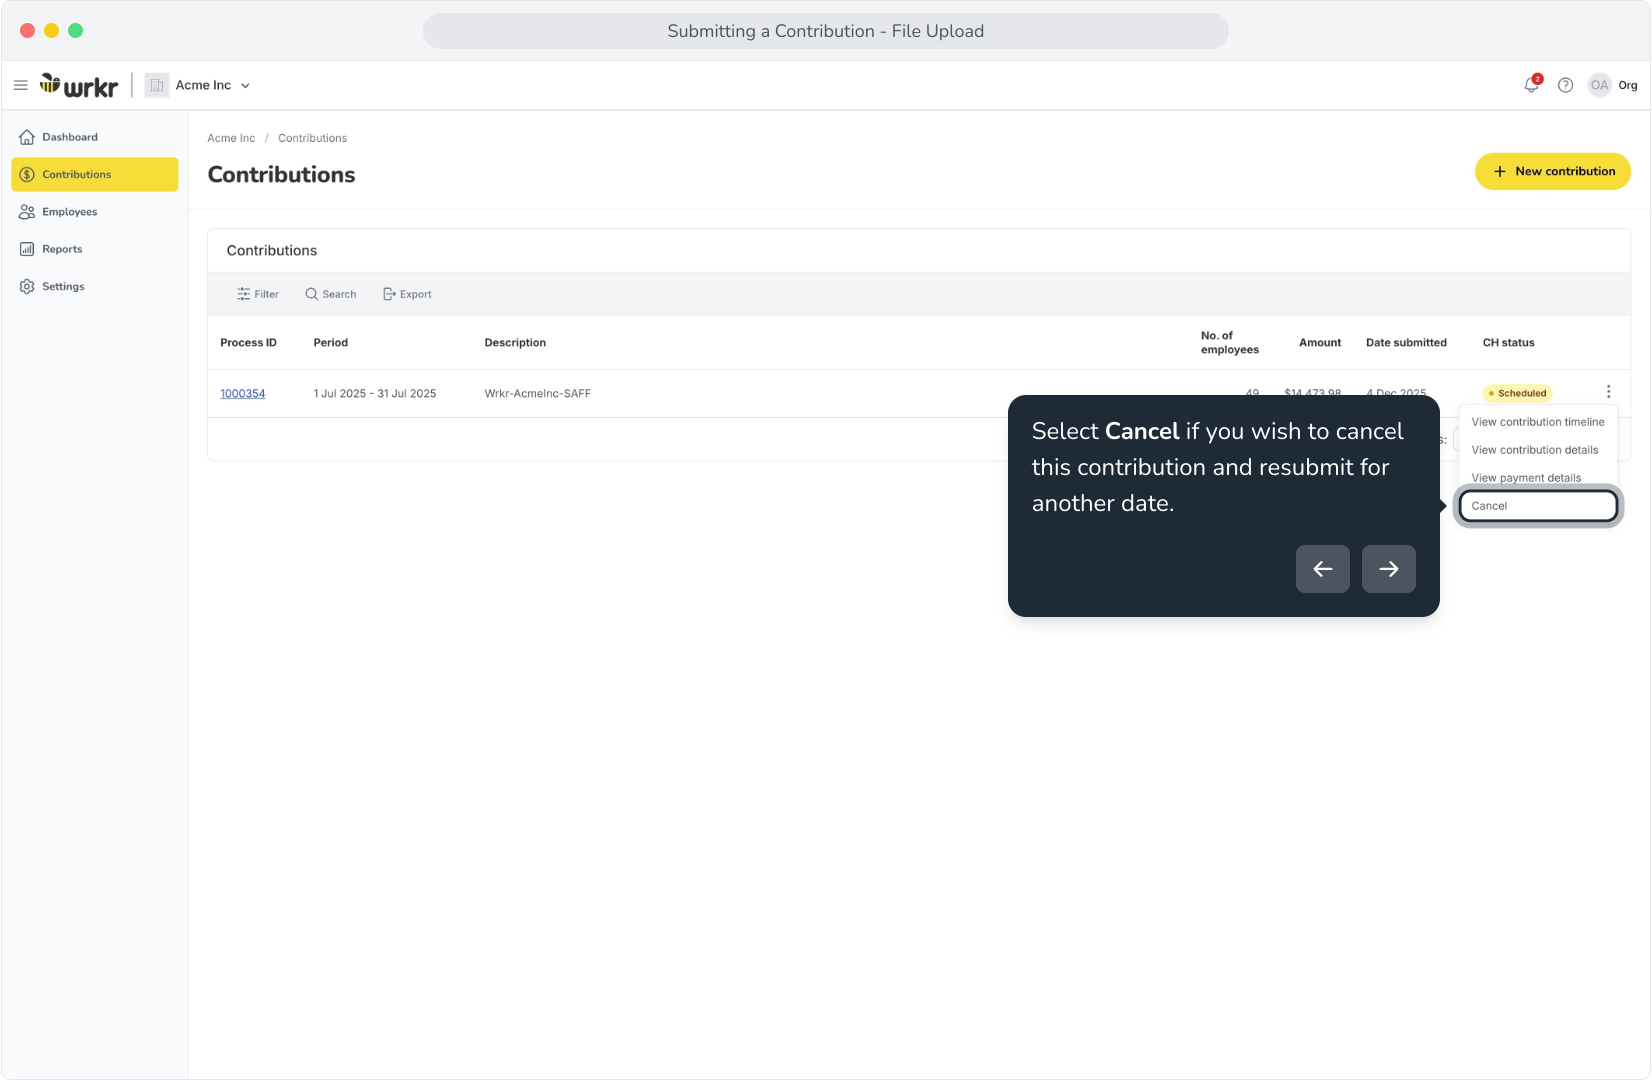
25. On the Contributions screen, we can now see our submitted contribution. As we scheduled this for the 10th December, the status reflects 'Scheduled'. If you wish to cancel this contribution, click on the action menu.
26. Select Cancel if you wish to cancel this contribution and resubmit for another date.
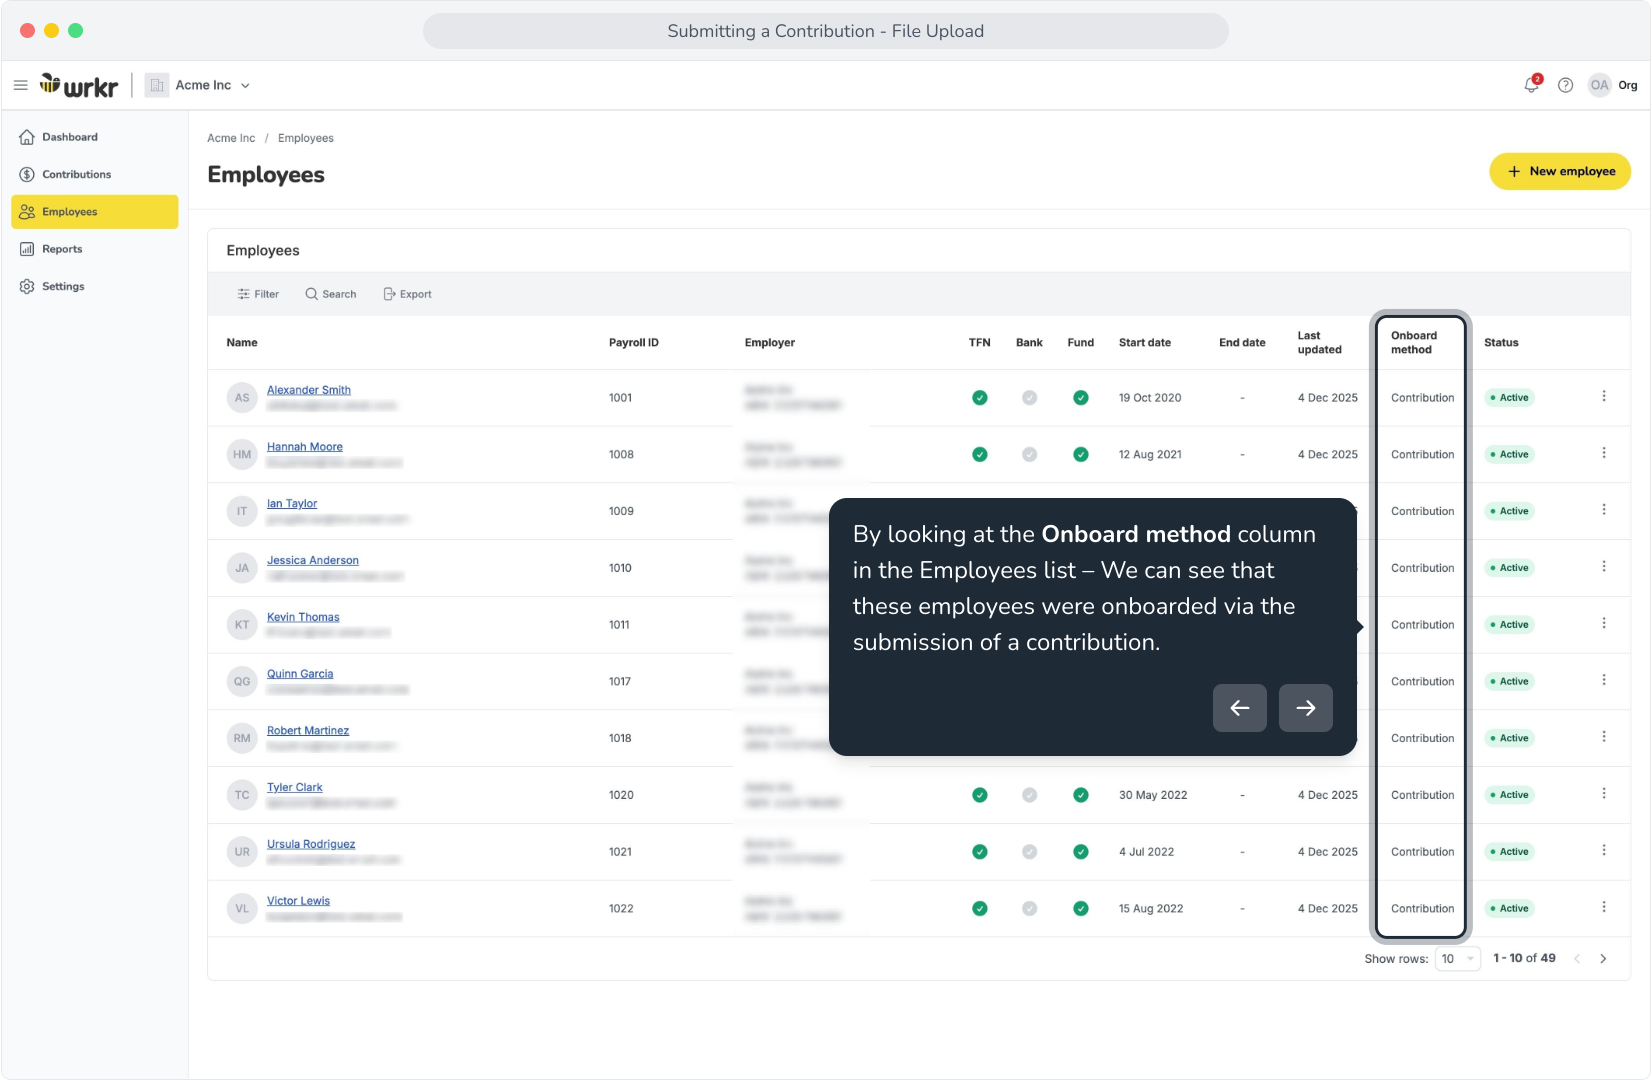
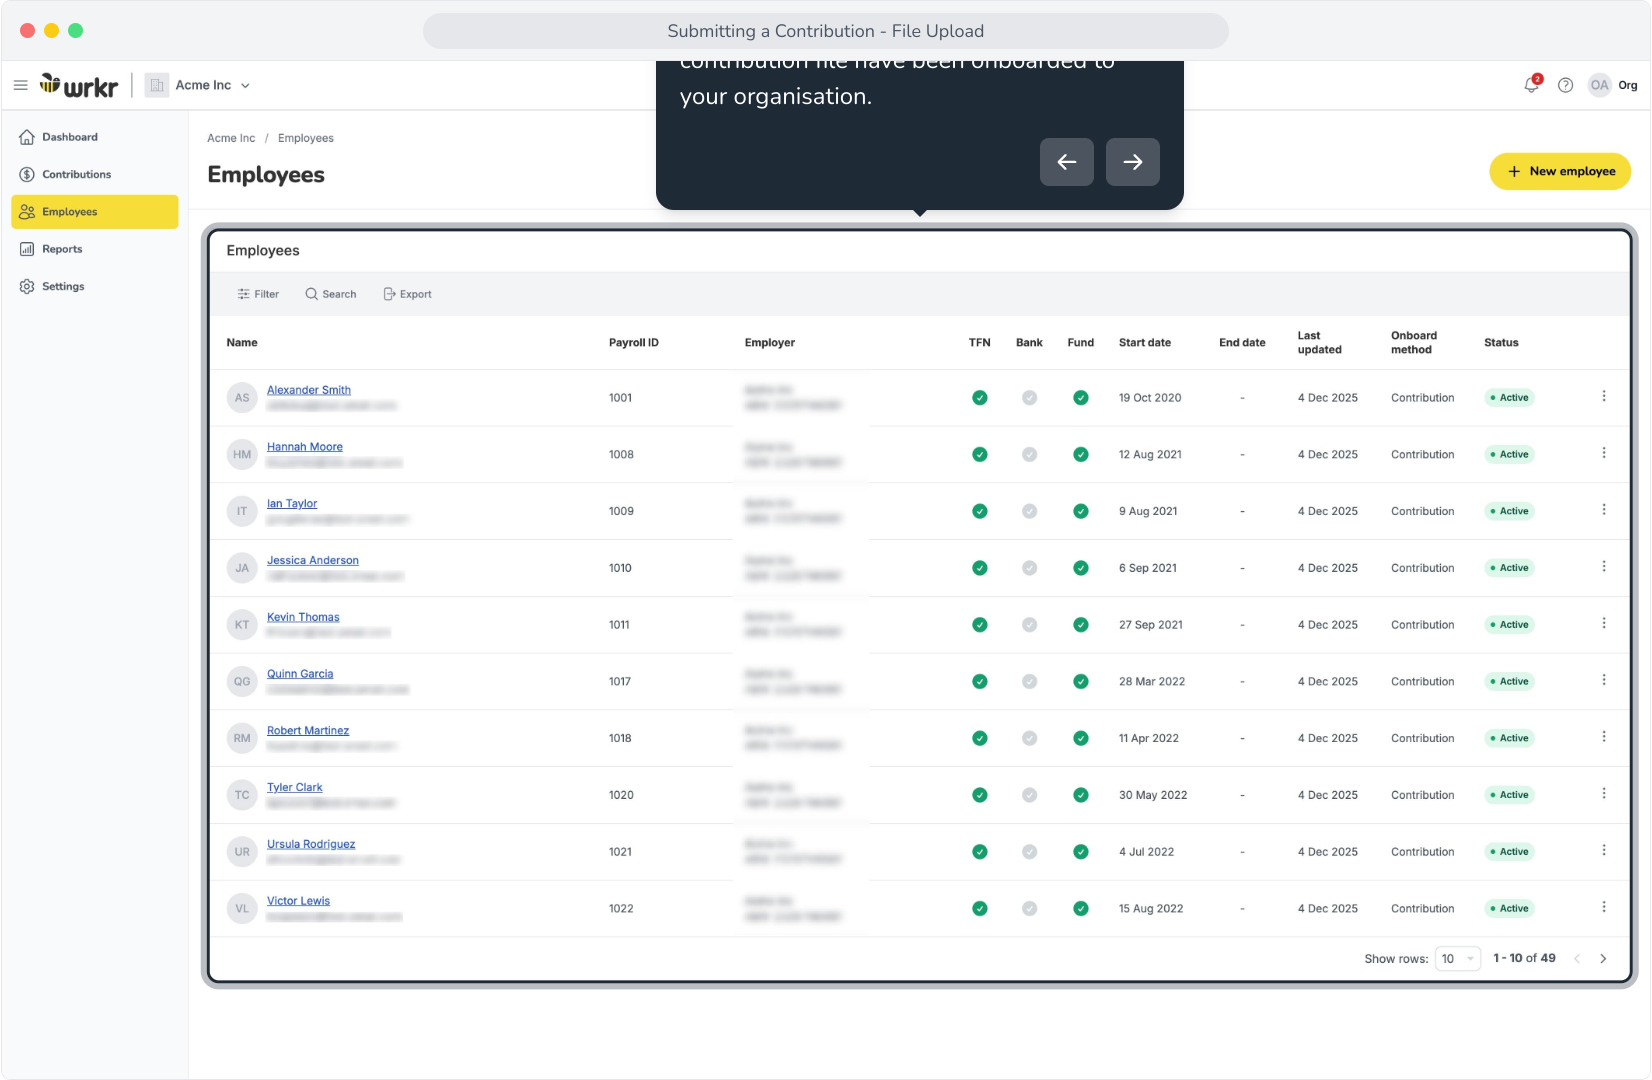
27. Navigating to the Employees tab, you can see that the employees from your contribution file have been onboarded to your organisation.
28. Note: As you submit new contributions, the portal will recognise existing employees – only onboarding those that do not already exist.
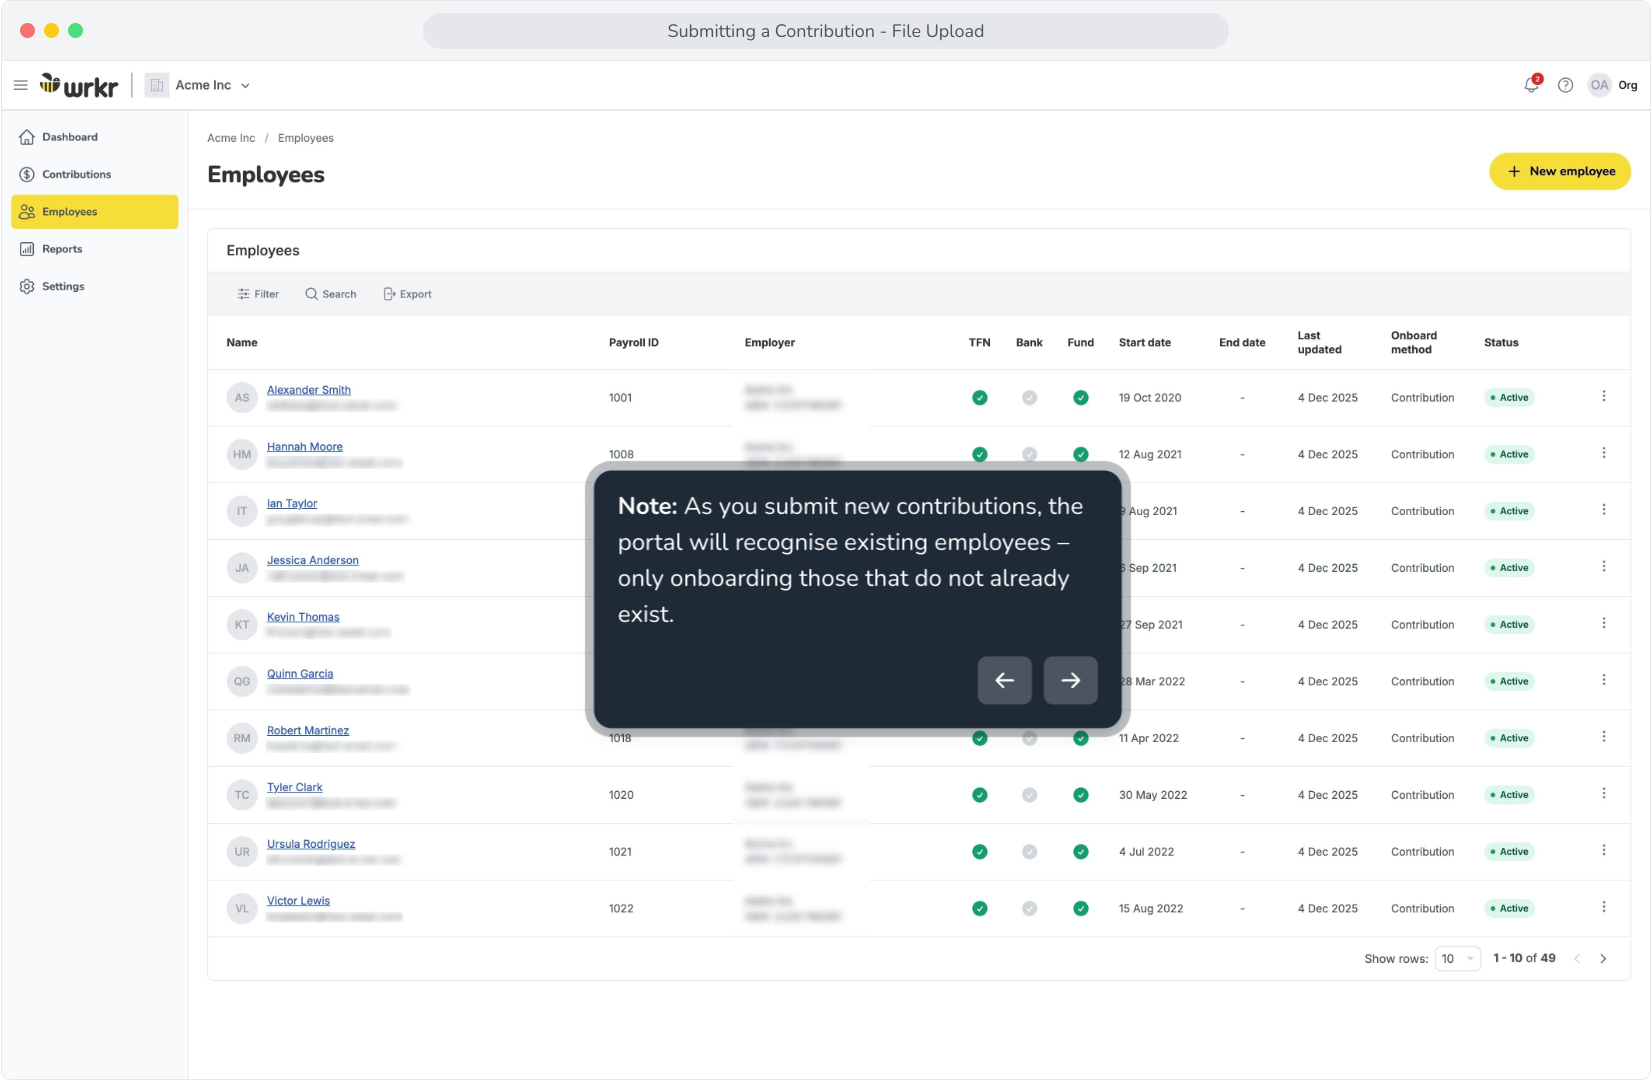
29. By looking at the Onboard method column in the Employees list – We can see that these employees were onboarded via the submission of a contribution.