Context: This guide covers the process of submitting a contribution via the manual grid in the Wrkr Portal.
Interactive Demo
Note: Make the demo full-screen for a better experience. You can mute/un-mute narration to suit your preferences.
Step by Step
1. Submitting a Contribution – Manual Grid
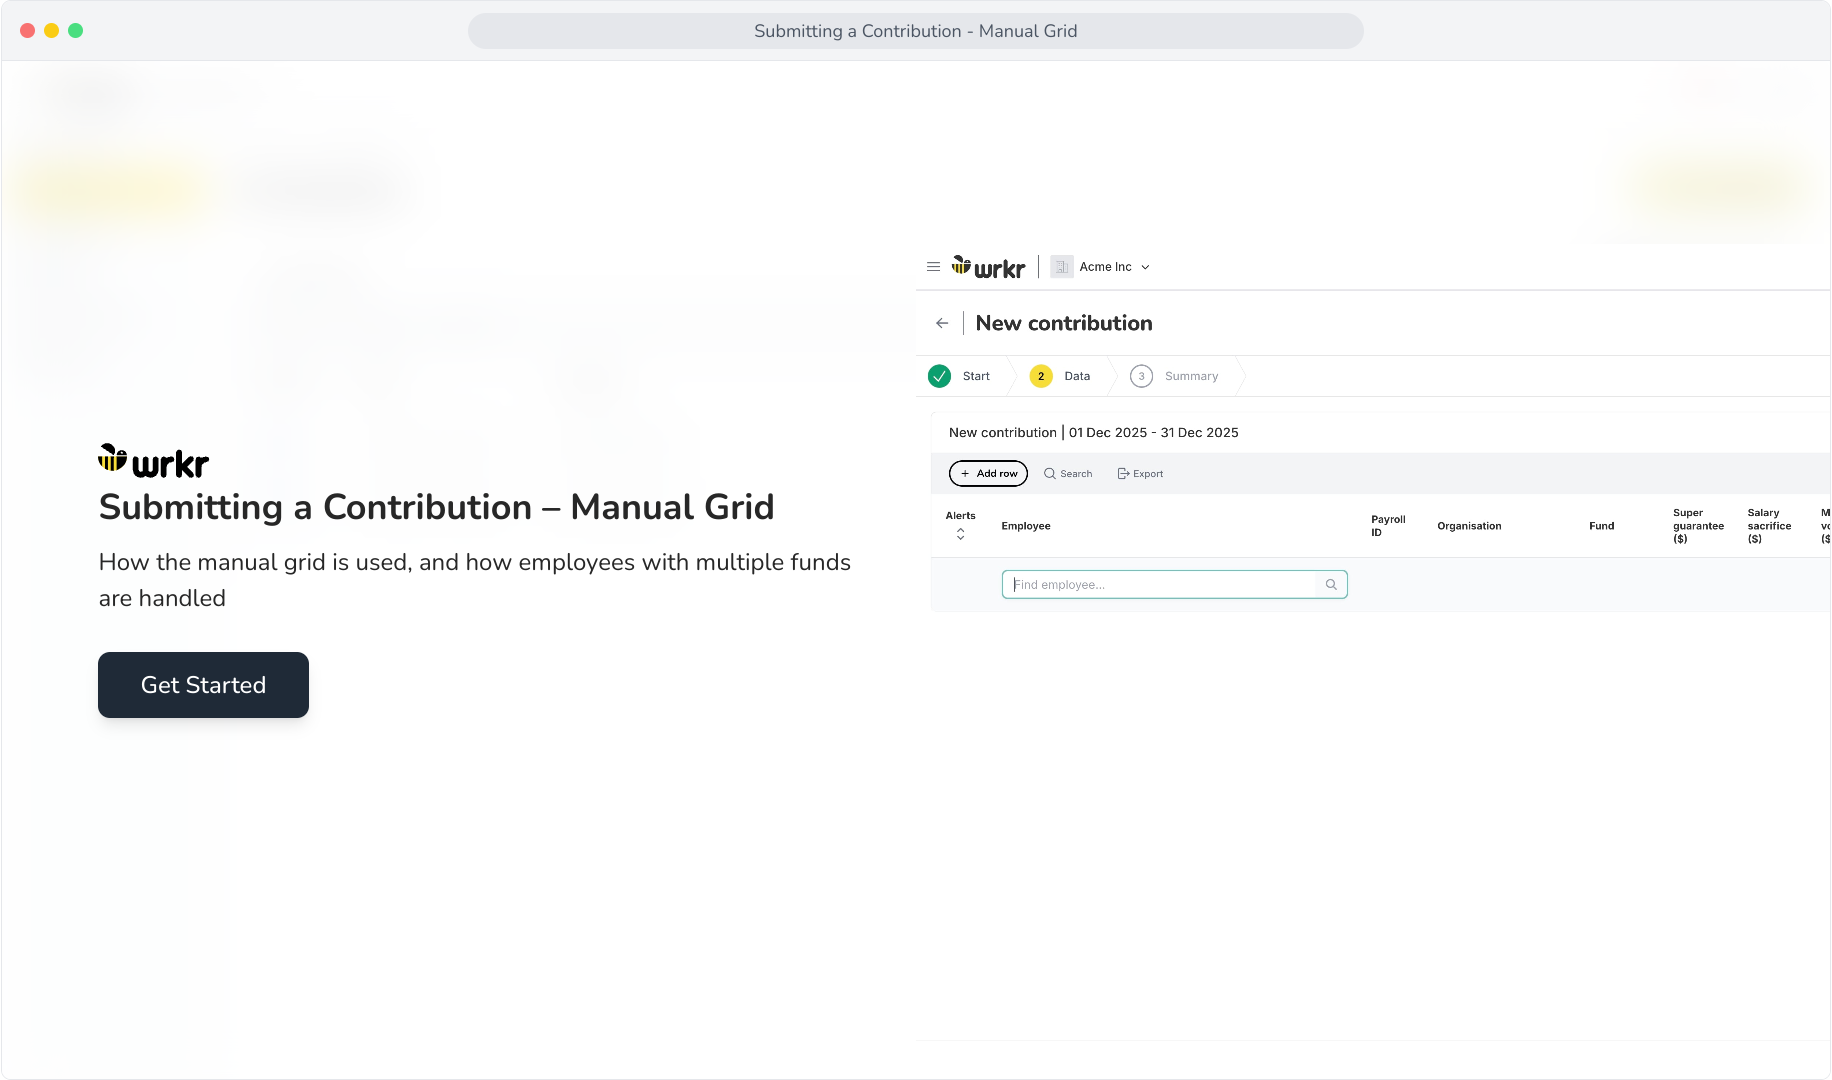
2. On the Contributions screen, click New contribution.
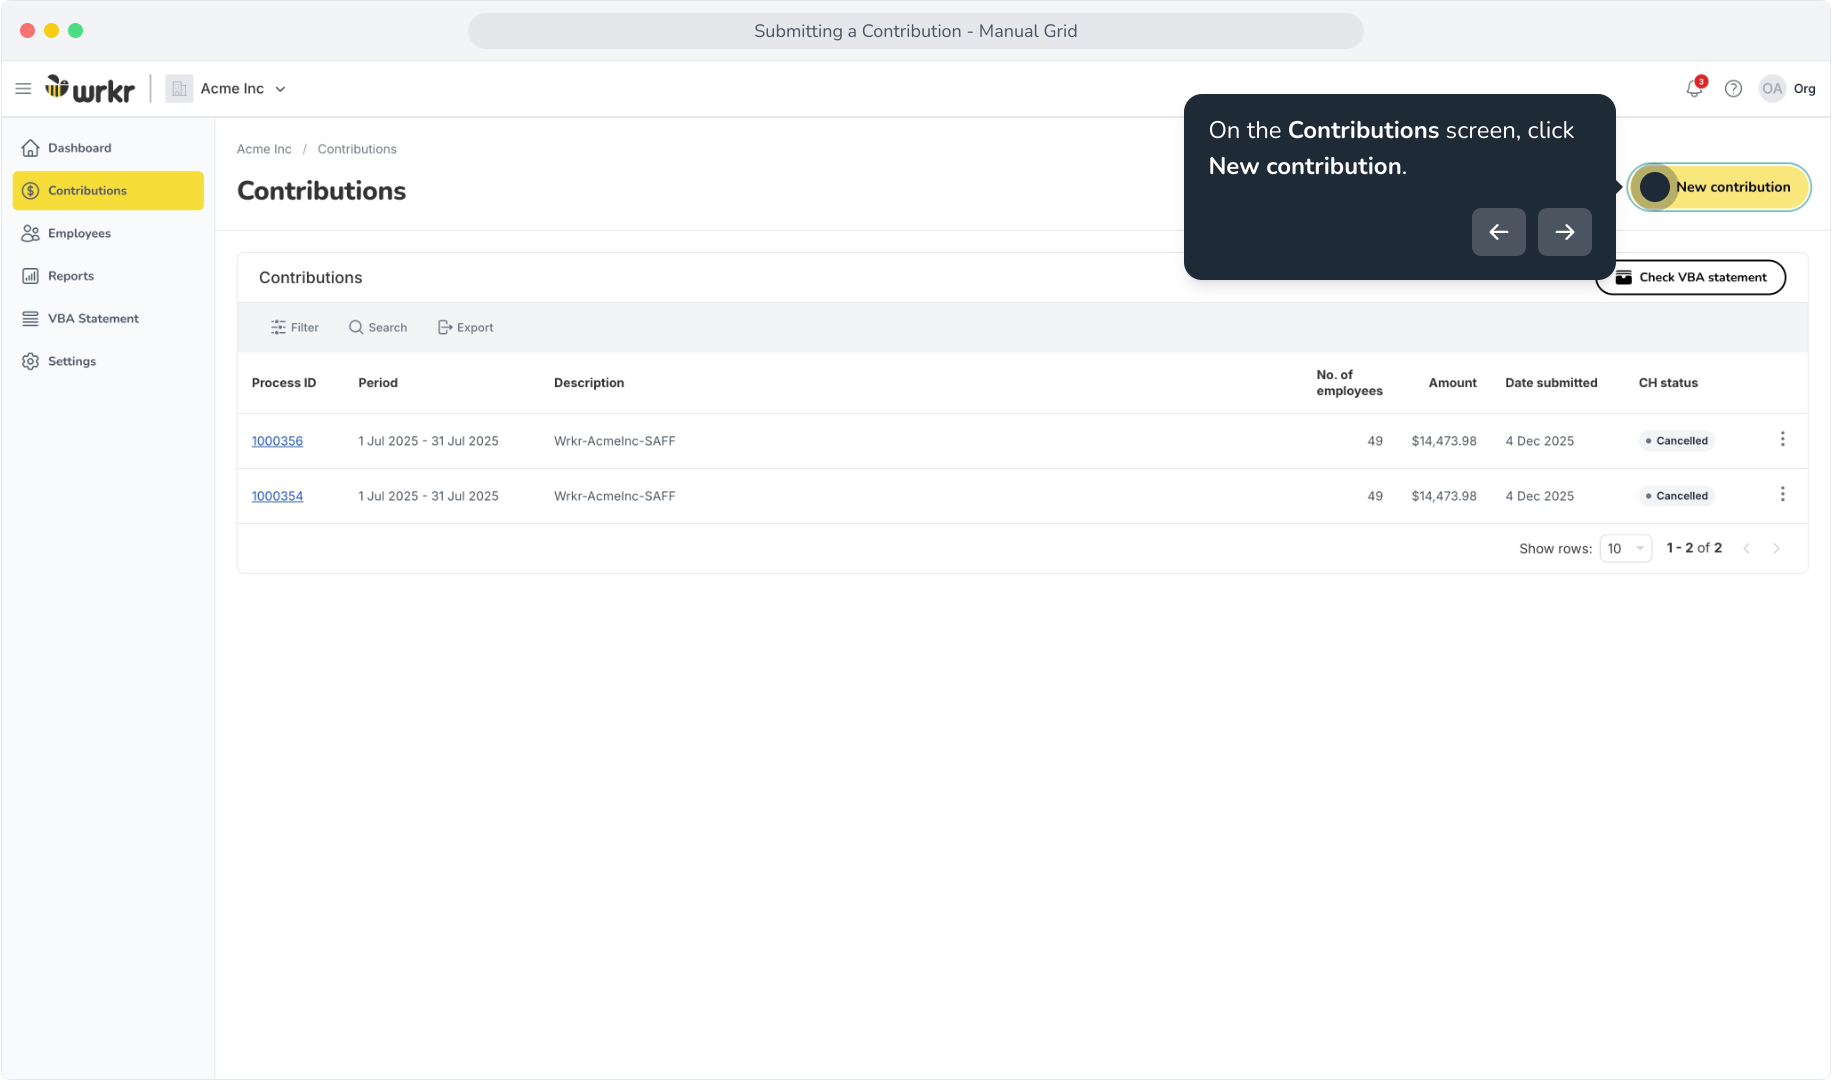
3. Select Manual grid.
4. When using the manual grid, you can start with a blank grid, pre-populate the grid with all employees, or pre-populate the grid with your last submitted contribution.
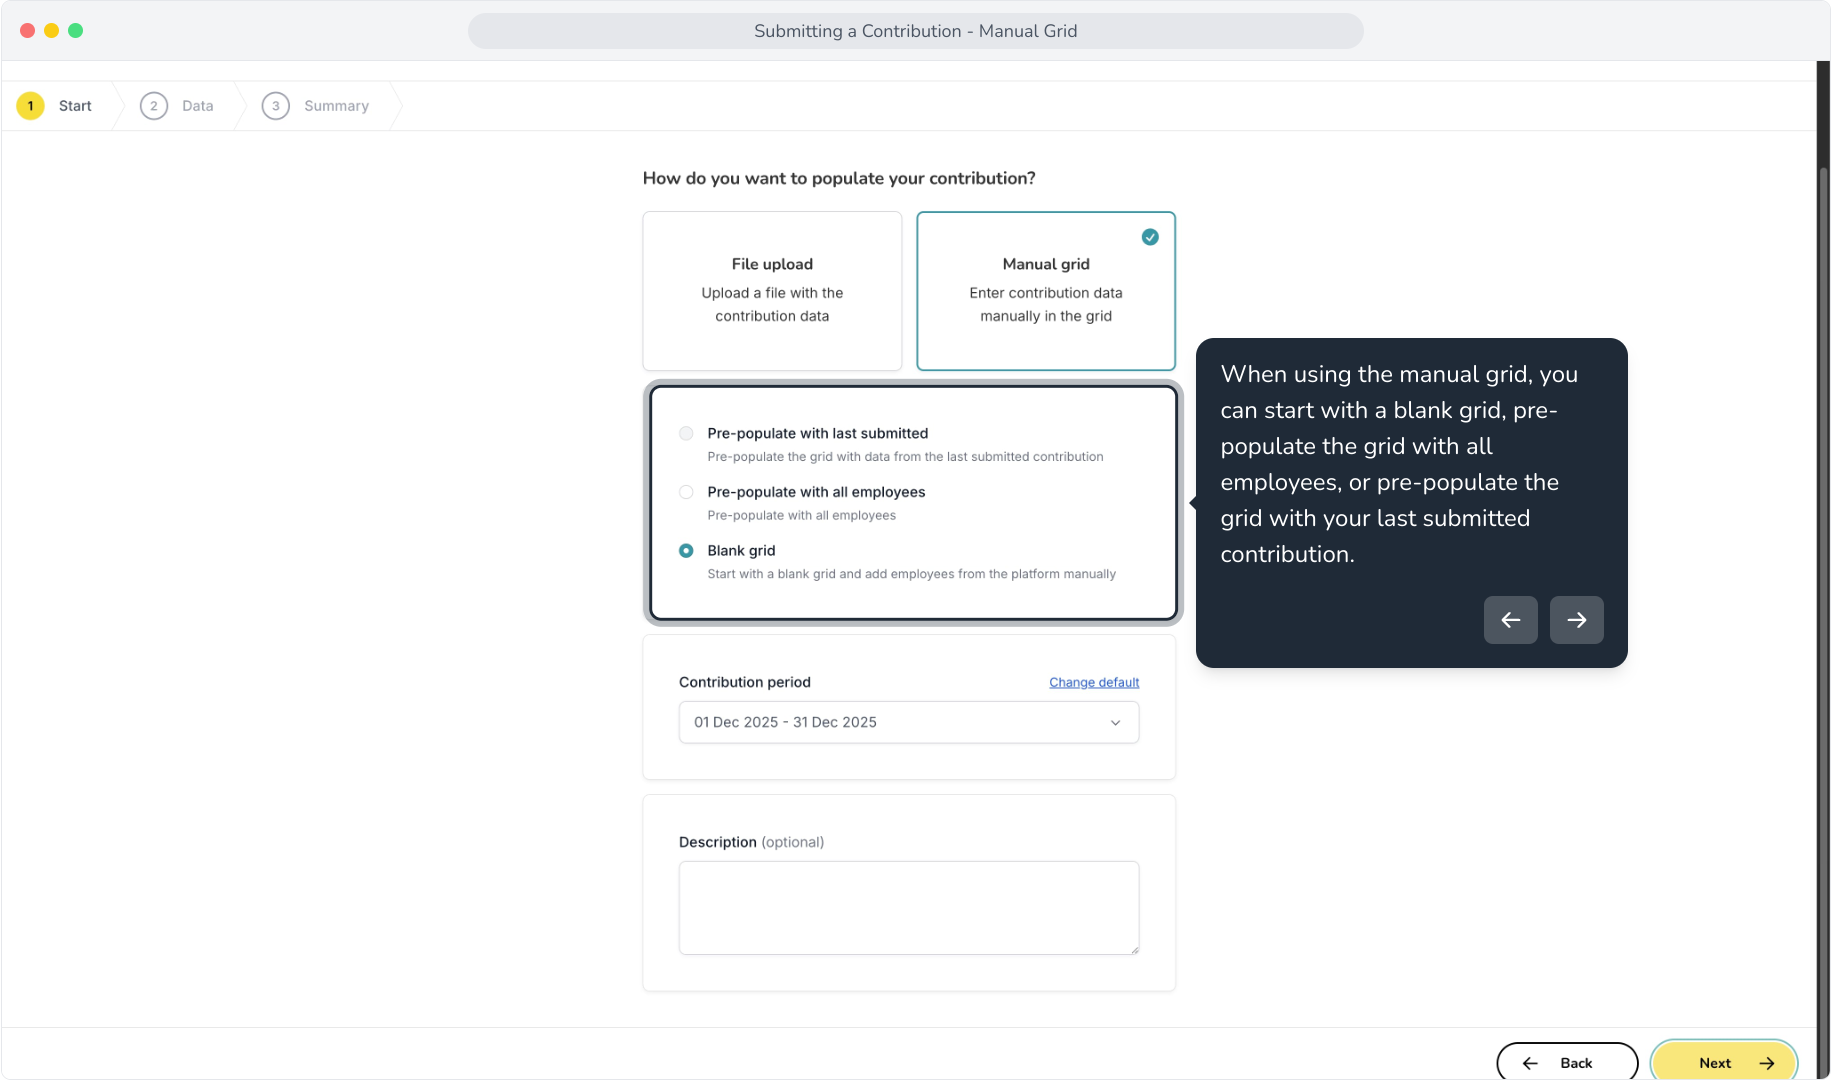
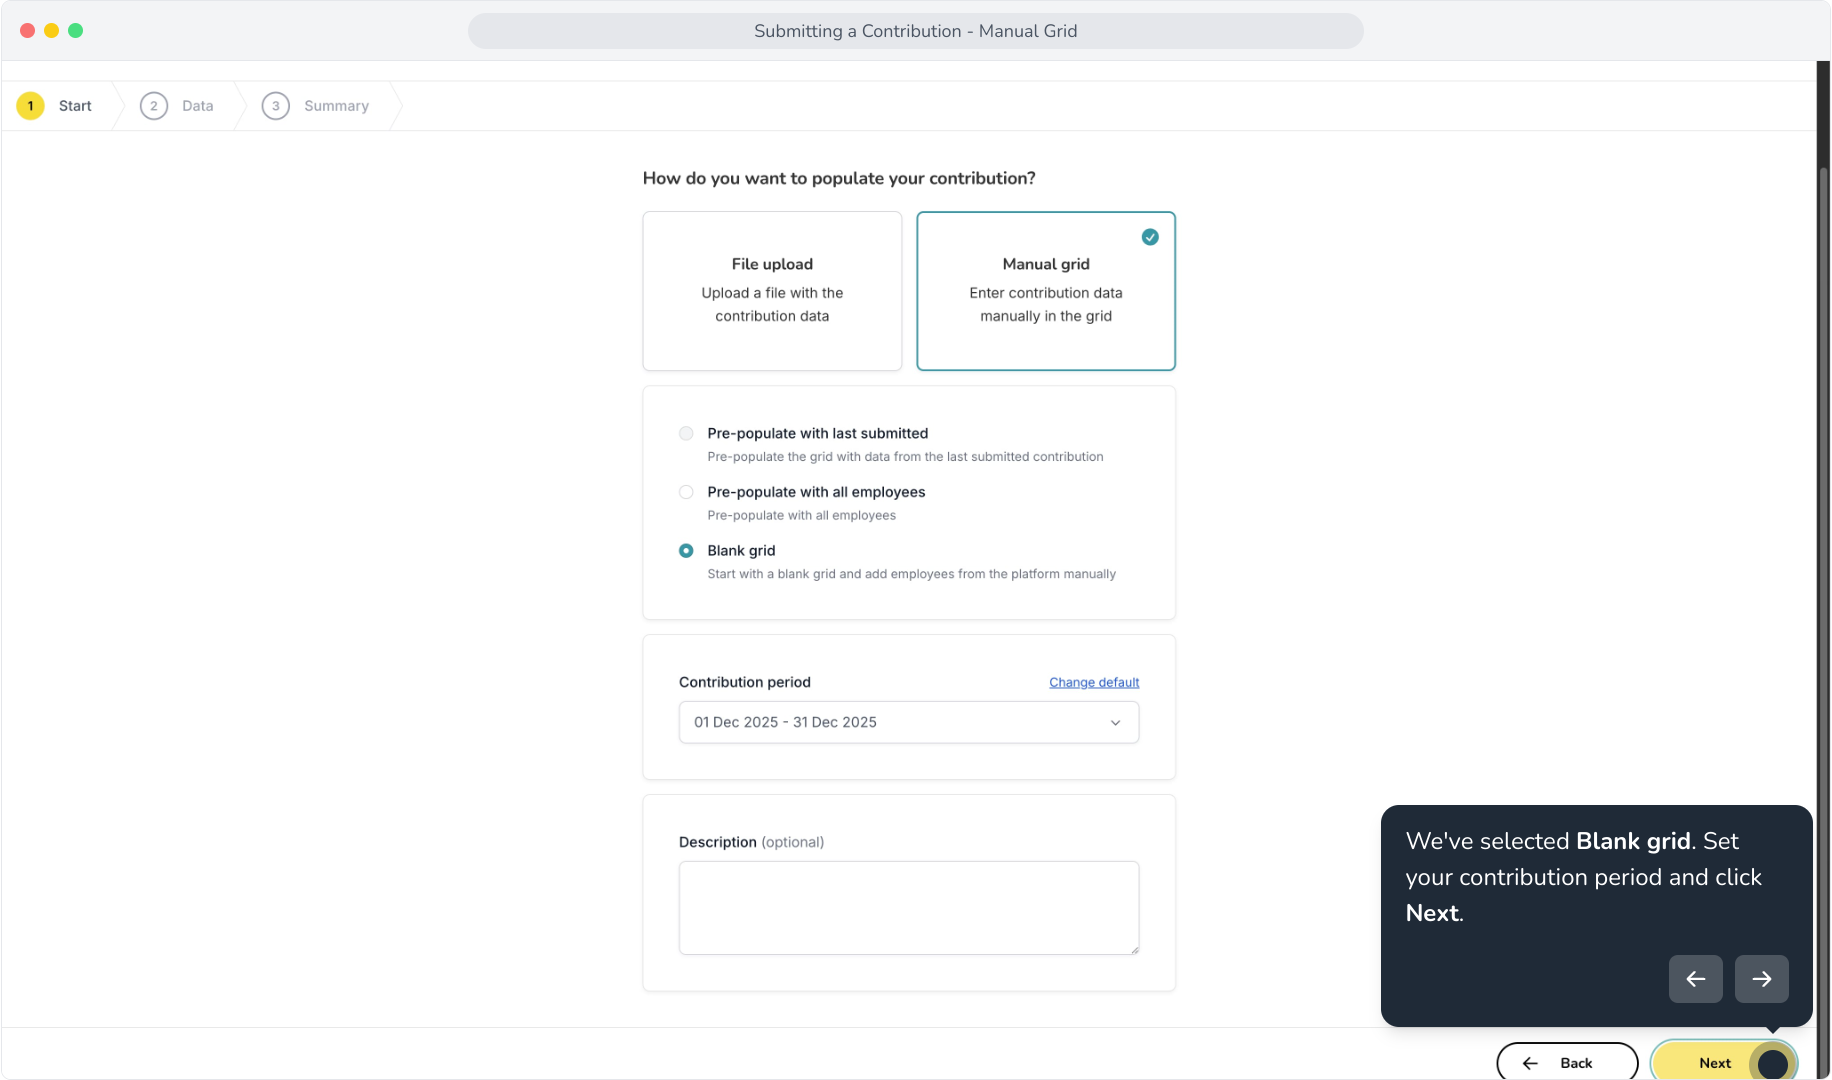
5. We've selected Blank grid. Set your contribution period and click Next.
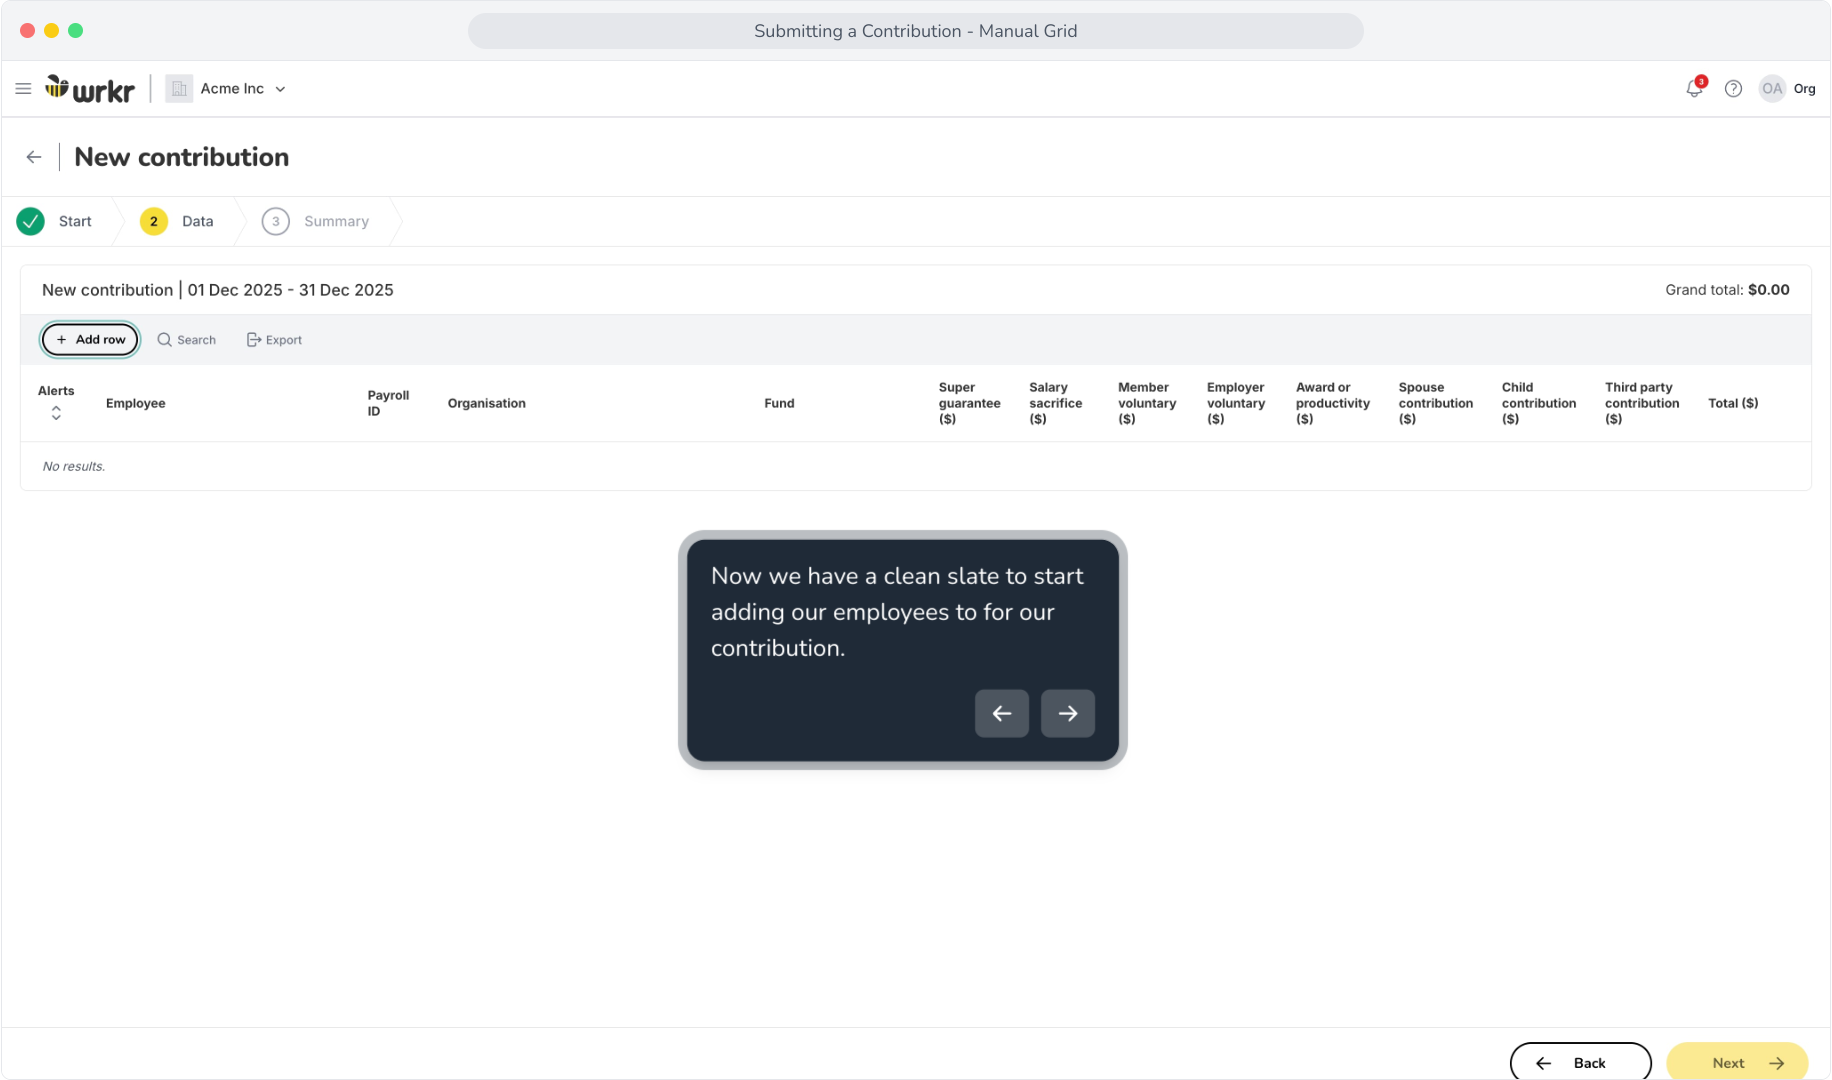
6. Now we have a clean slate to start adding our employees to for our contribution.
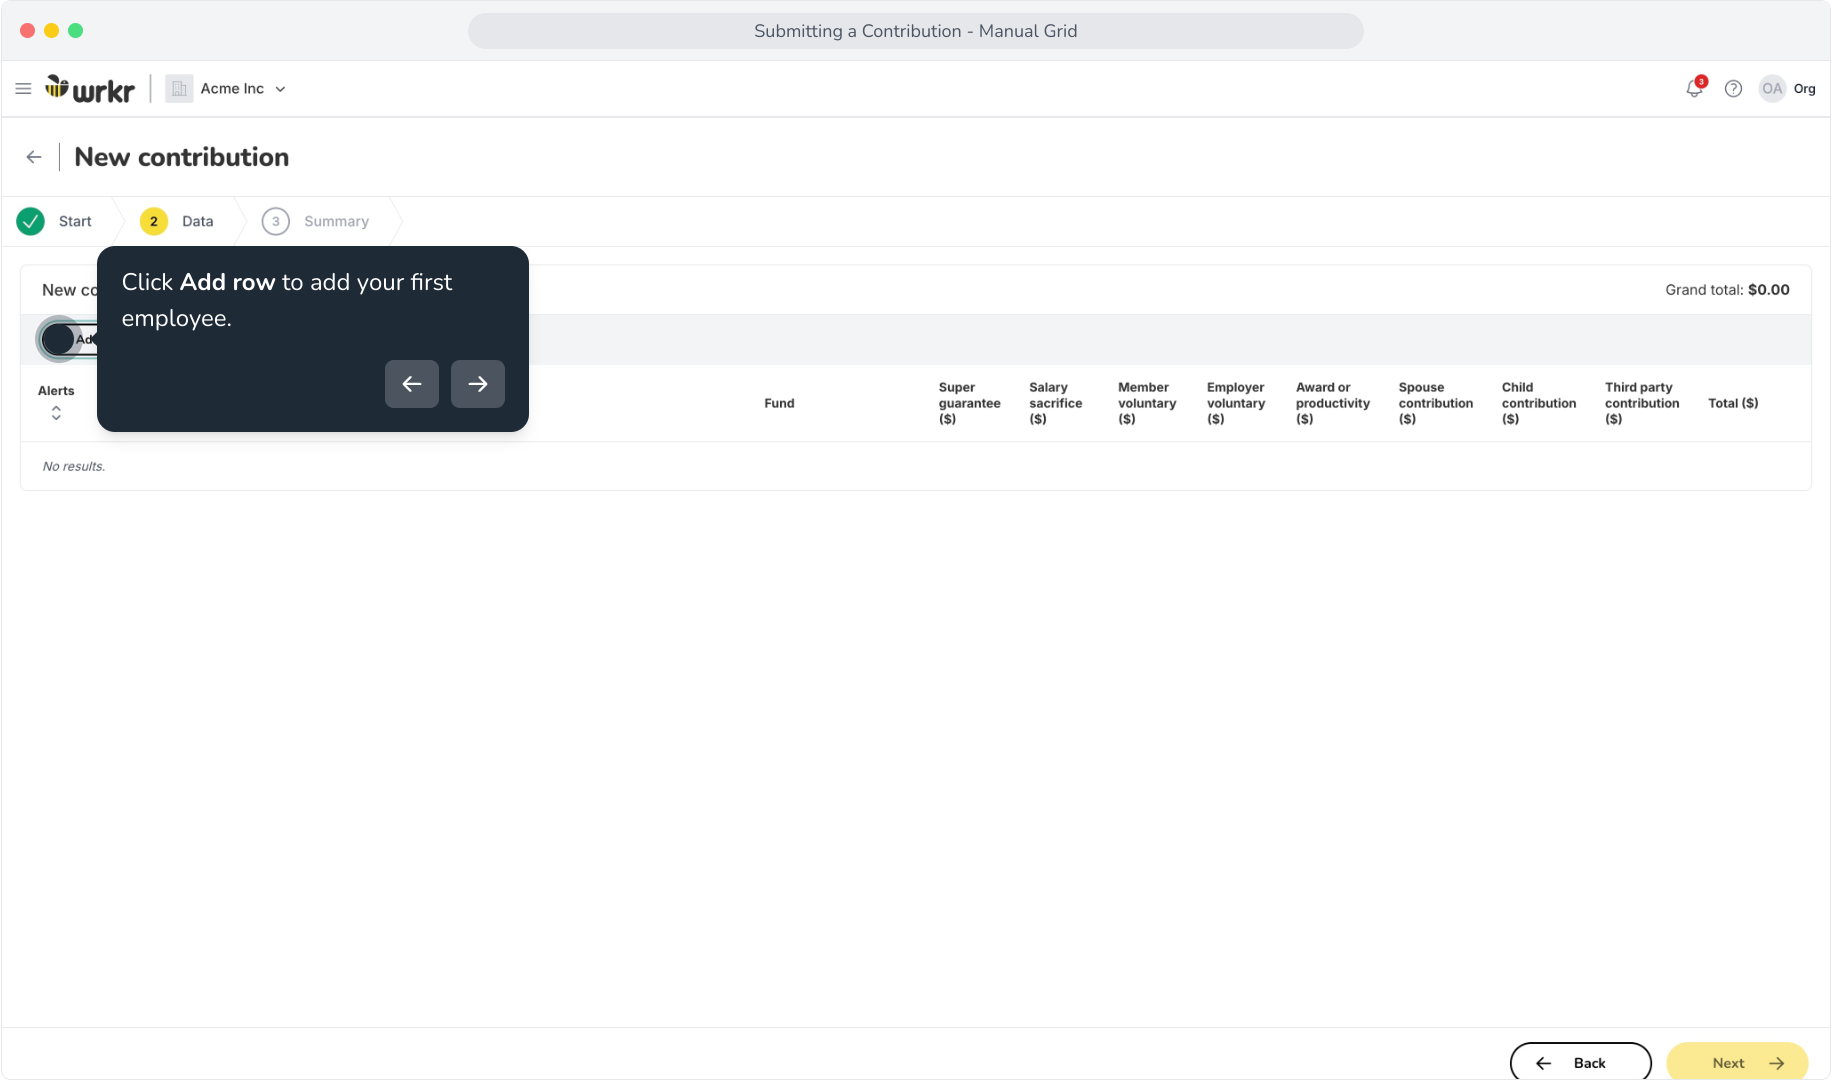
7. Click Add row to add your first employee.
8. Use the search field to find your employee, and select them from the search results.
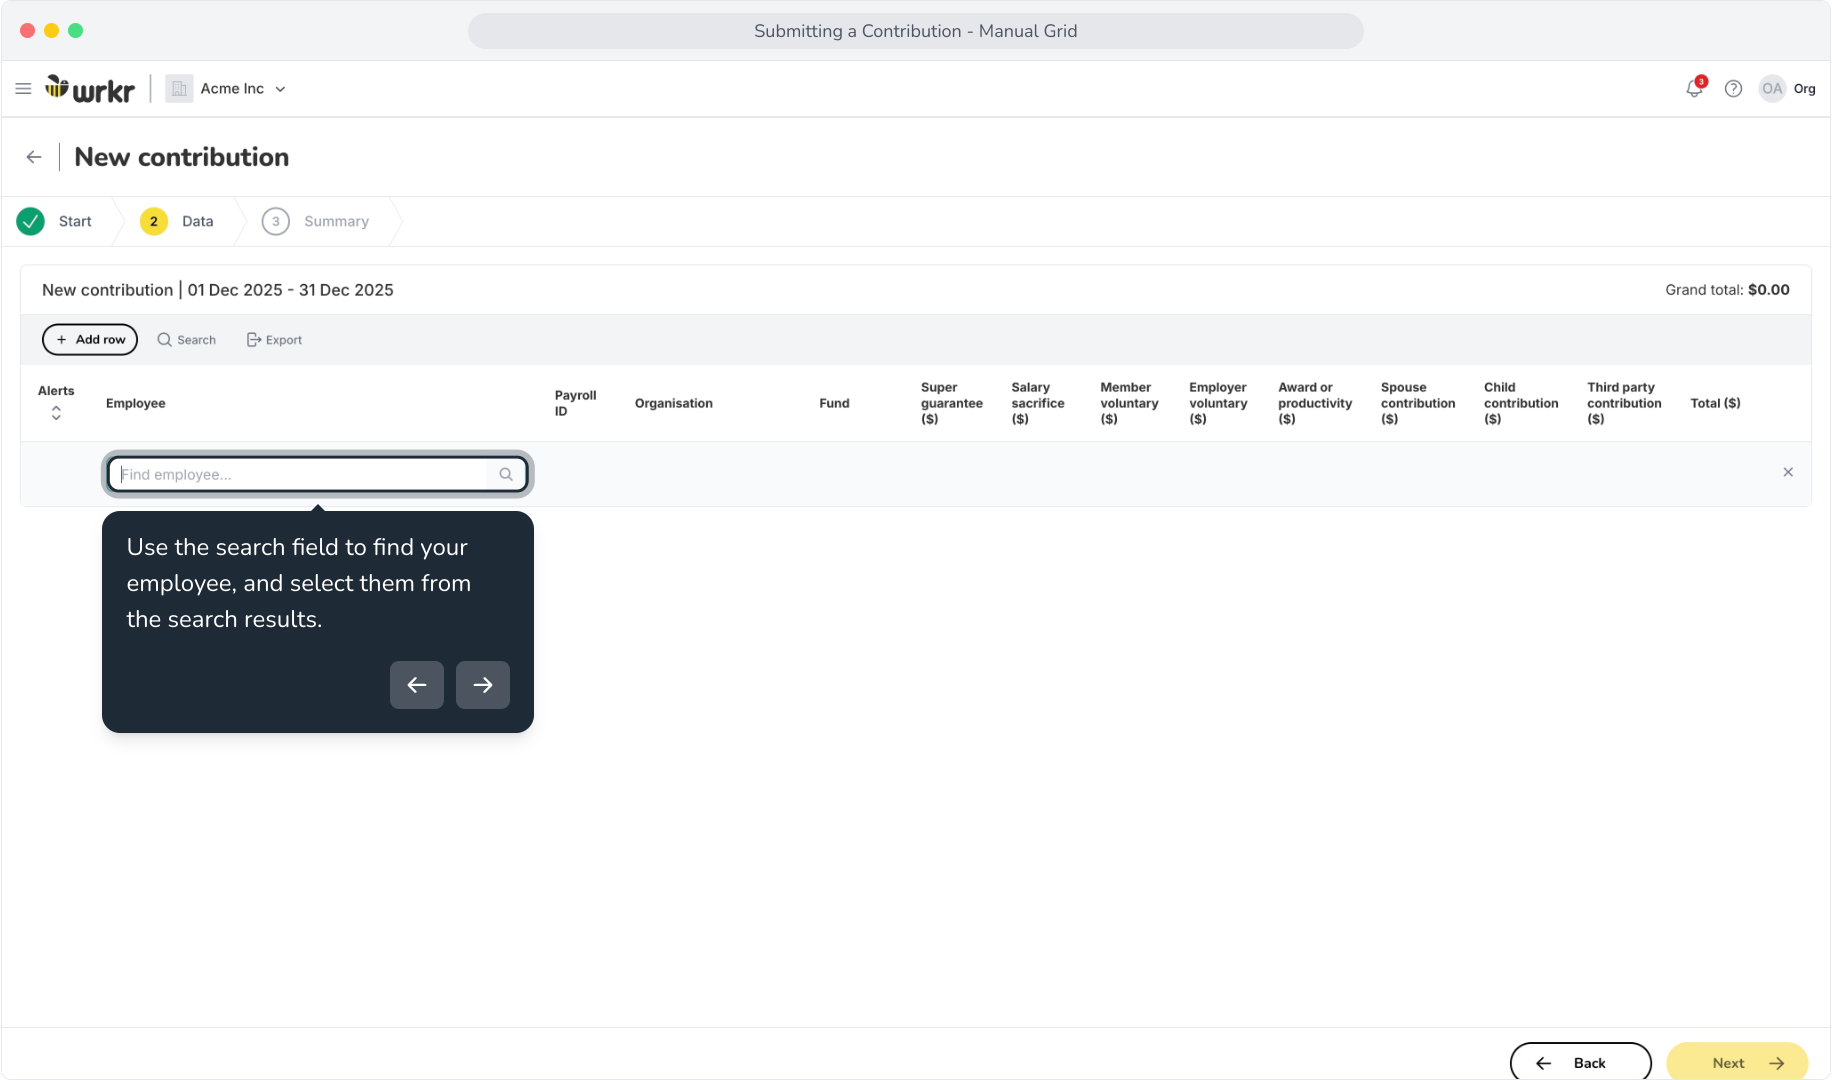
9. Each employee that you add will create a new row on the grid. Let's add another.
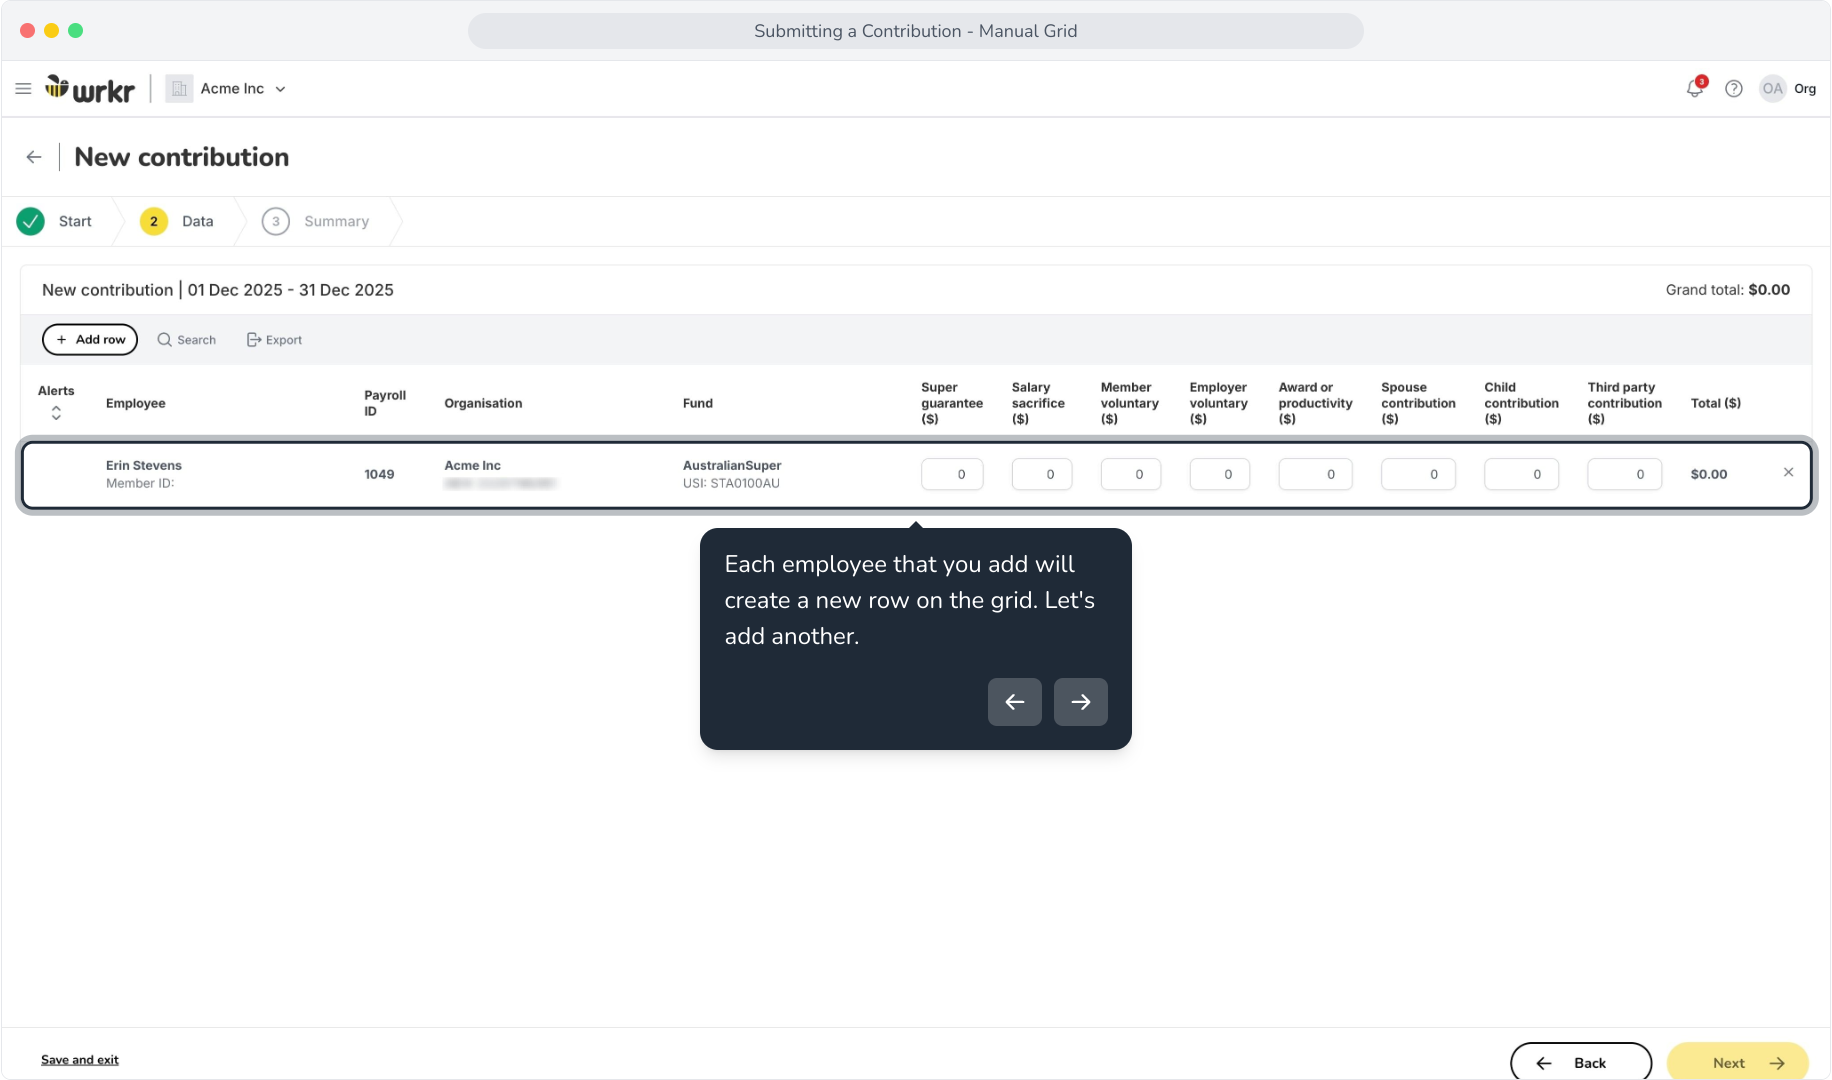
10. We've added a second employee that belongs to two funds. In this case, the grid creates a new row for each fund the employee belongs to, allowing you to split contribution amounts across each.
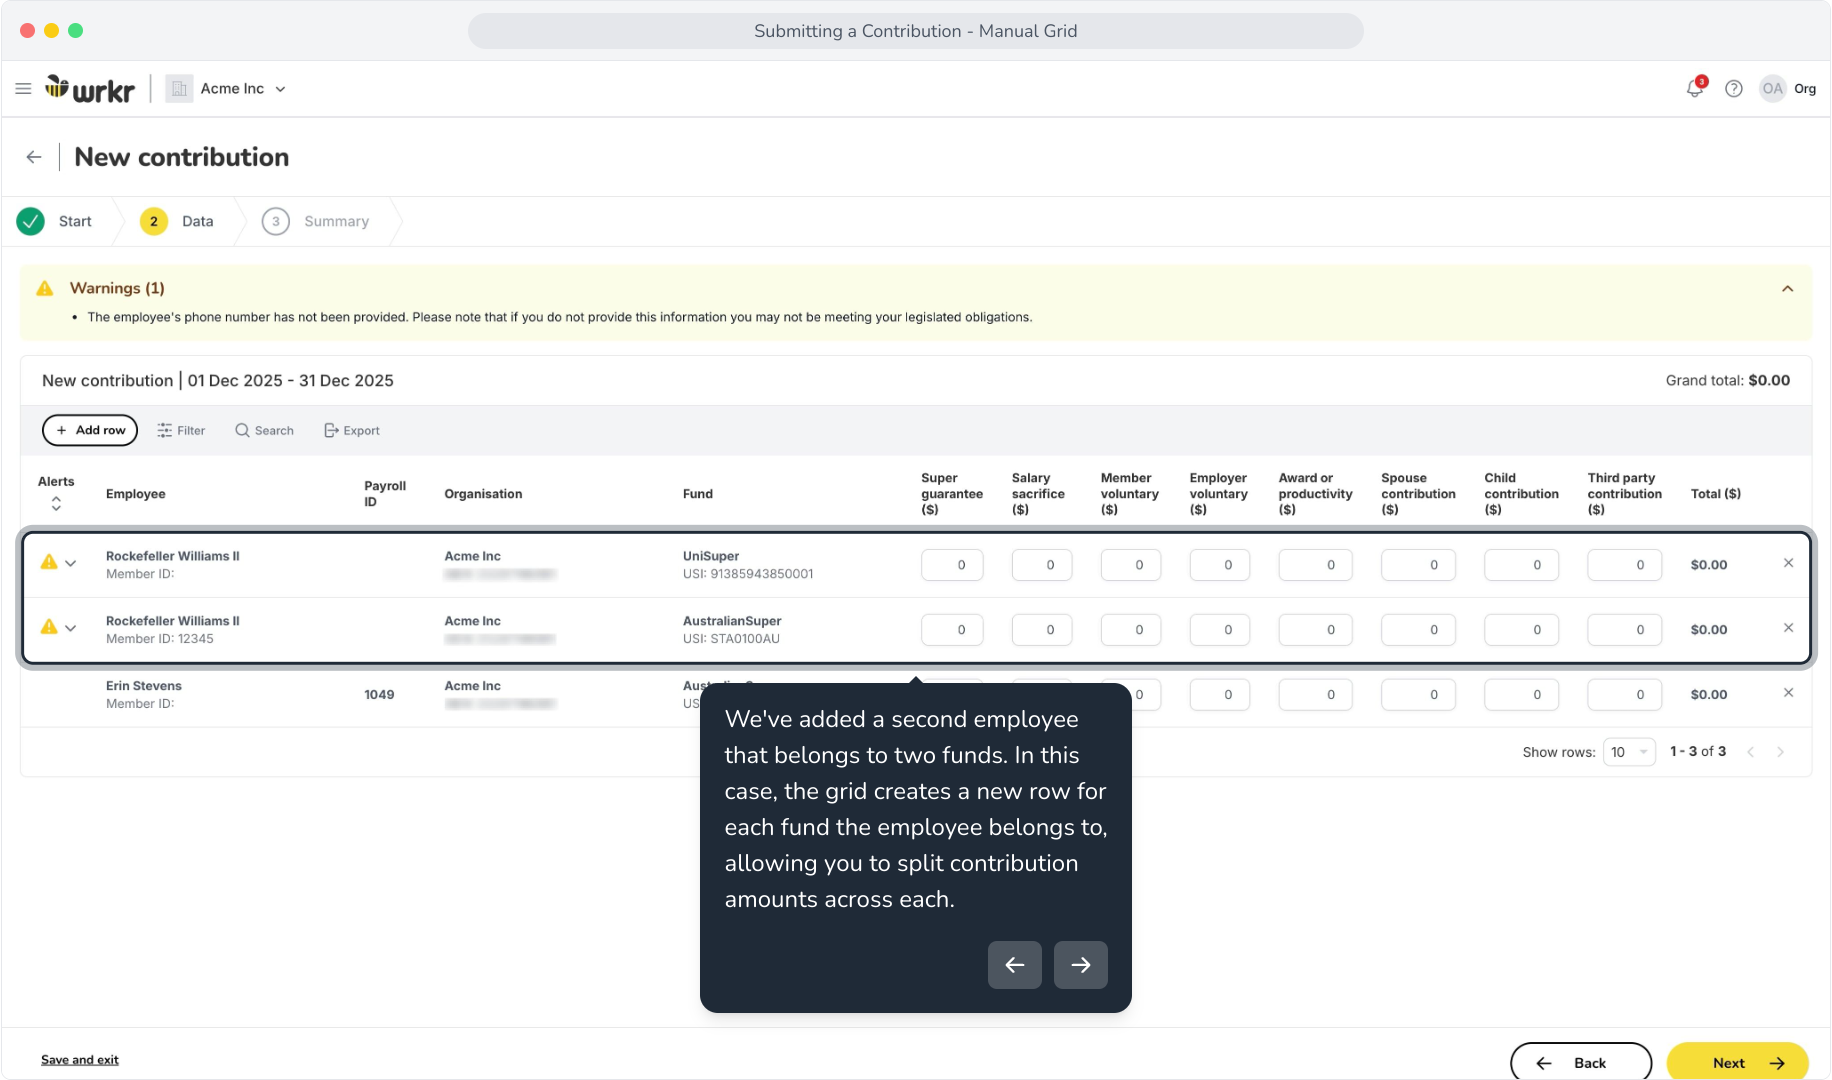
11. As we add employees to the grid, any warnings or errors relating to those employees will be displayed at the top of the grid.
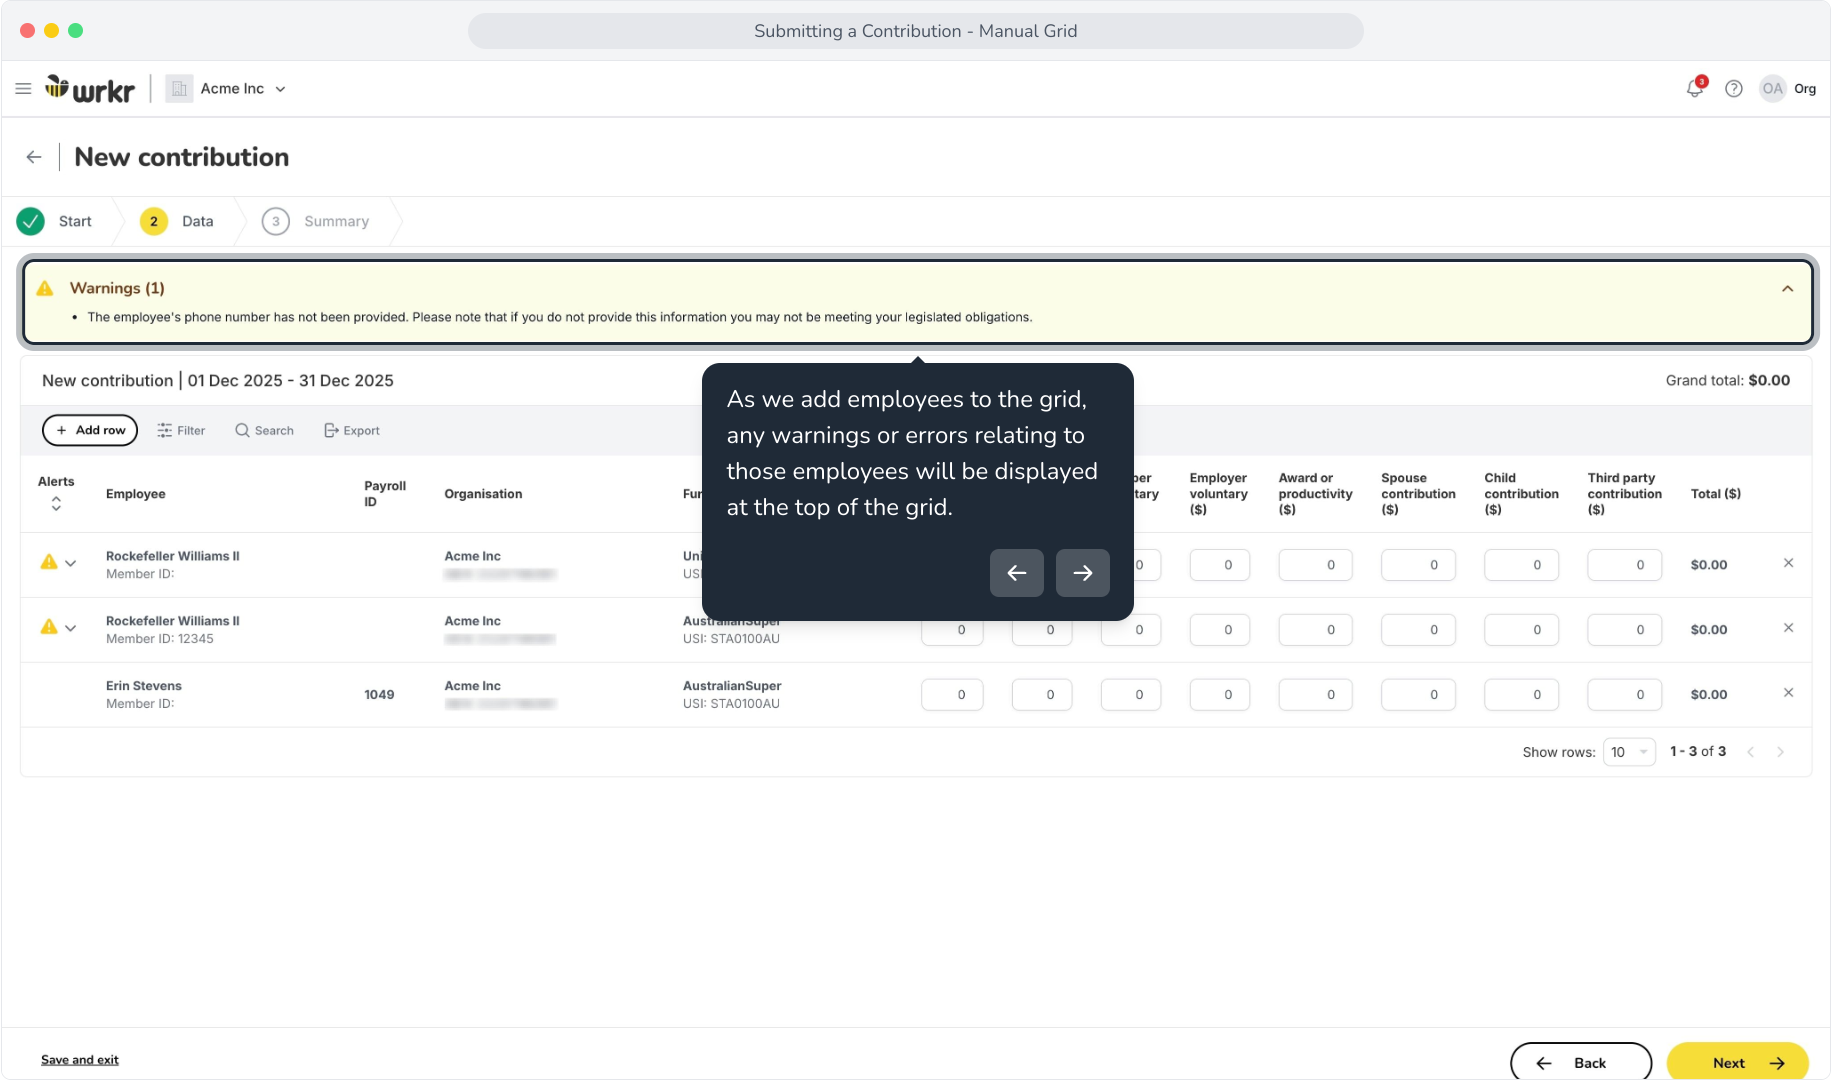
12. Note: Contributions with warnings can still be submitted, but contributions with errors cannot.
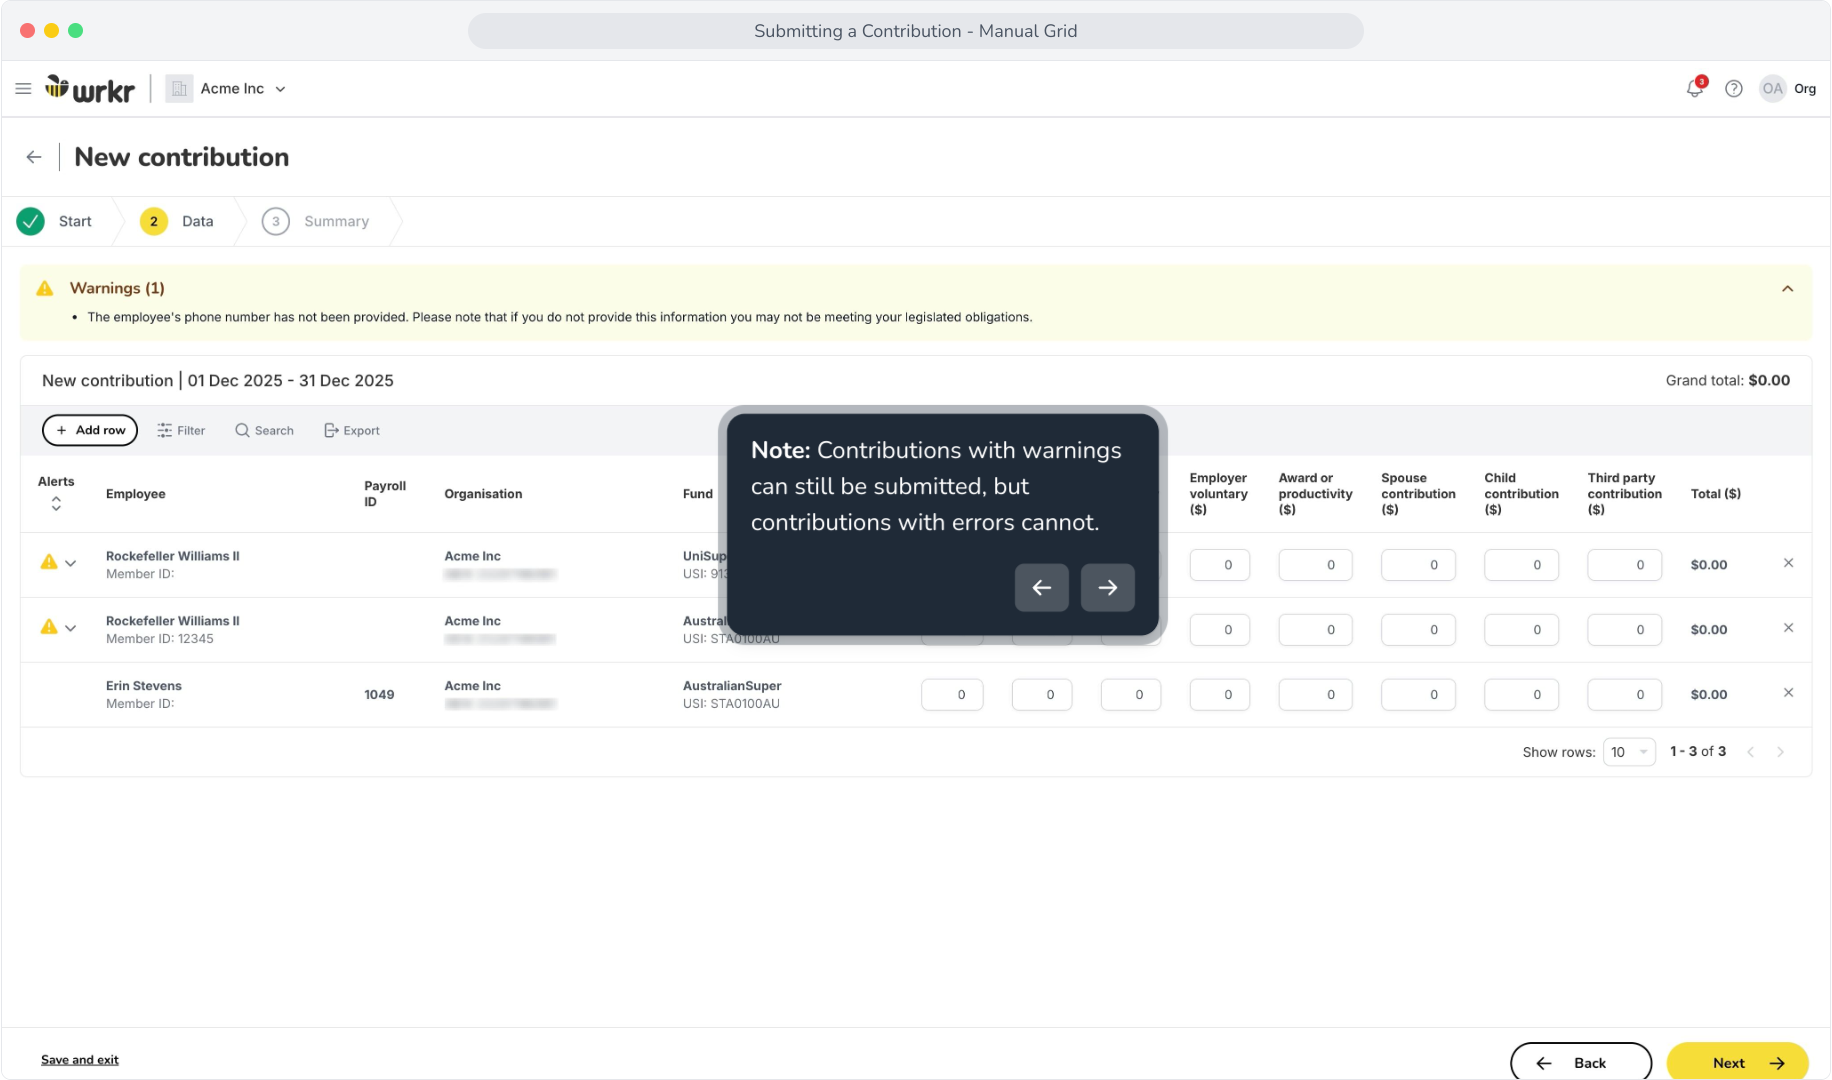
13. When errors or warnings are present, you can review each issue against the employee they relate to. Click on the down chevron next to the user.
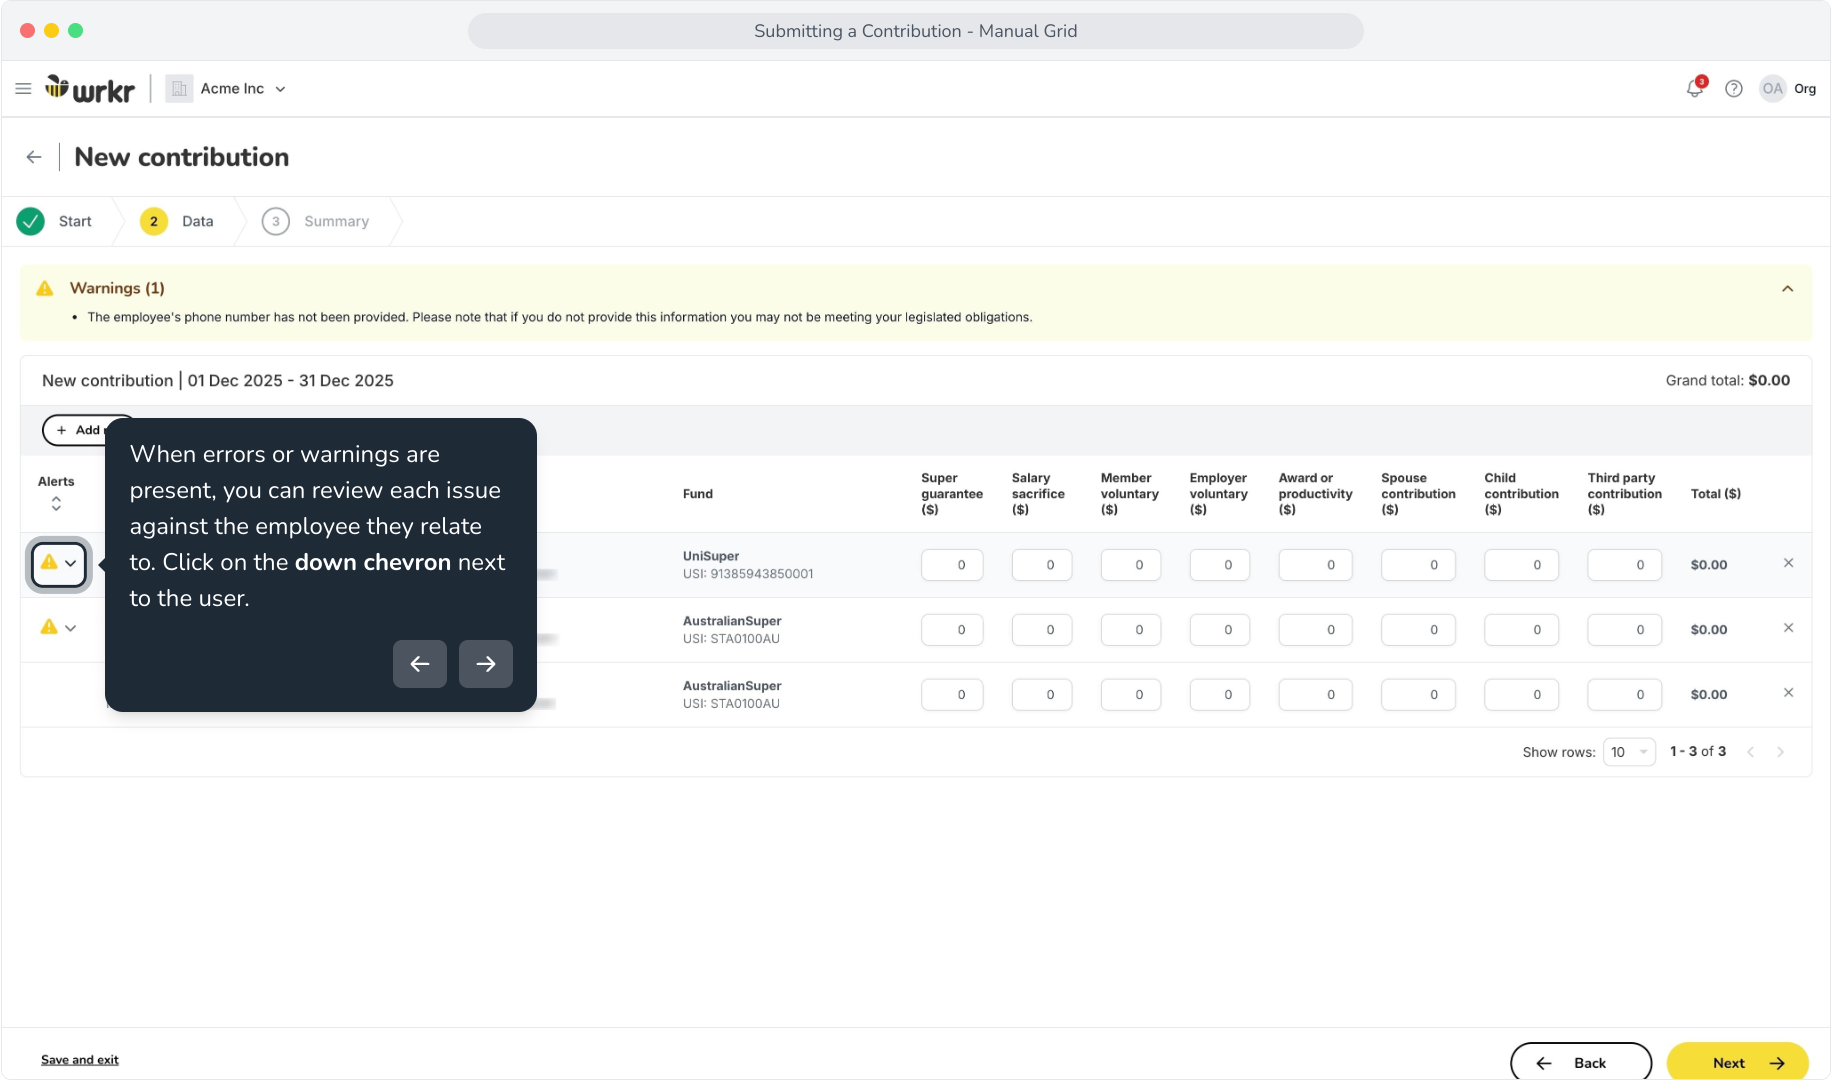
14. By expanding the rows with errors or warnings, in-line context is provided about the changes required for each employee.
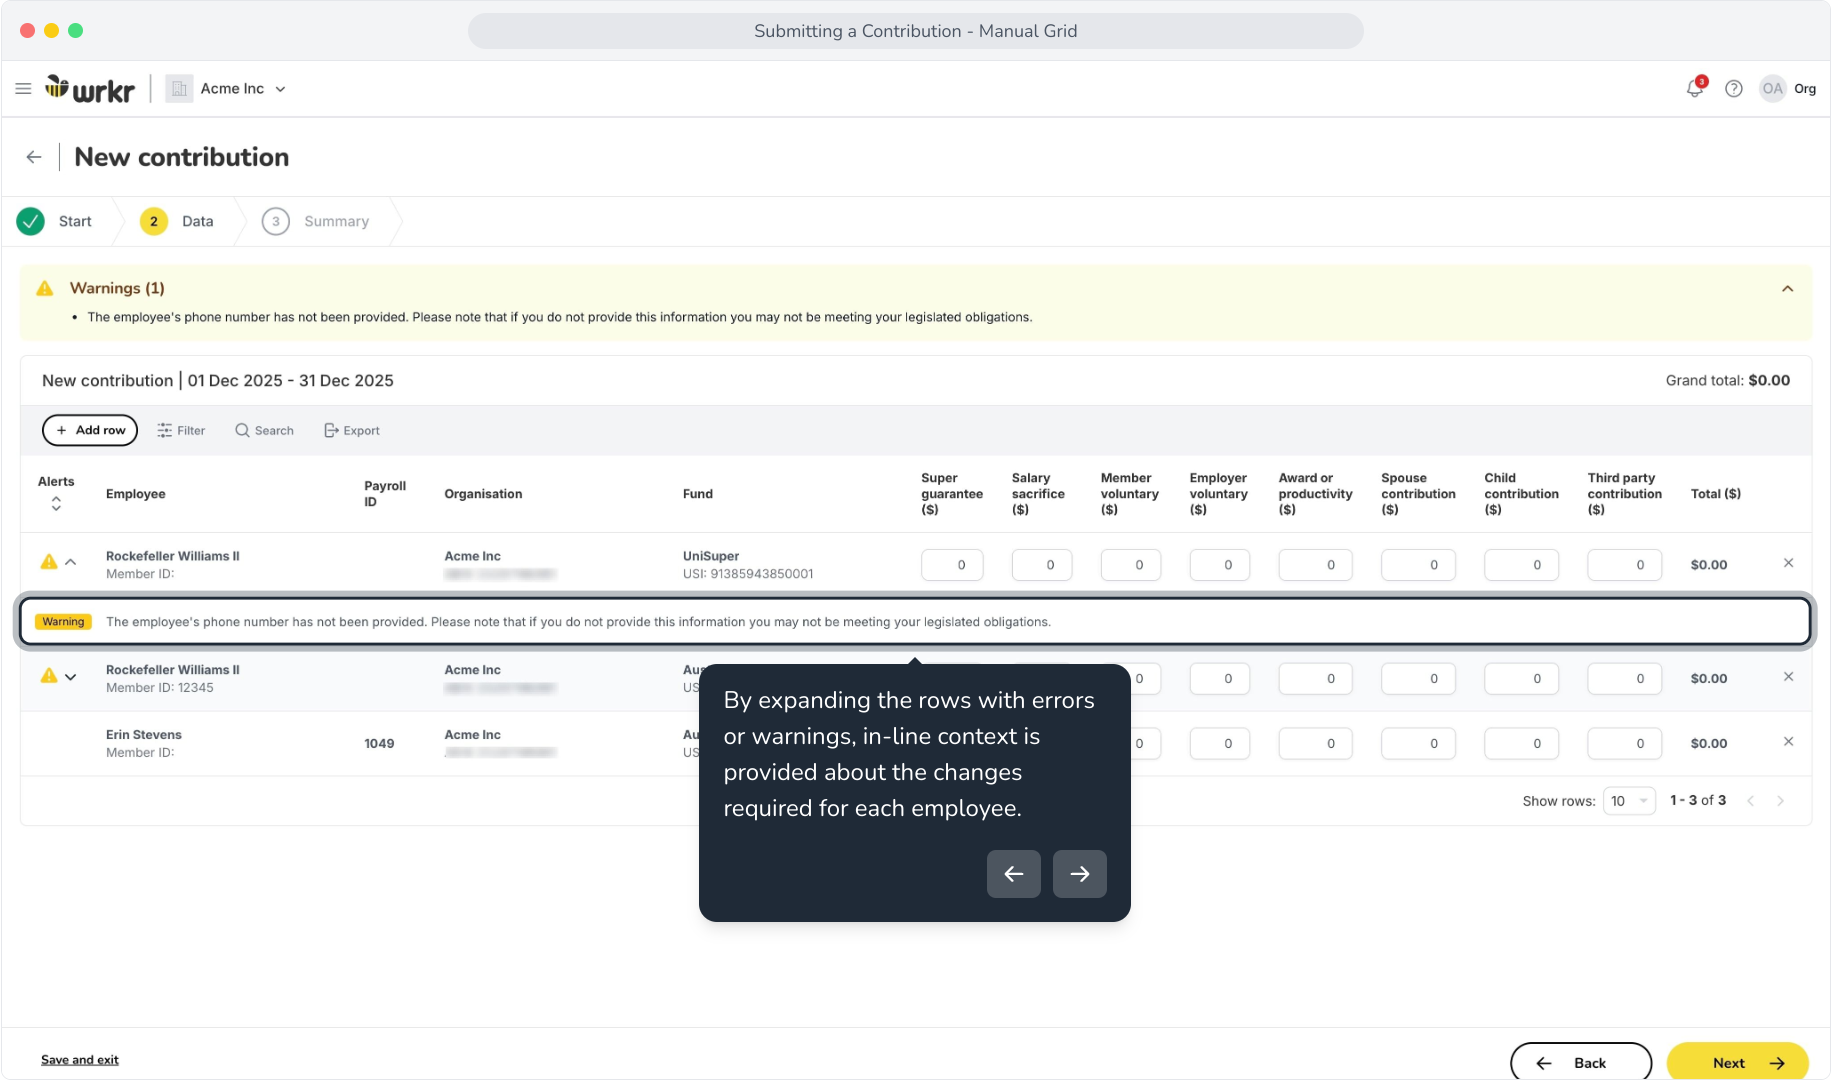
15. As Rockefeller is the source of the contribution warning, and he belongs to two funds – the warning is displayed against both rows within the grid.
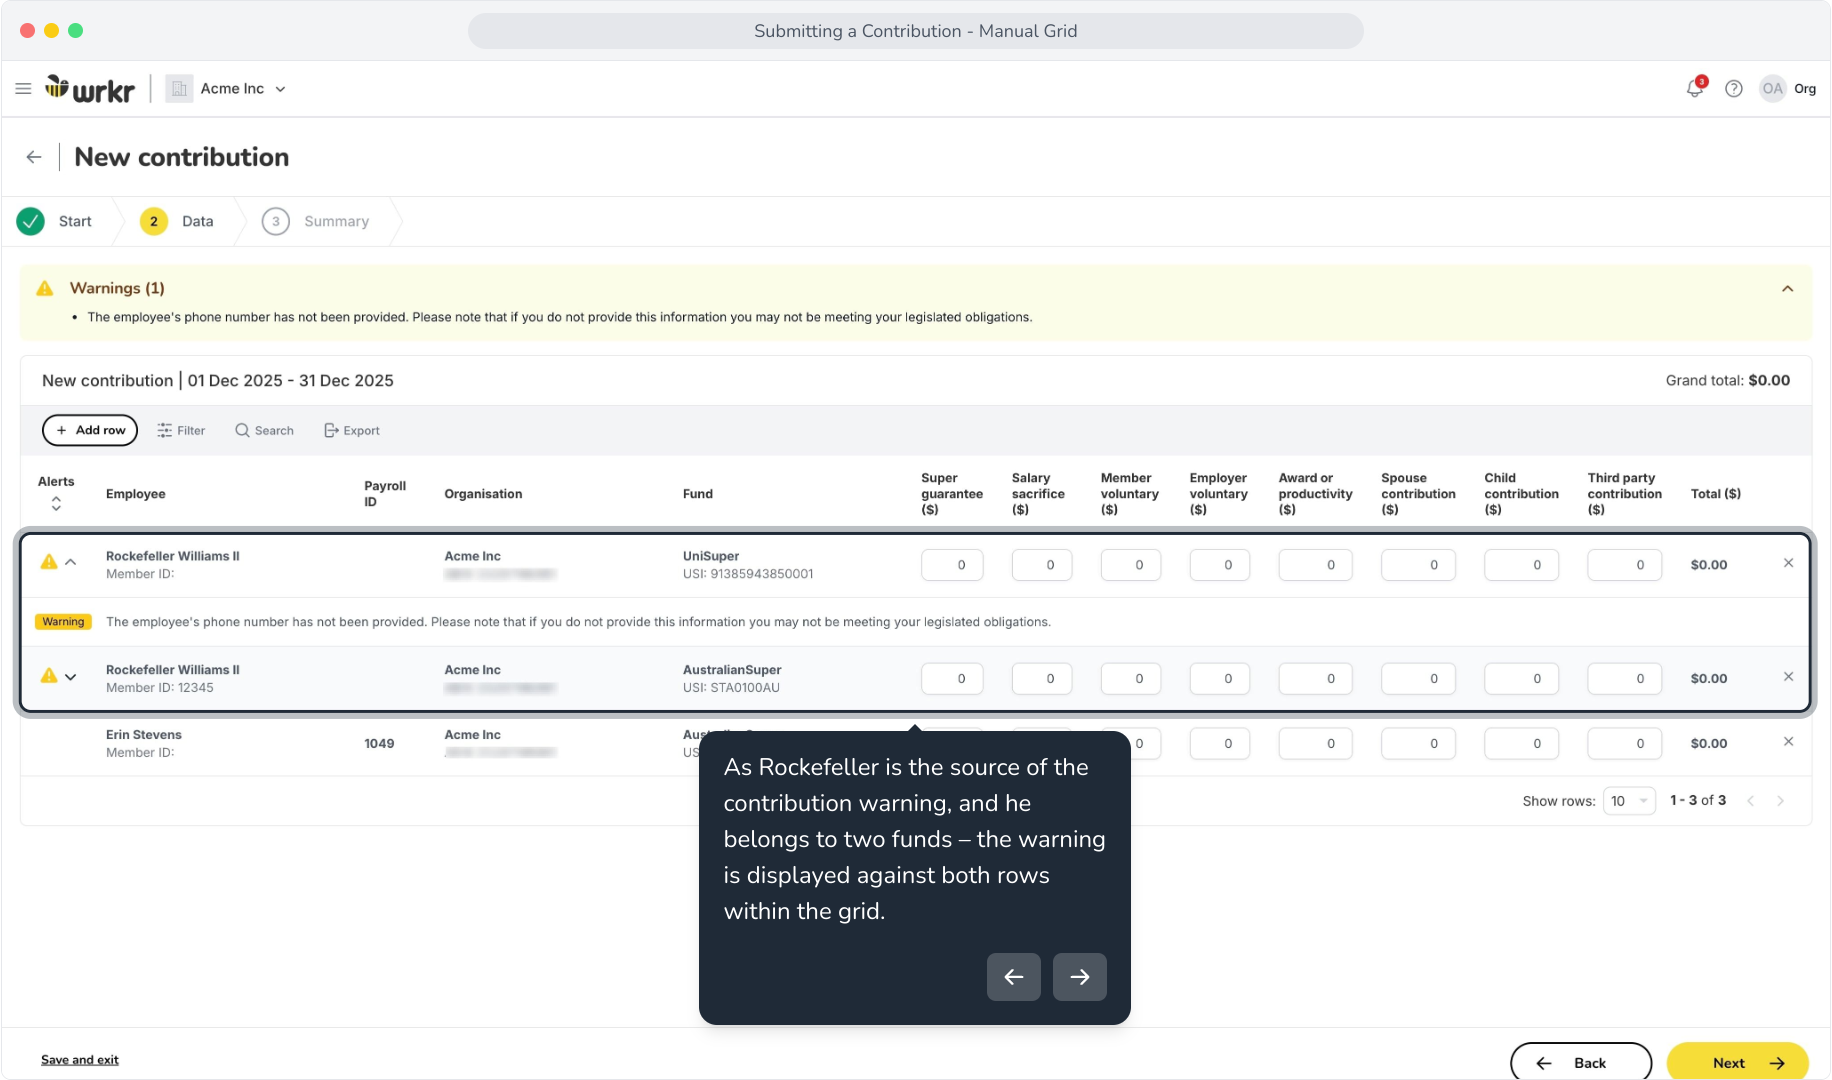
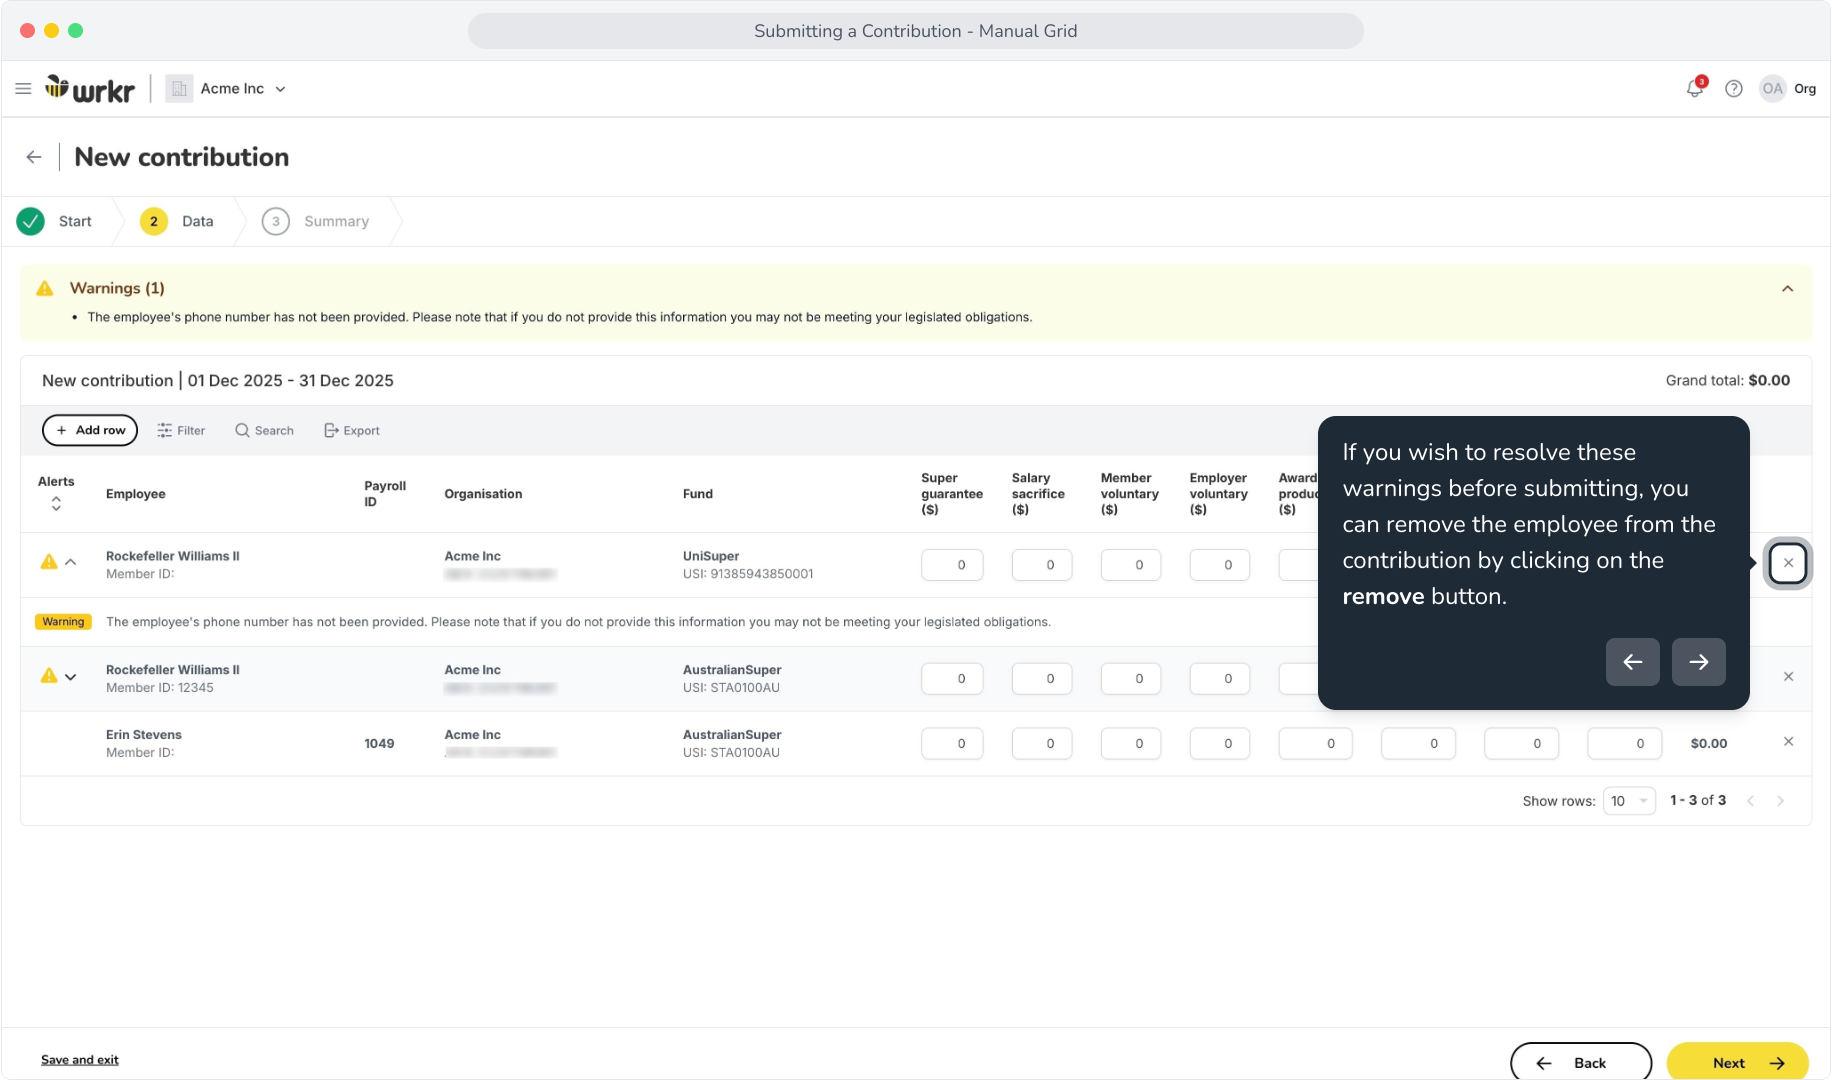
16. If you wish to resolve these warnings before submitting, you can remove the employee from the contribution by clicking on the remove button.
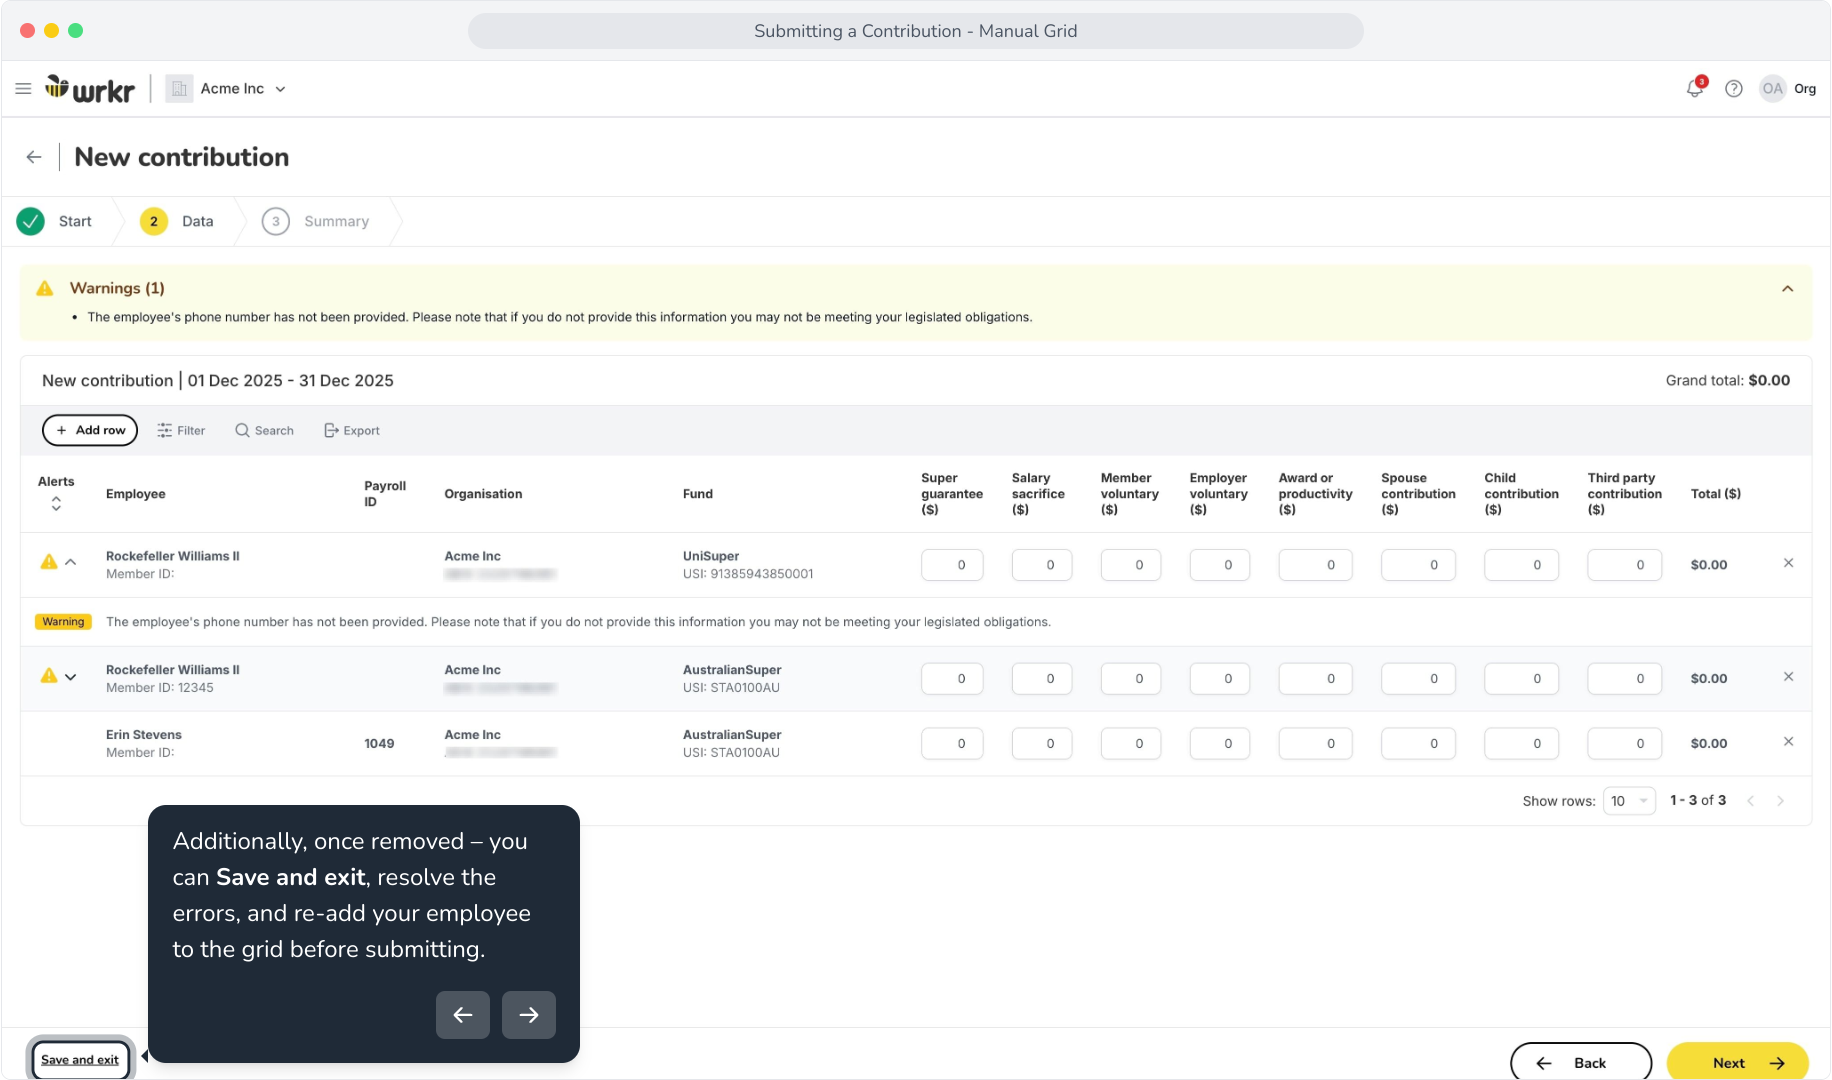
17. Additionally, once removed – you can Save and exit, resolve the errors, and re-add your employee to the grid before submitting.
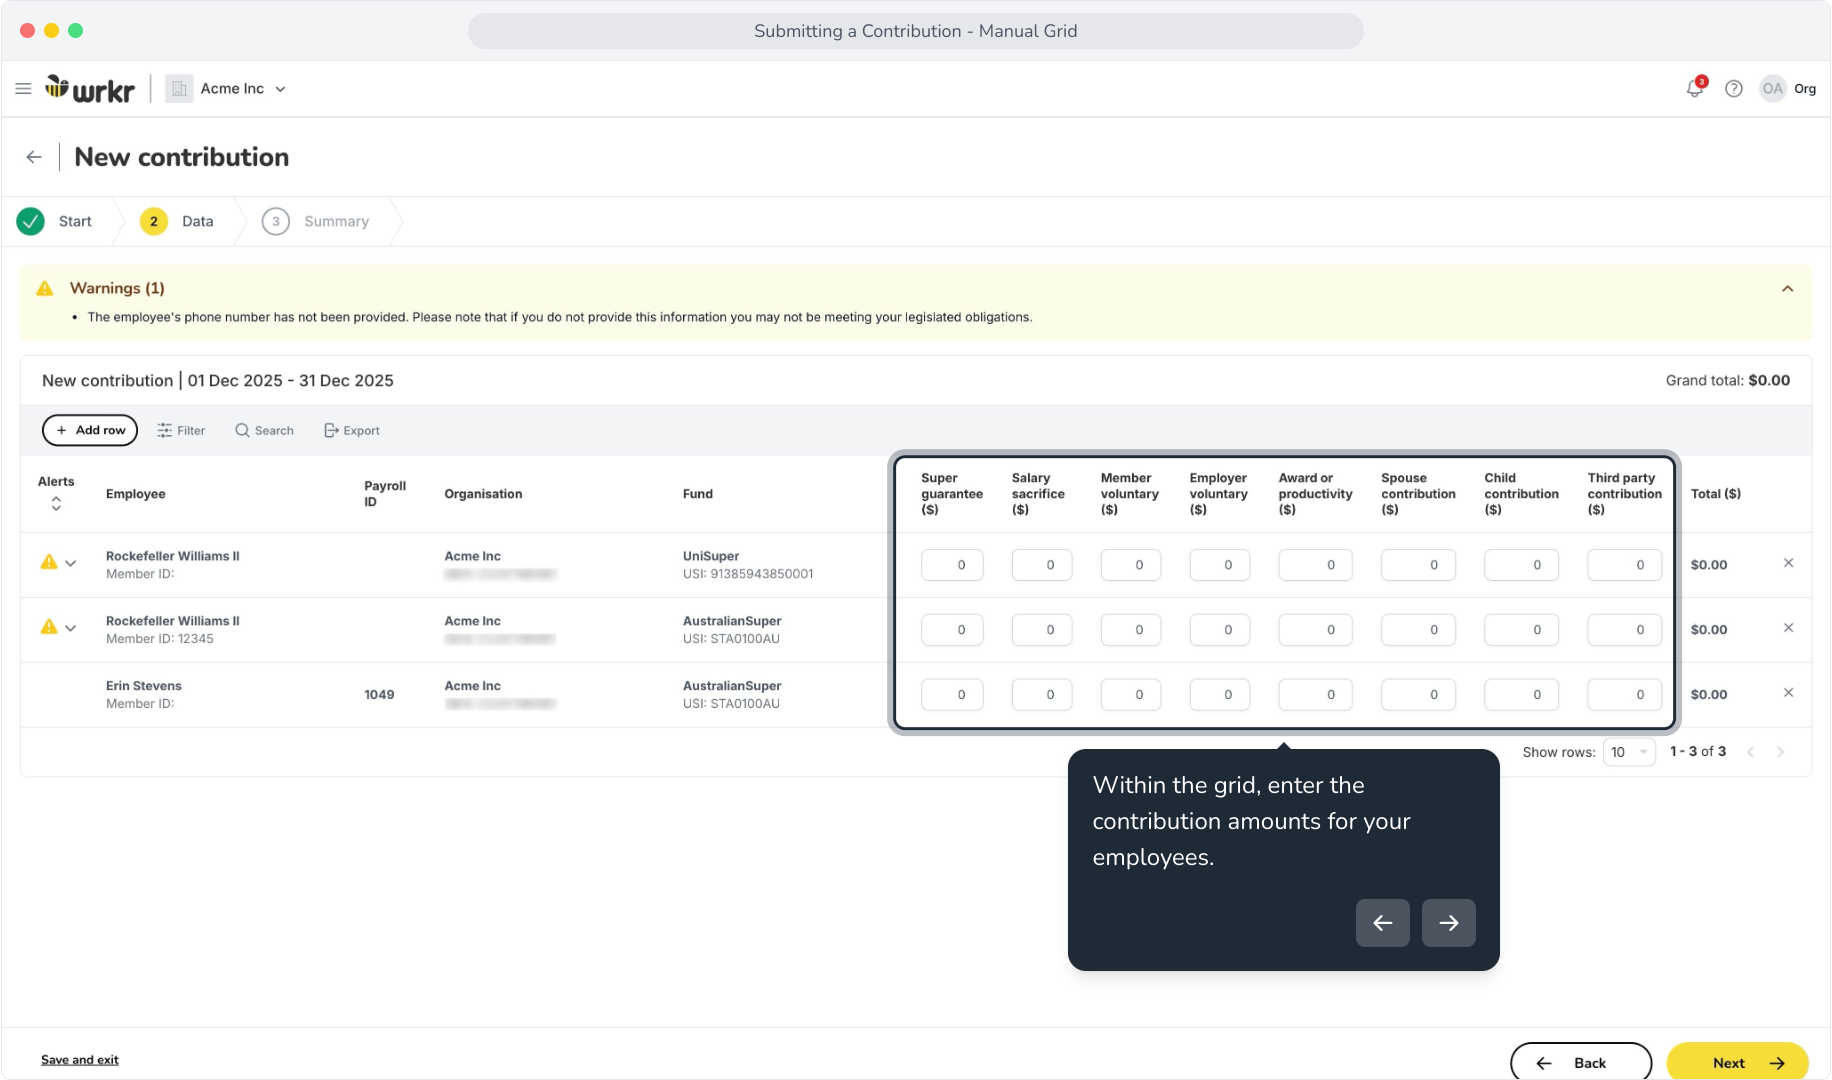
18. Within the grid, enter the contribution amounts for your employees.
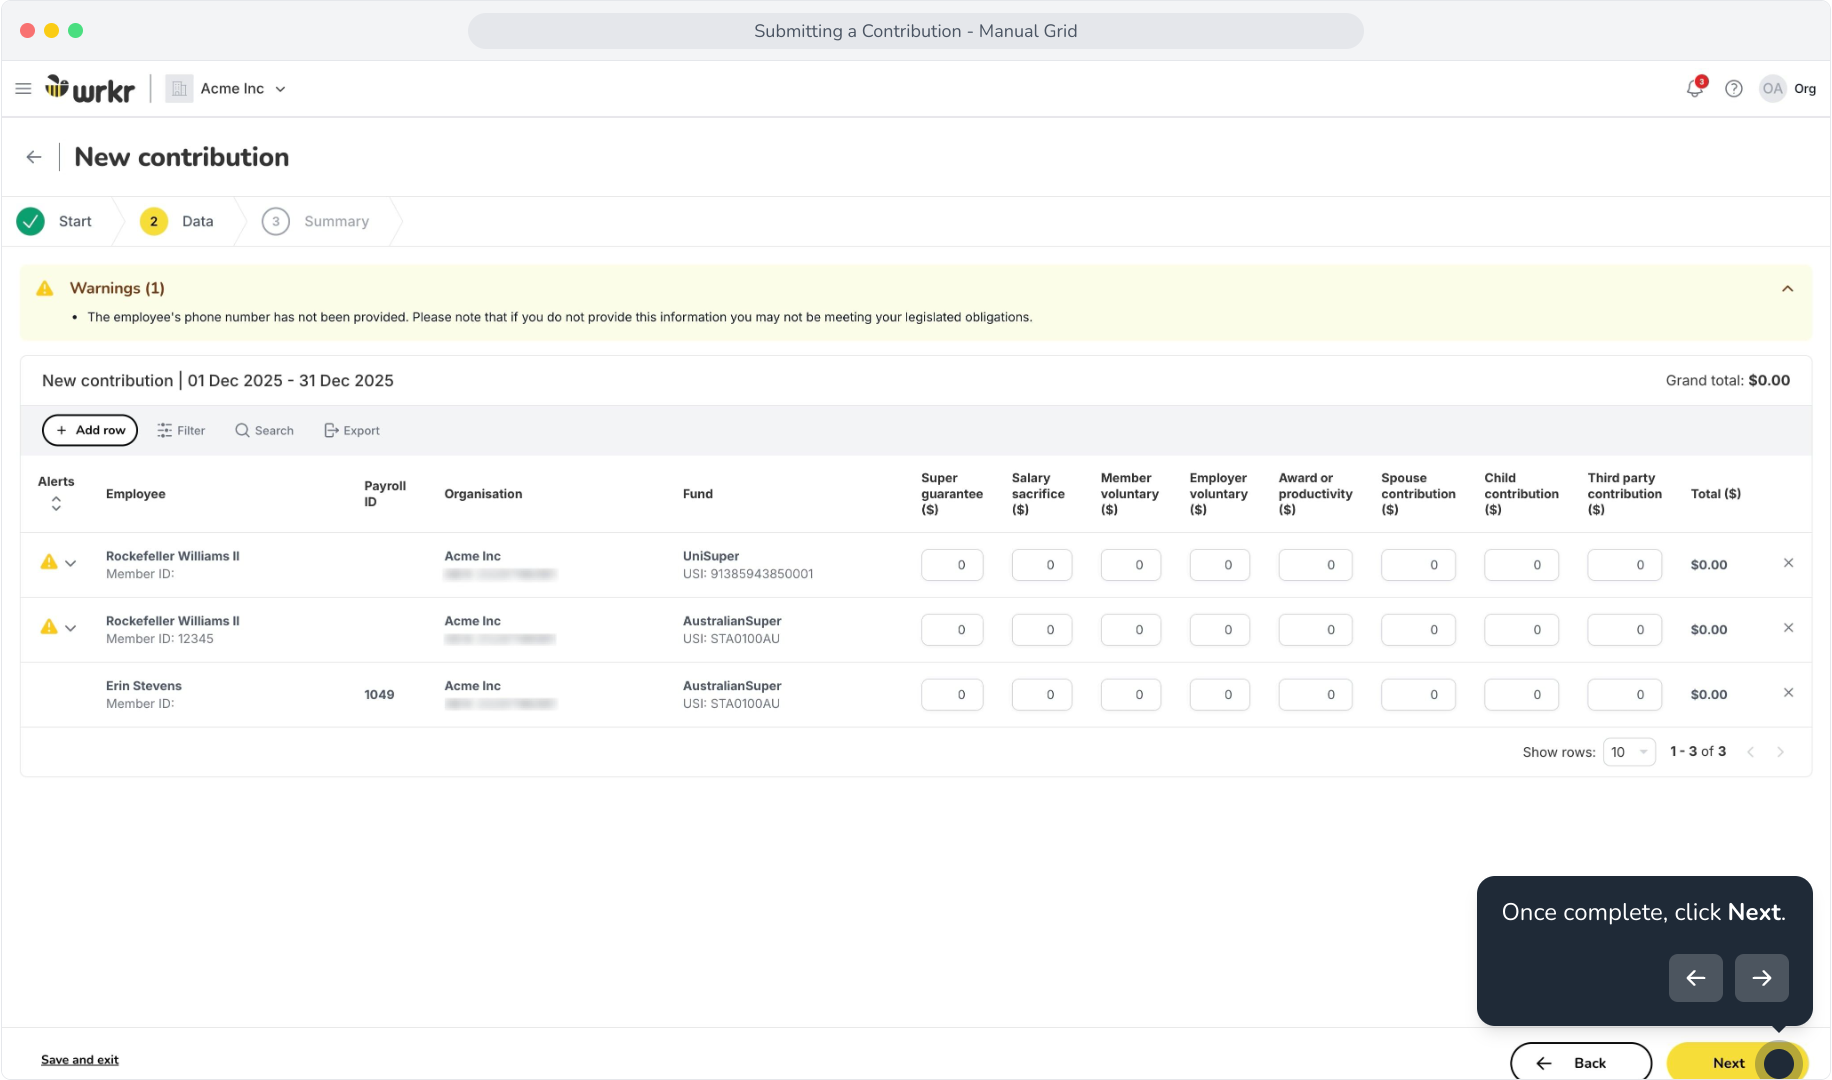
19. Once complete, click Next.
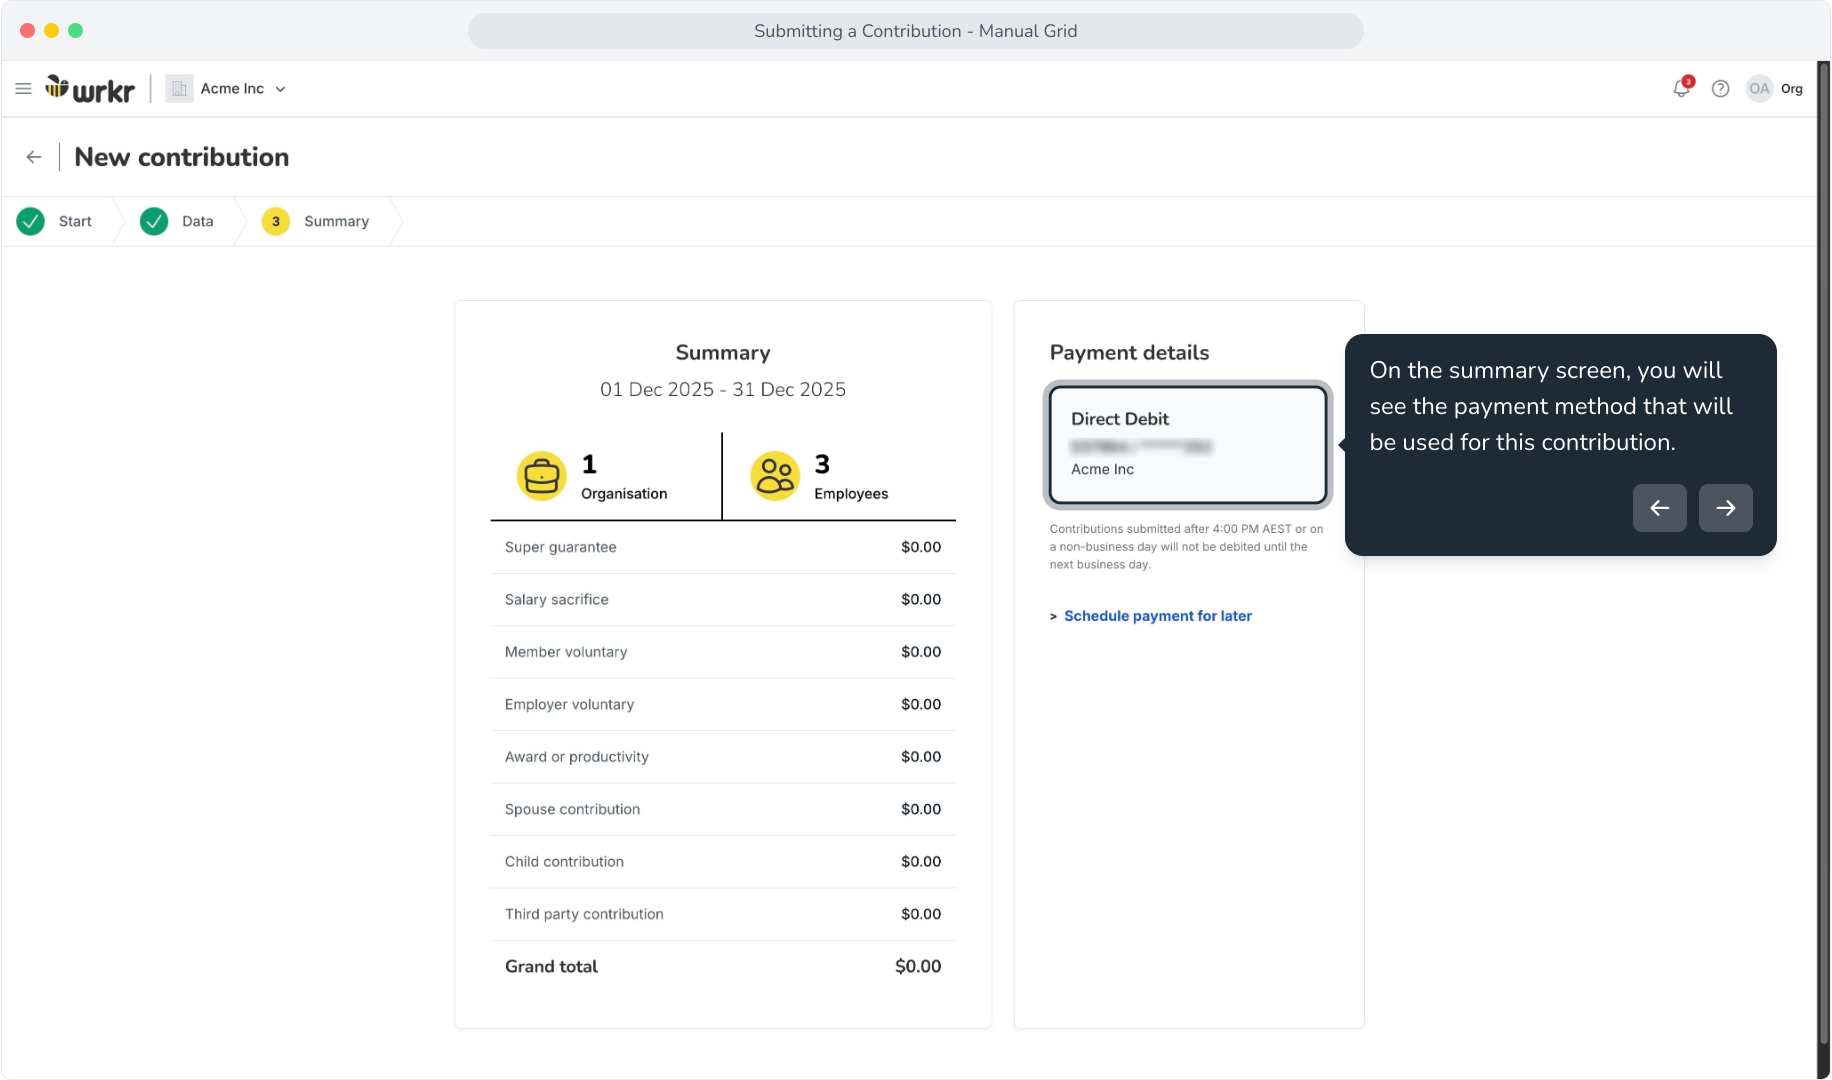
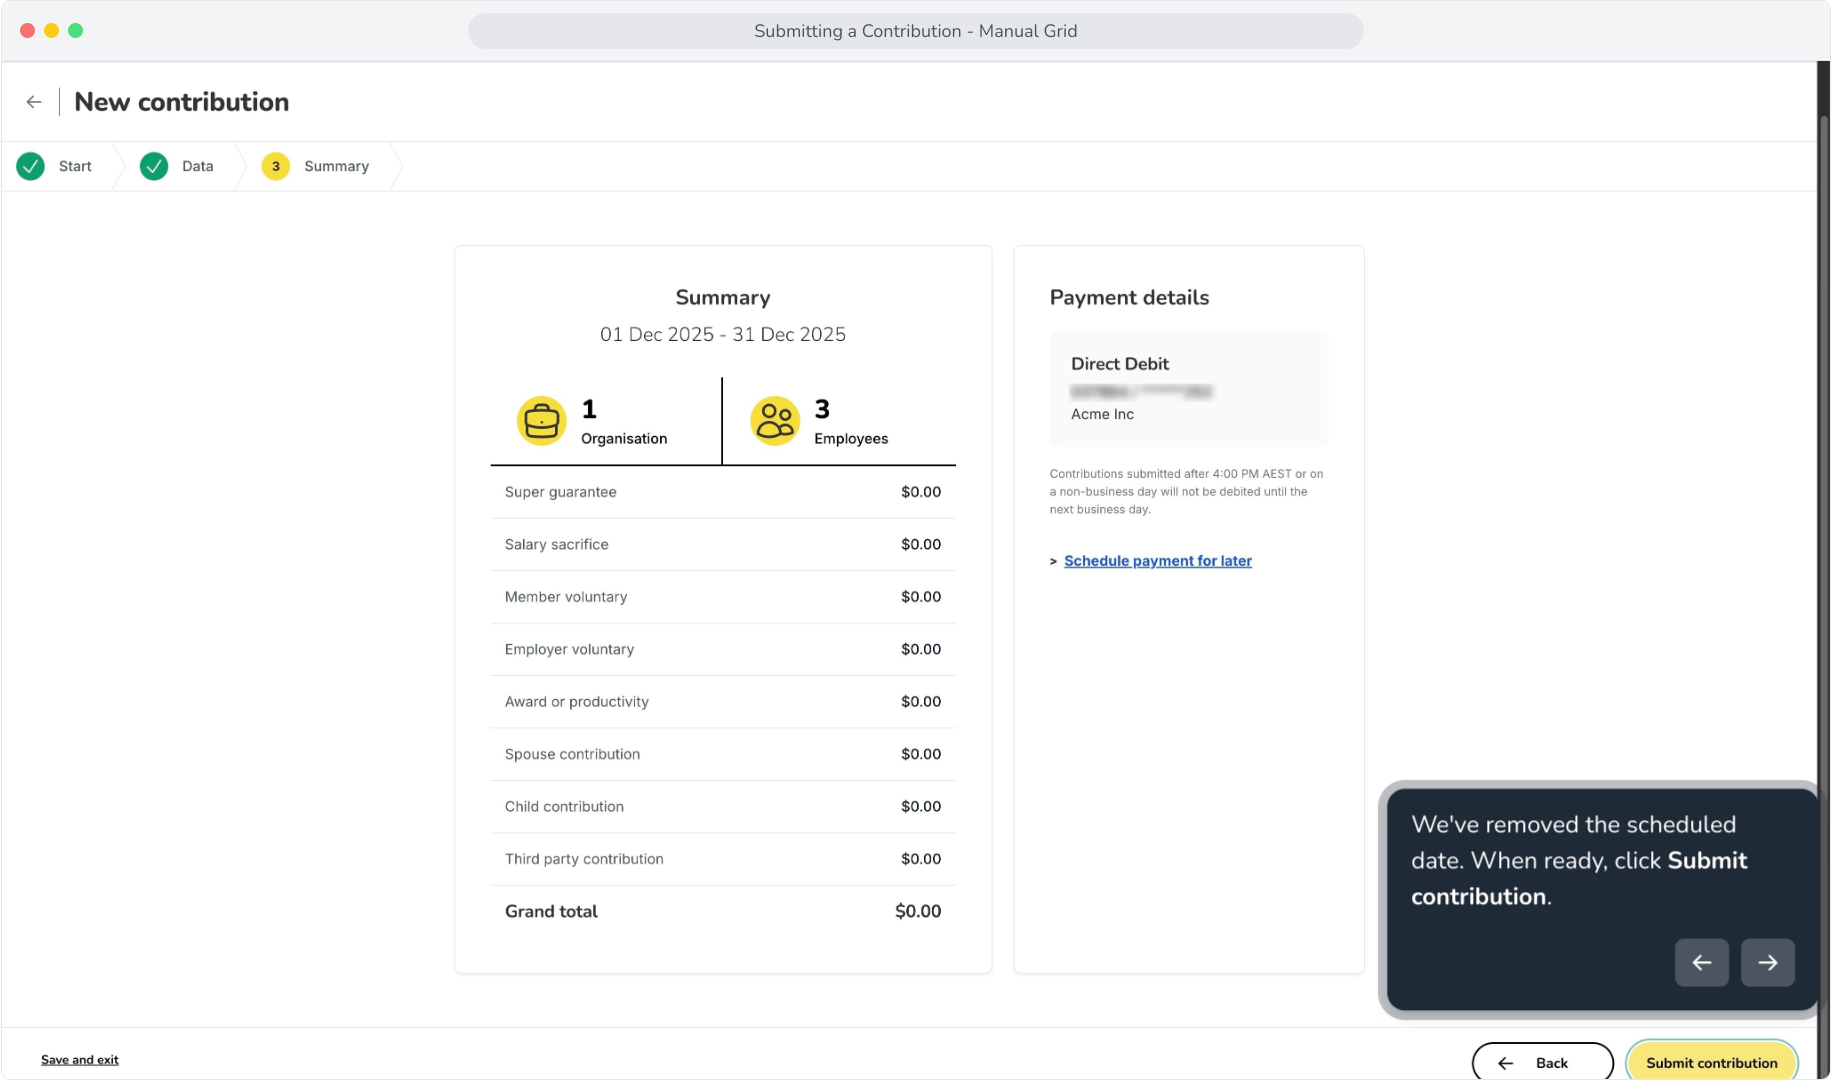
20. On the summary screen, you will see the payment method that will be used for this contribution.
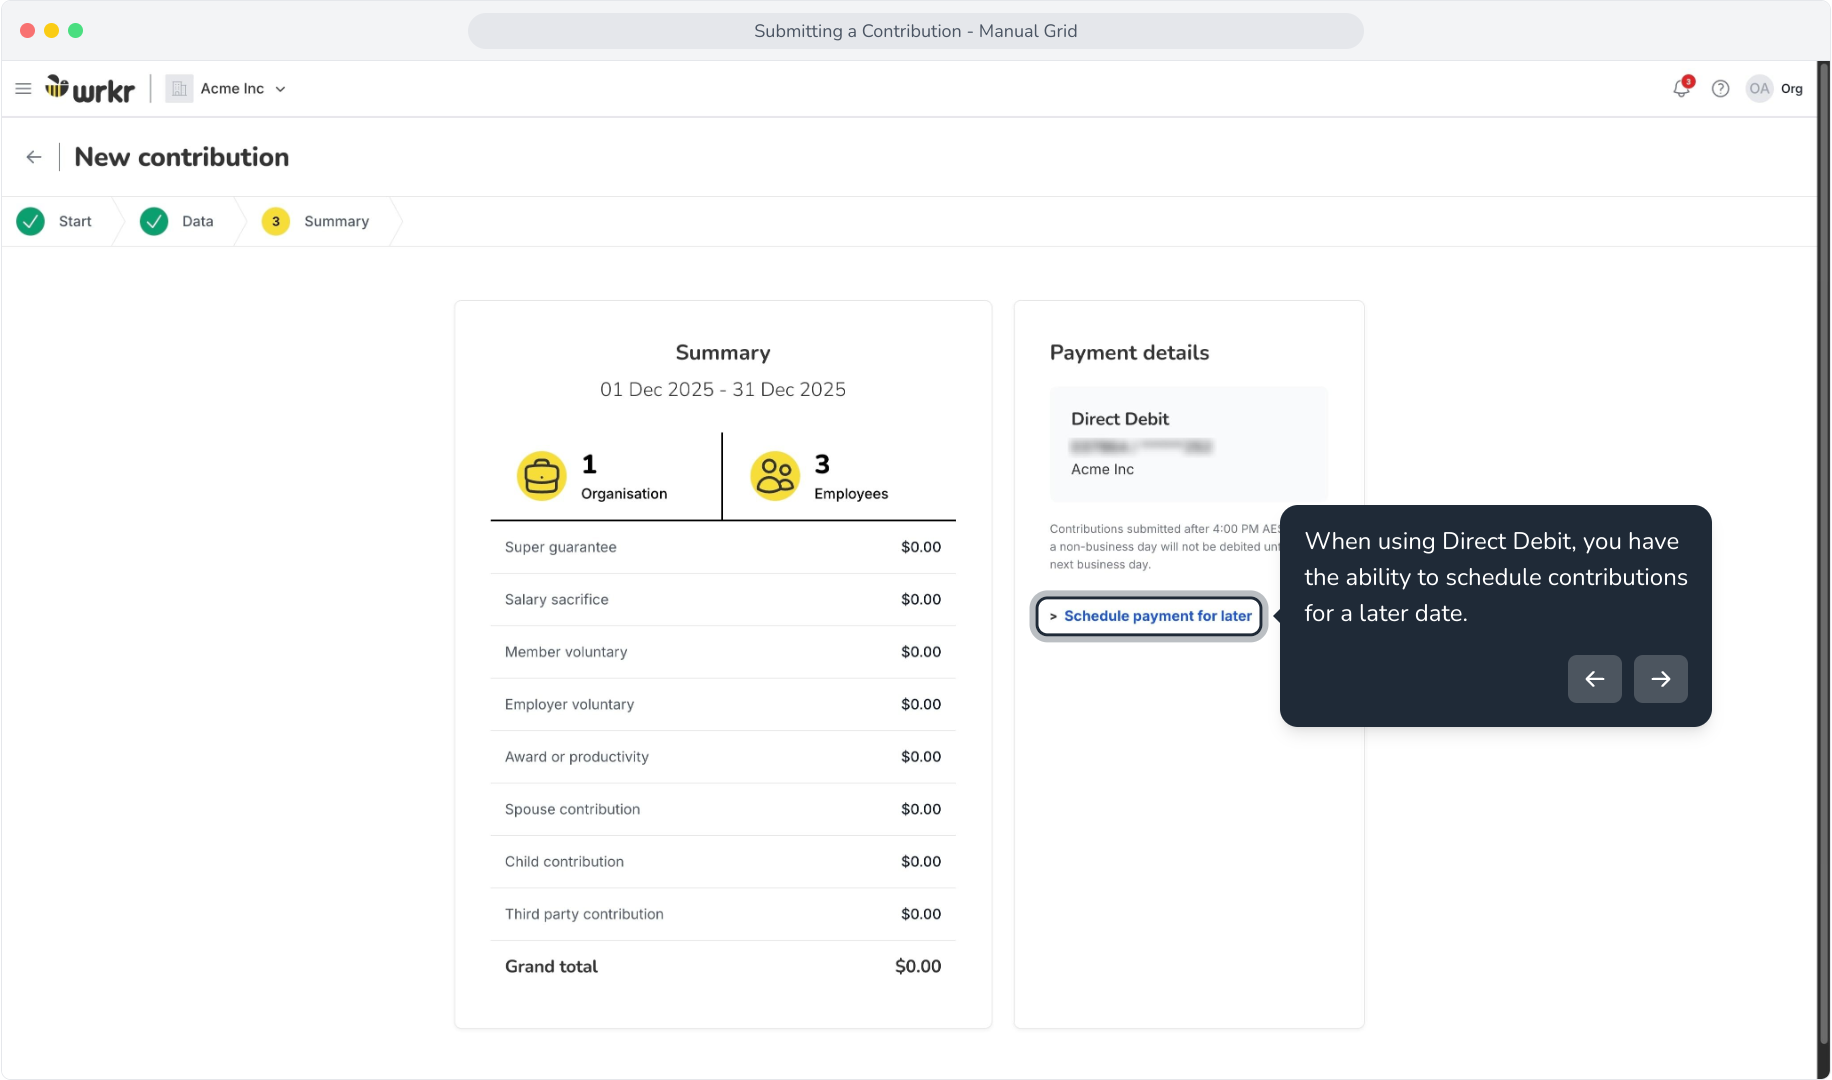
21. When using Direct Debit, you have the ability to schedule contributions for a later date.
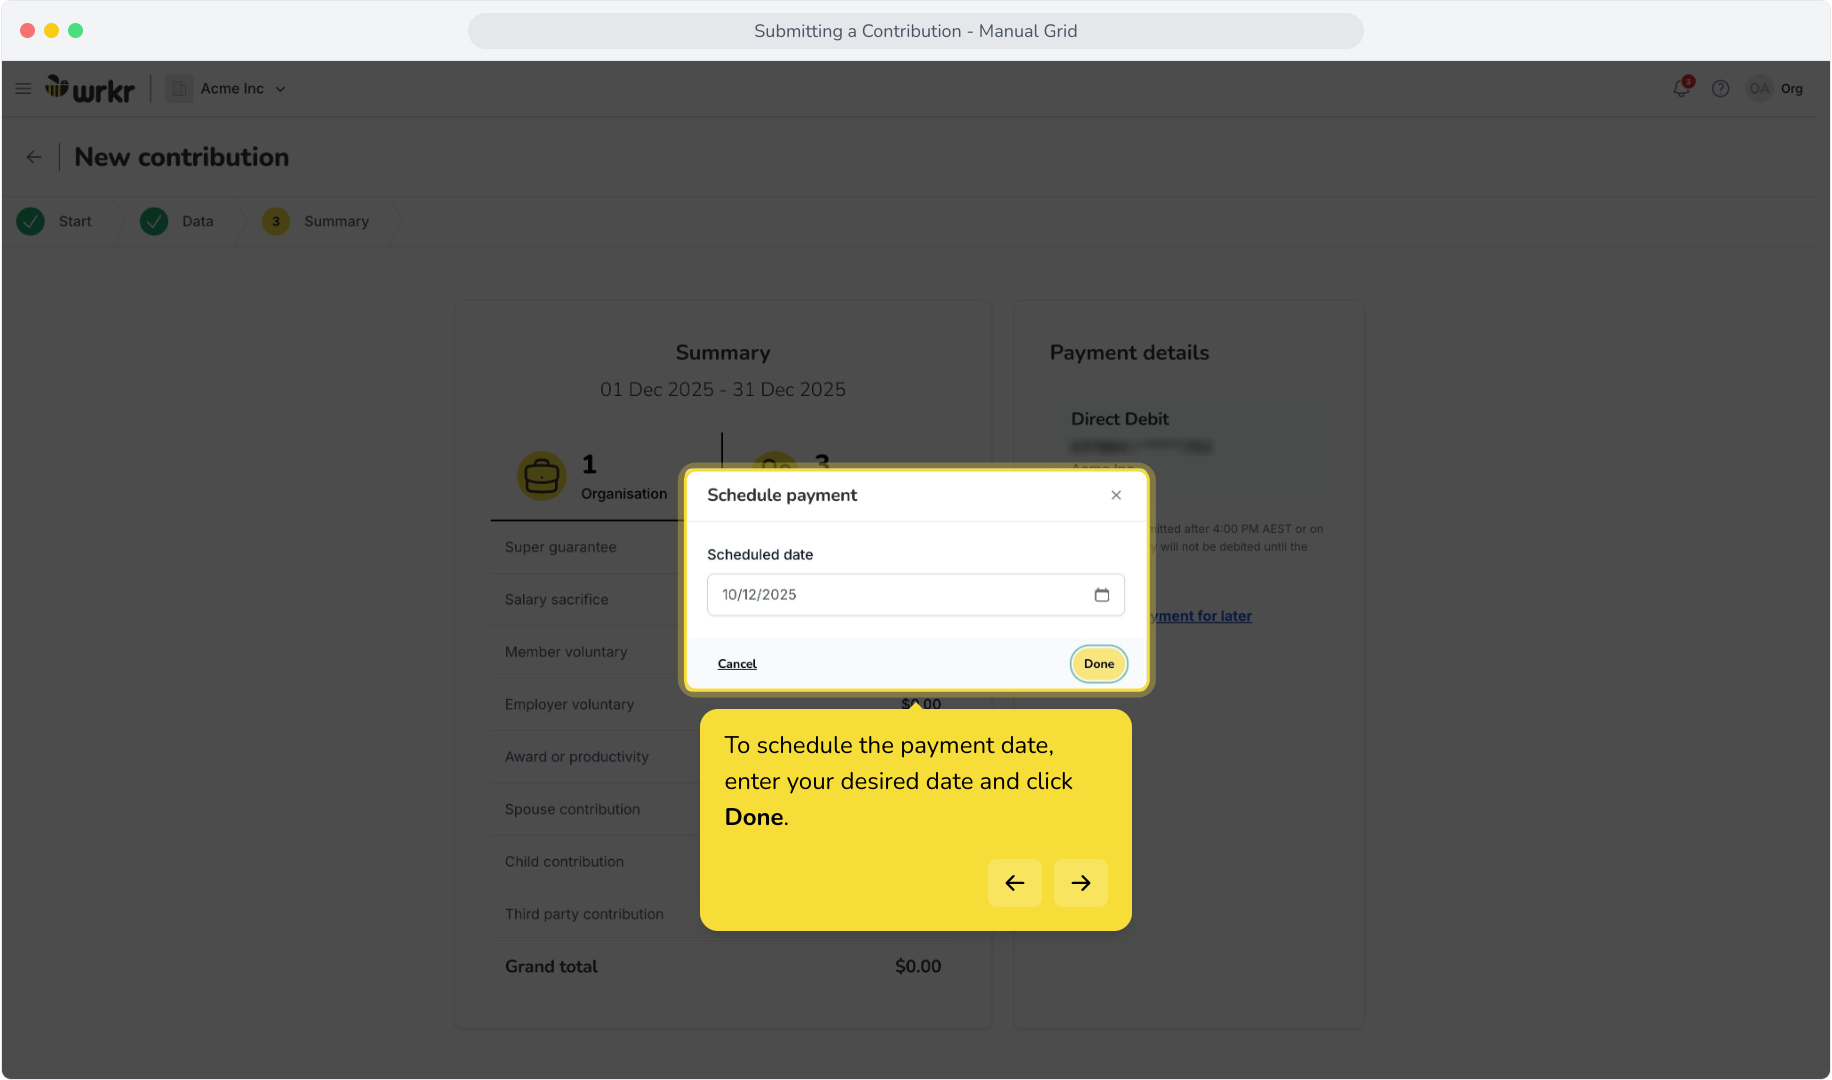
22. To schedule the payment date, enter your desired date and click Done.
23. Once scheduled, you will see the date in the Payment details panel. Before submitting, you can Edit or Remove the scheduled date.
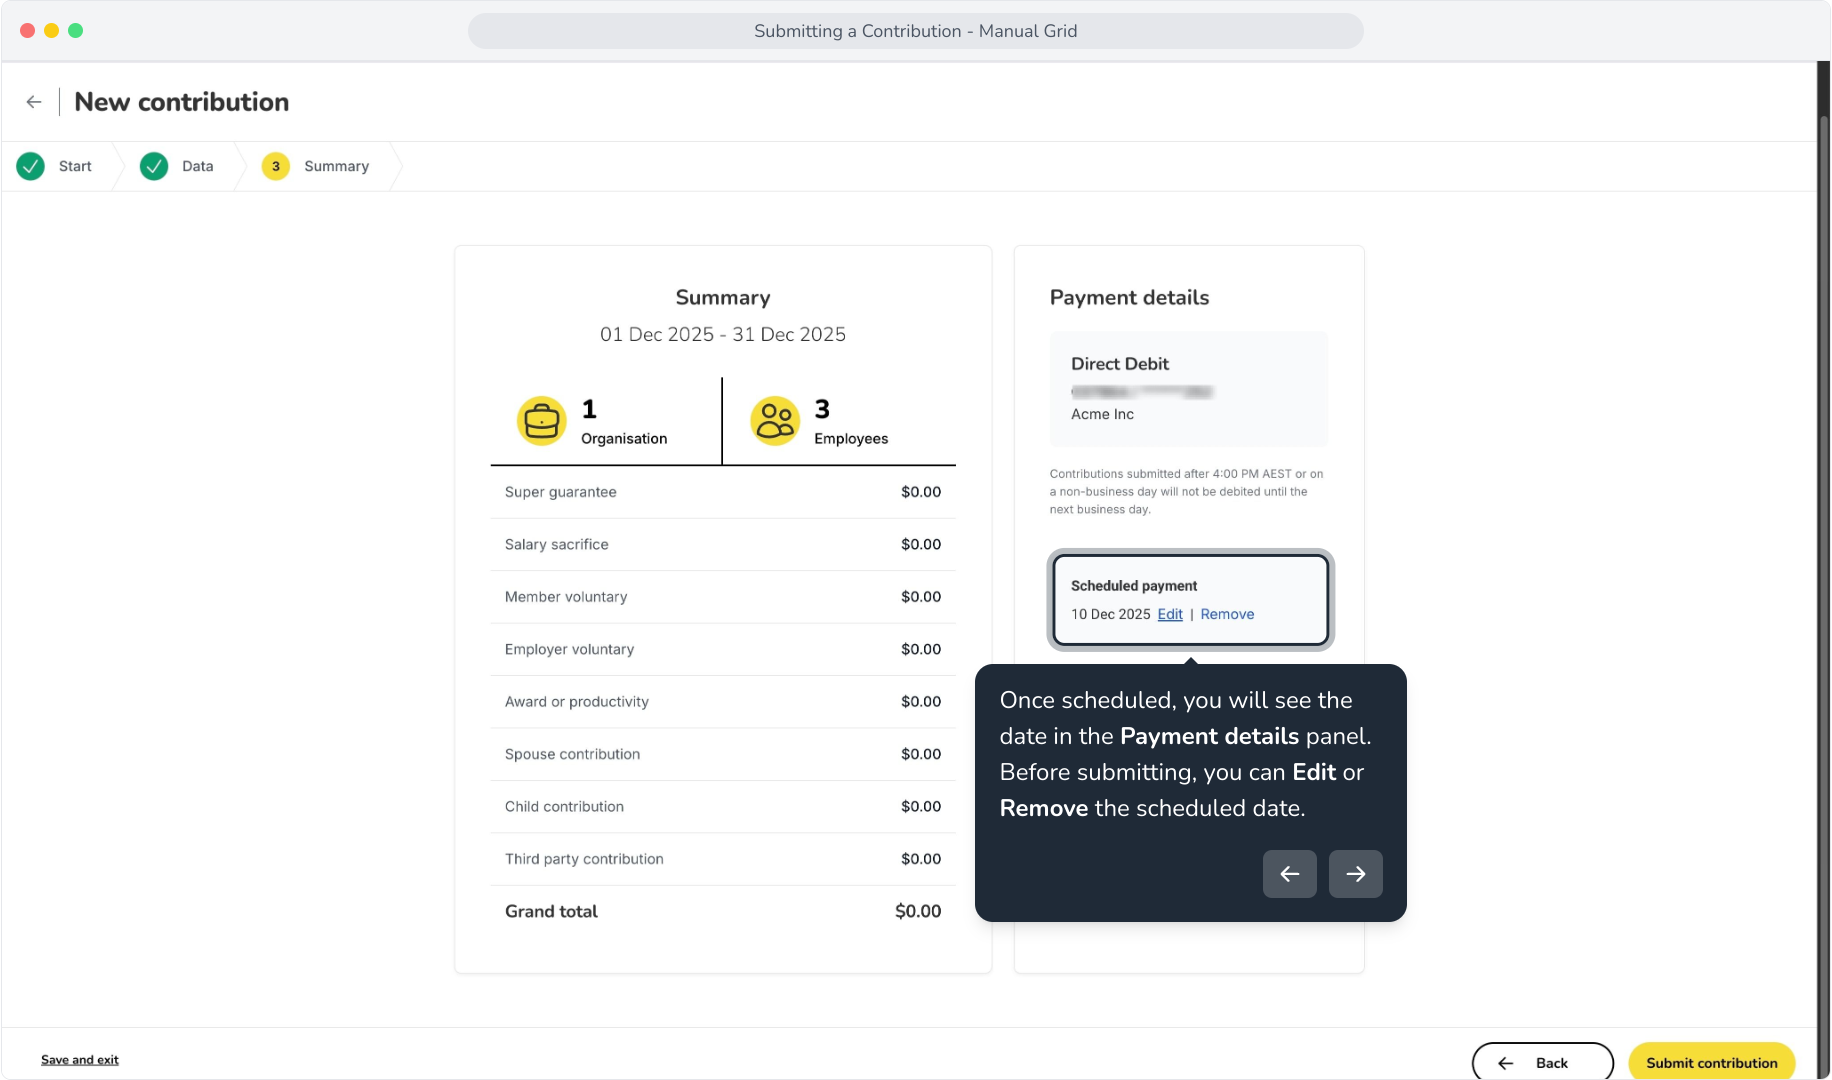
24. We've removed the scheduled date. When ready, click Submit contribution.
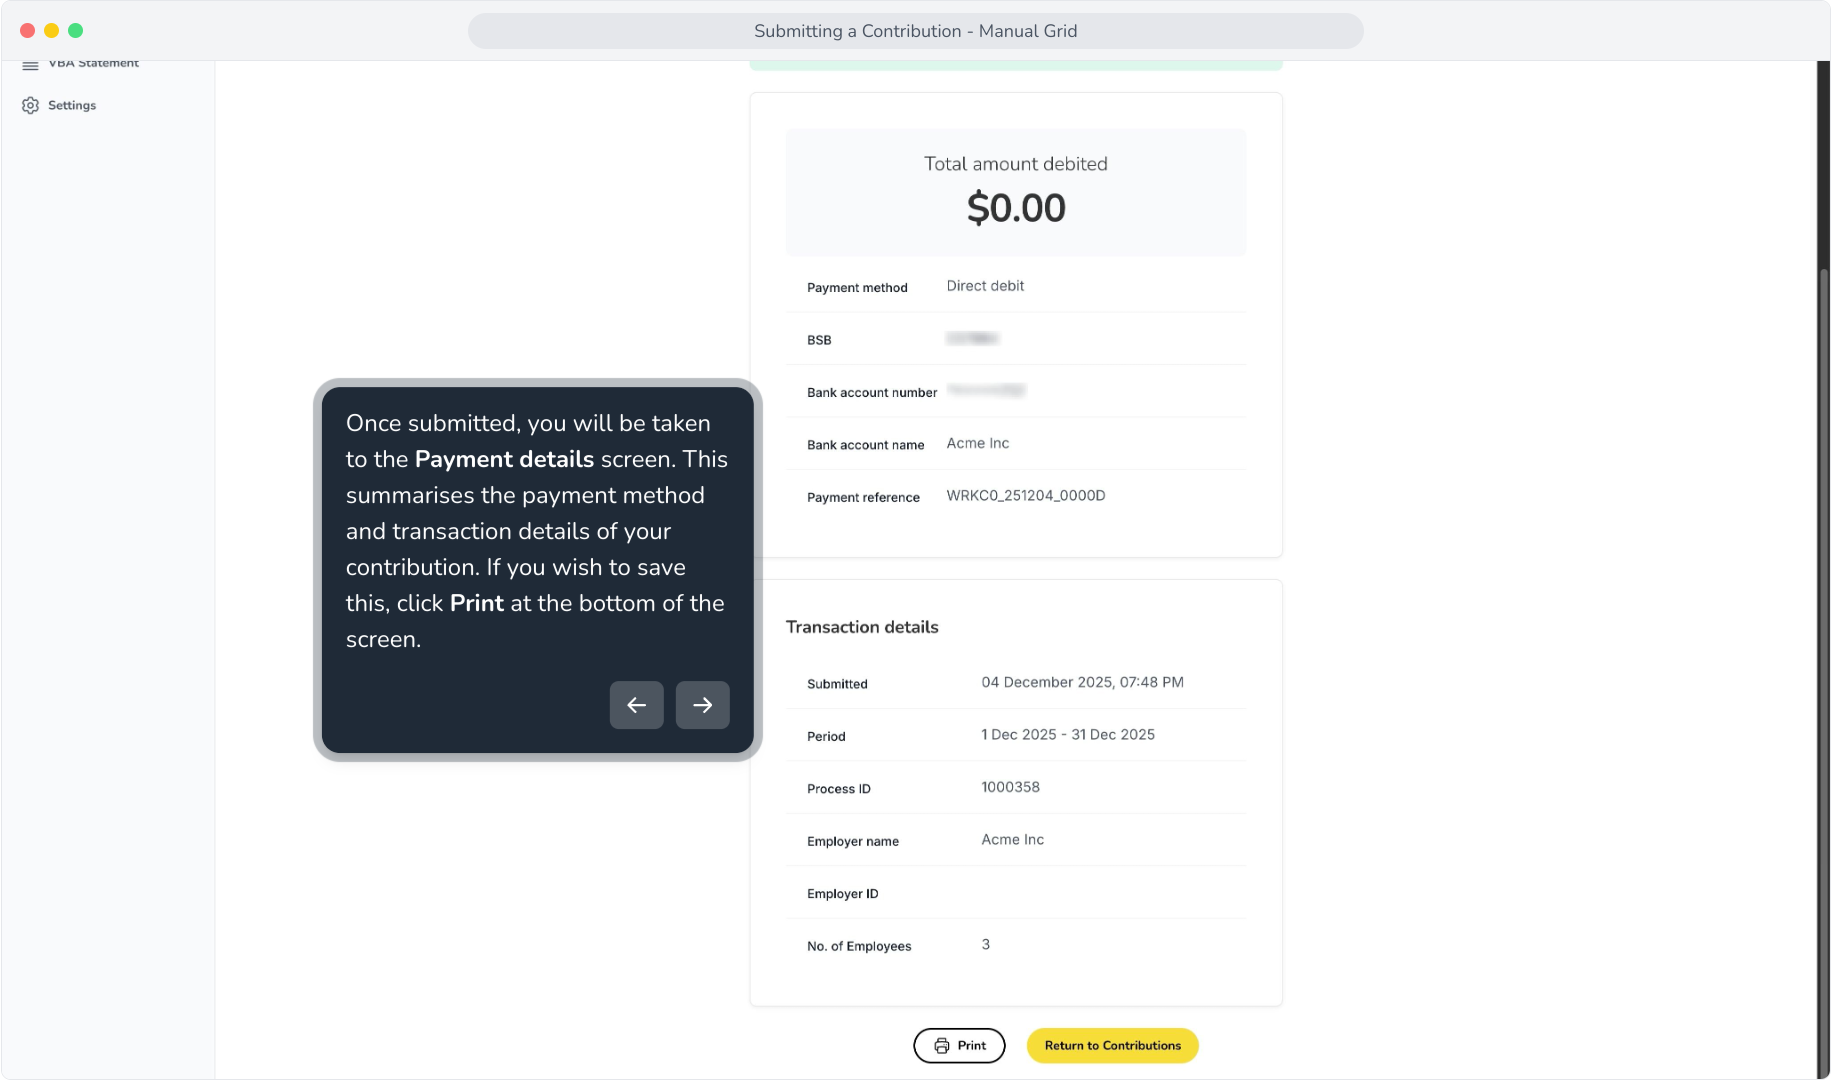
25. Once submitted, you will be taken to the Payment details screen. This summarises the payment method and transaction details of your contribution. If you wish to save this, click Print at the bottom of the screen.
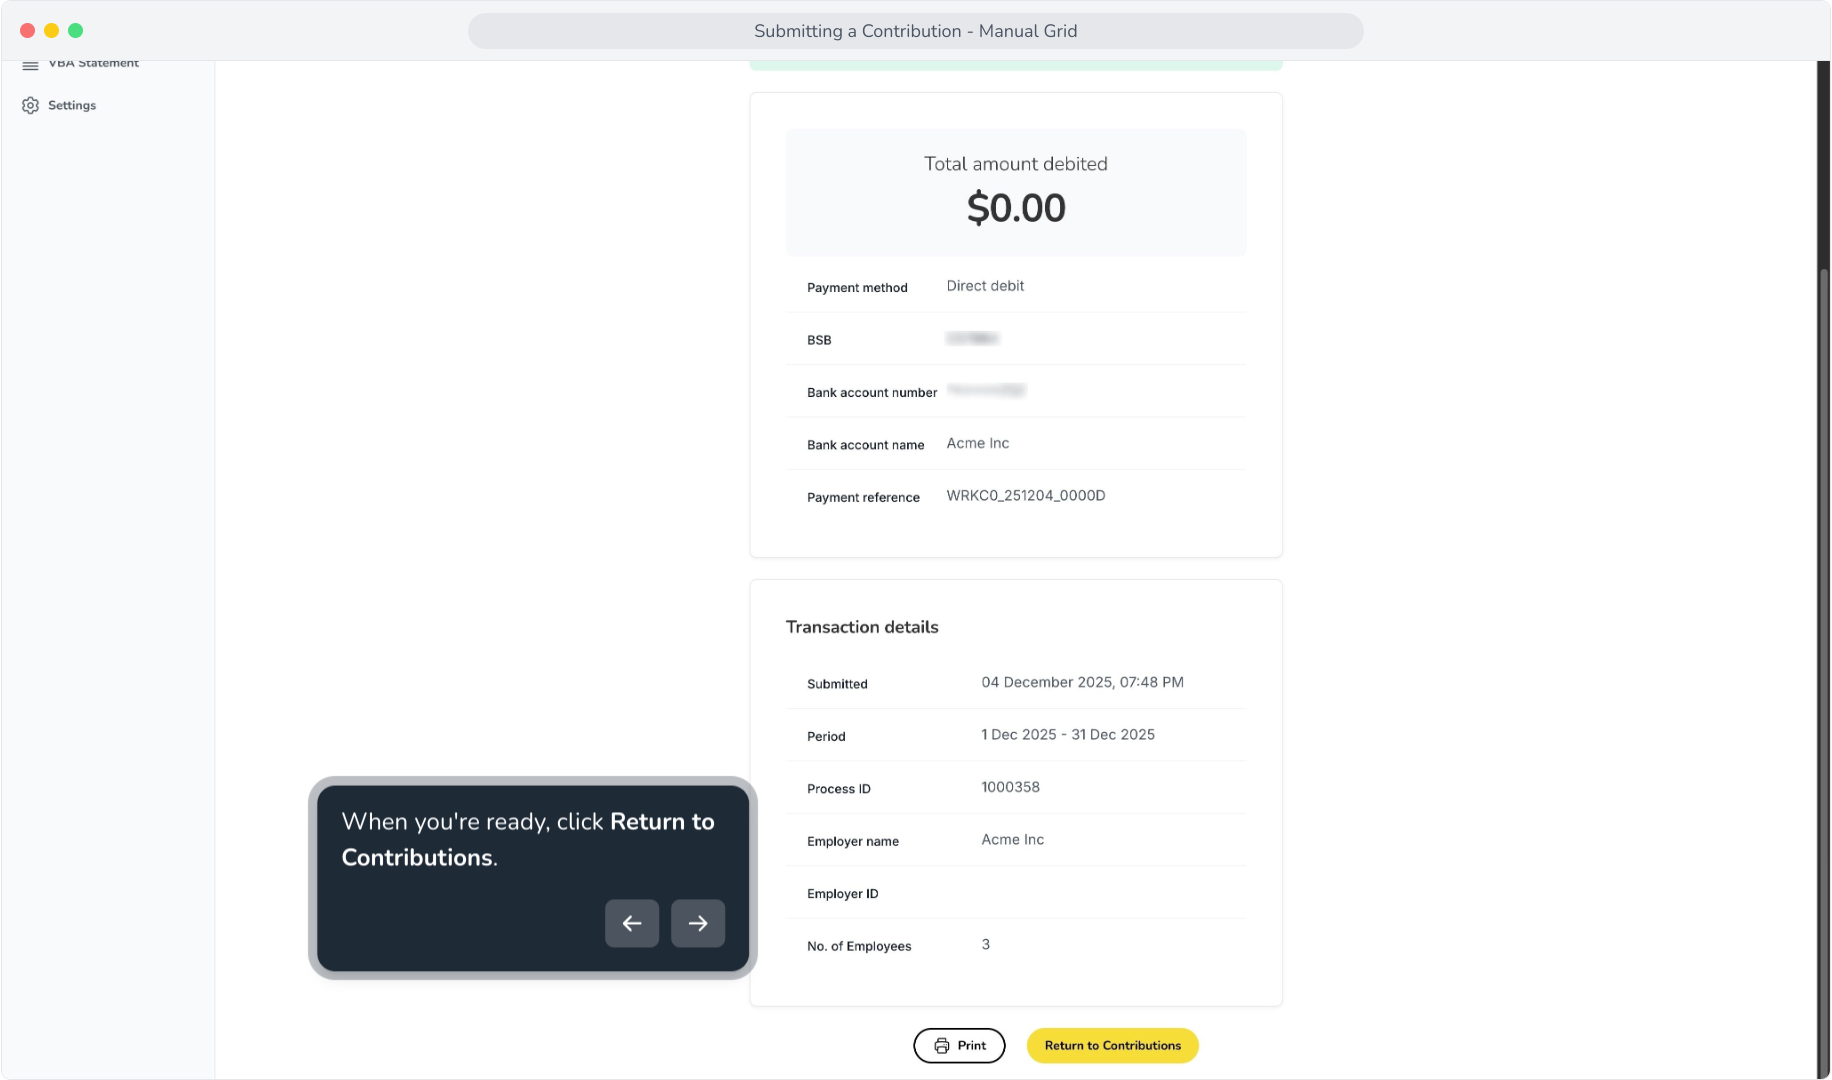
26. When you're ready, click Return to Contributions.
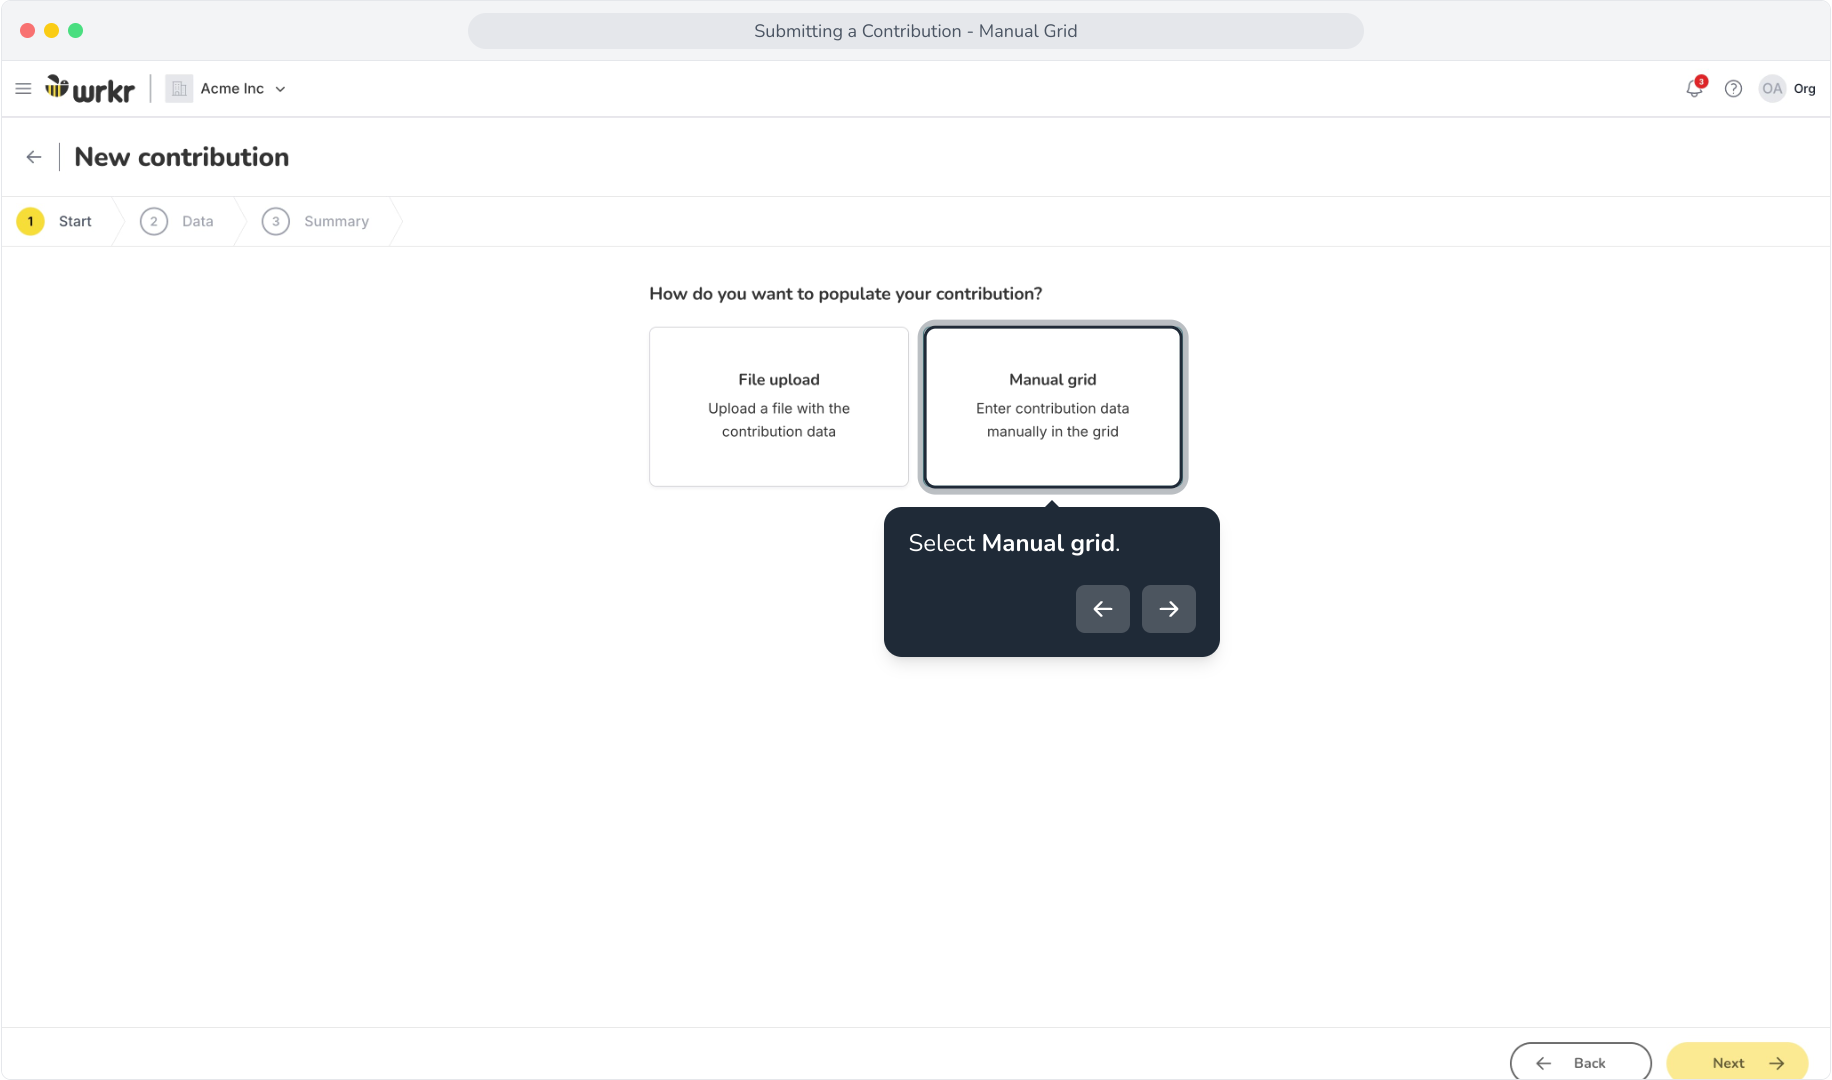
27. On the Contributions screen, you will now see your new contribution. As we opted not to schedule our payment, our status will reflect Awaiting payment.