Context: This guide details how to add and remove default funds within the Wrkr Portal.
Interactive Demo
Note: Make the demo full-screen for a better experience. You can mute/un-mute narration to suit your preferences.
Step by Step
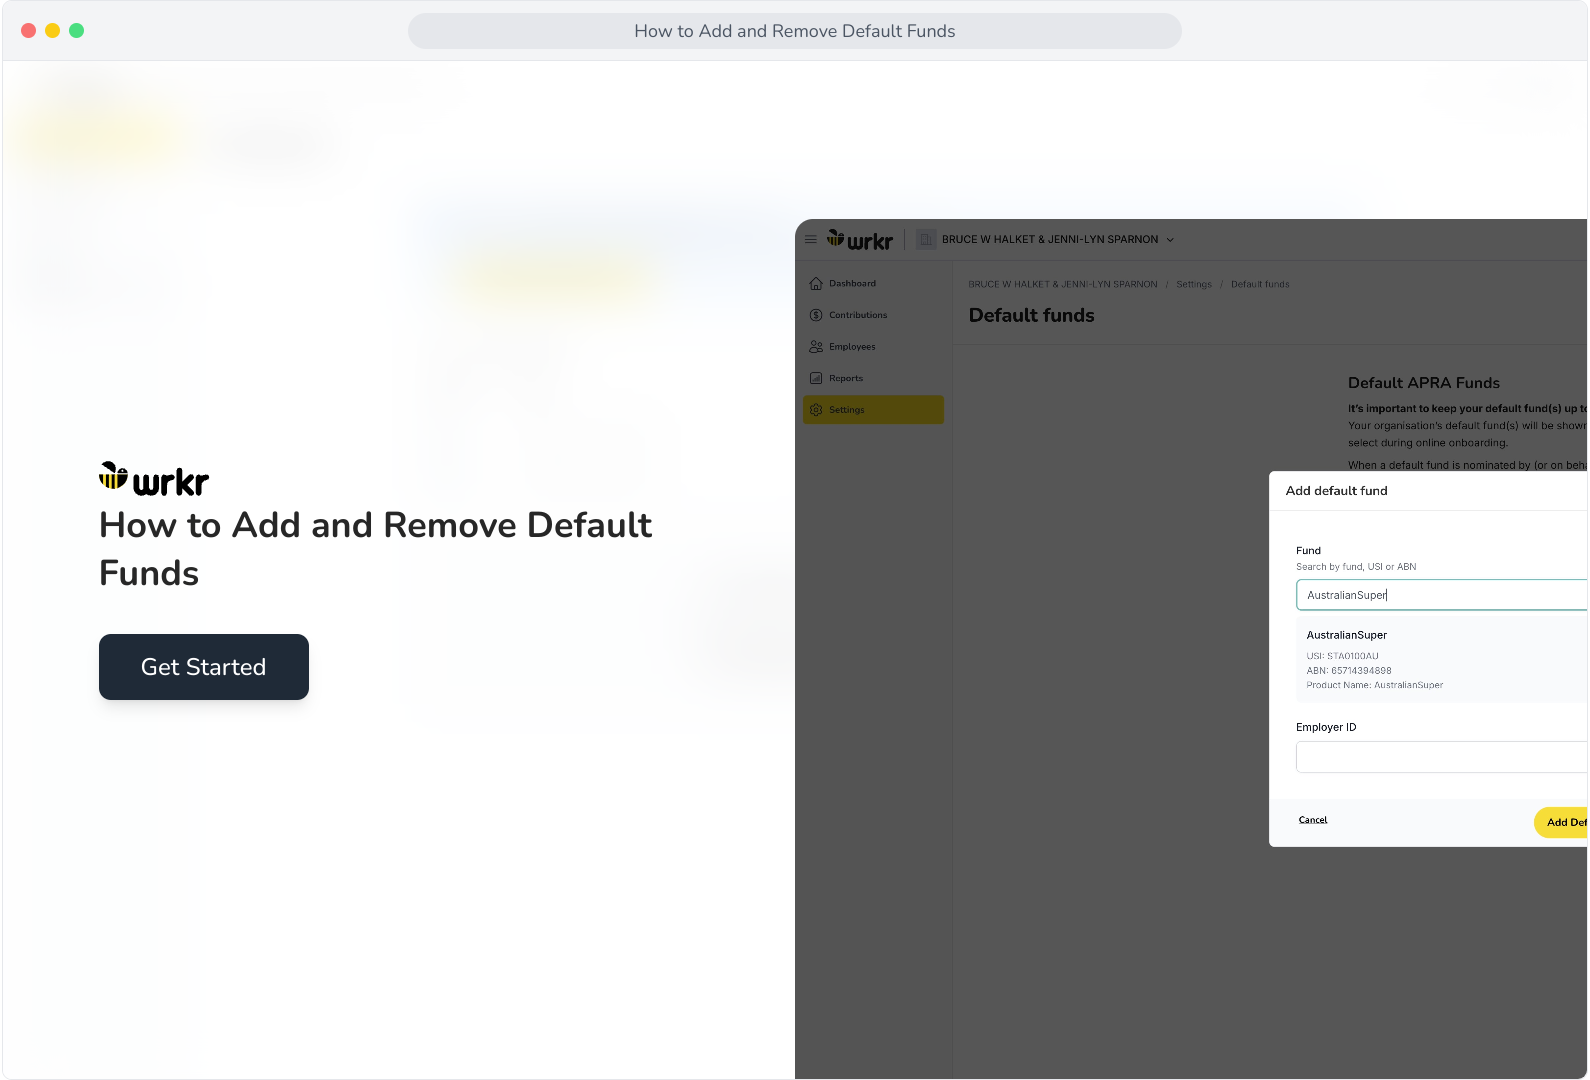
1. How to Add and Remove Default Funds
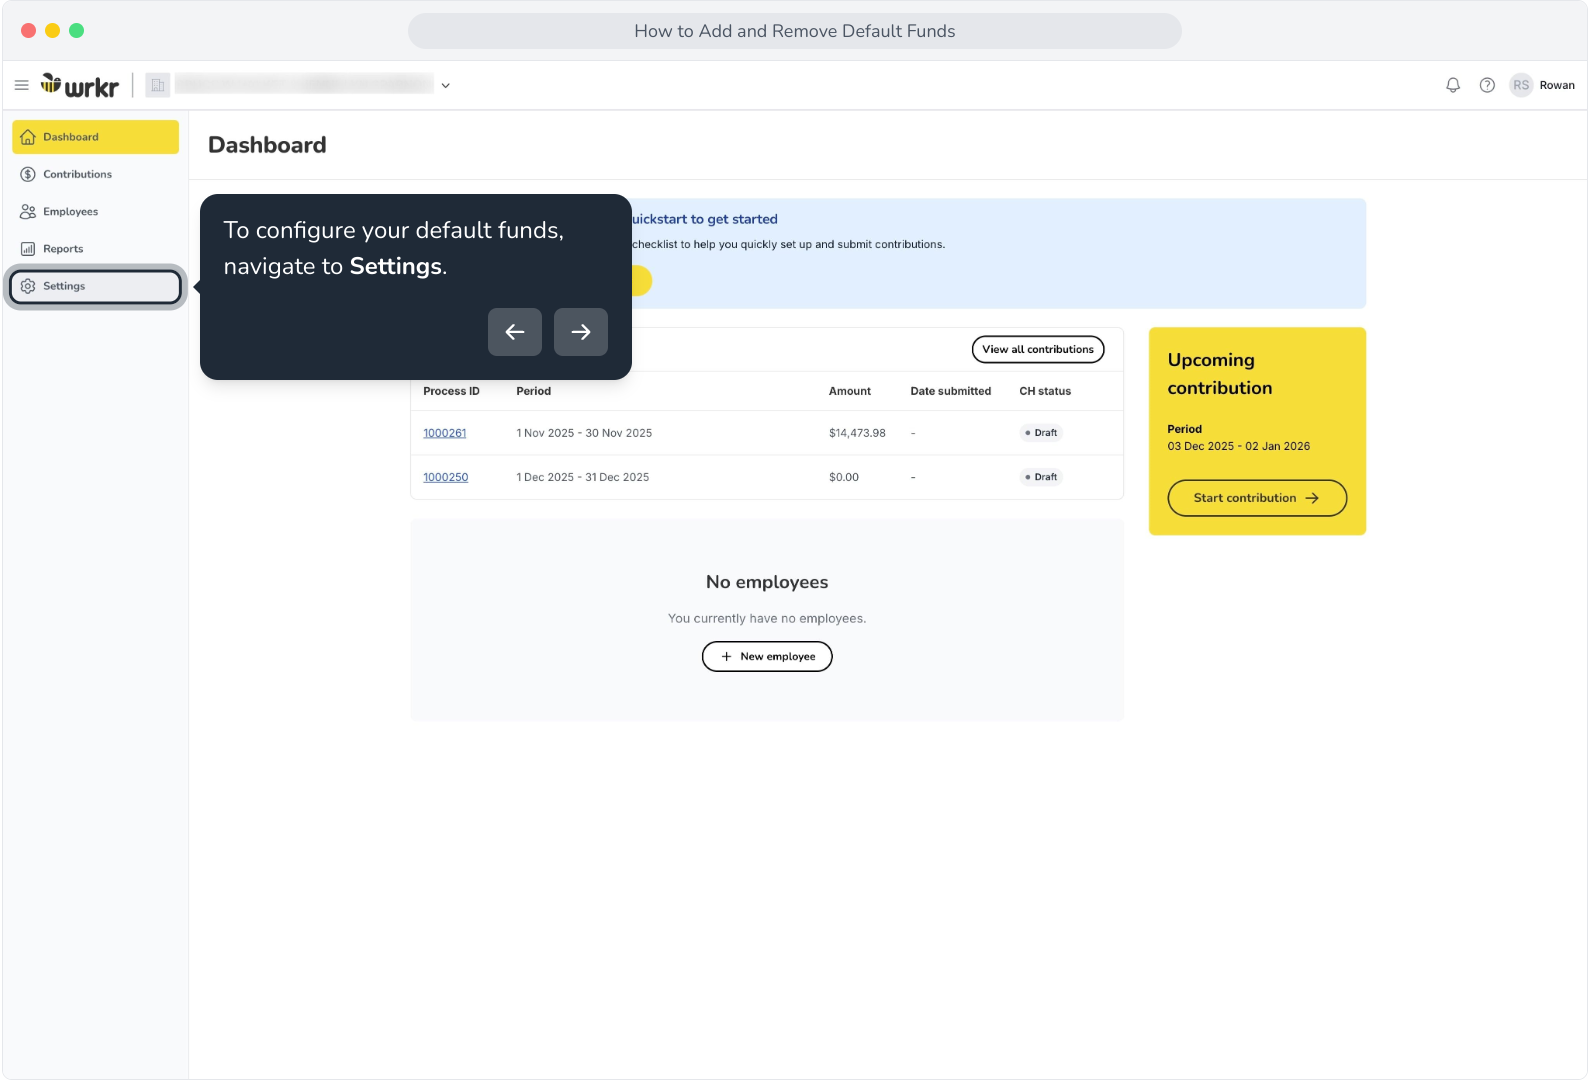
2. To configure your default funds, navigate to Settings.
3. Select Default funds.
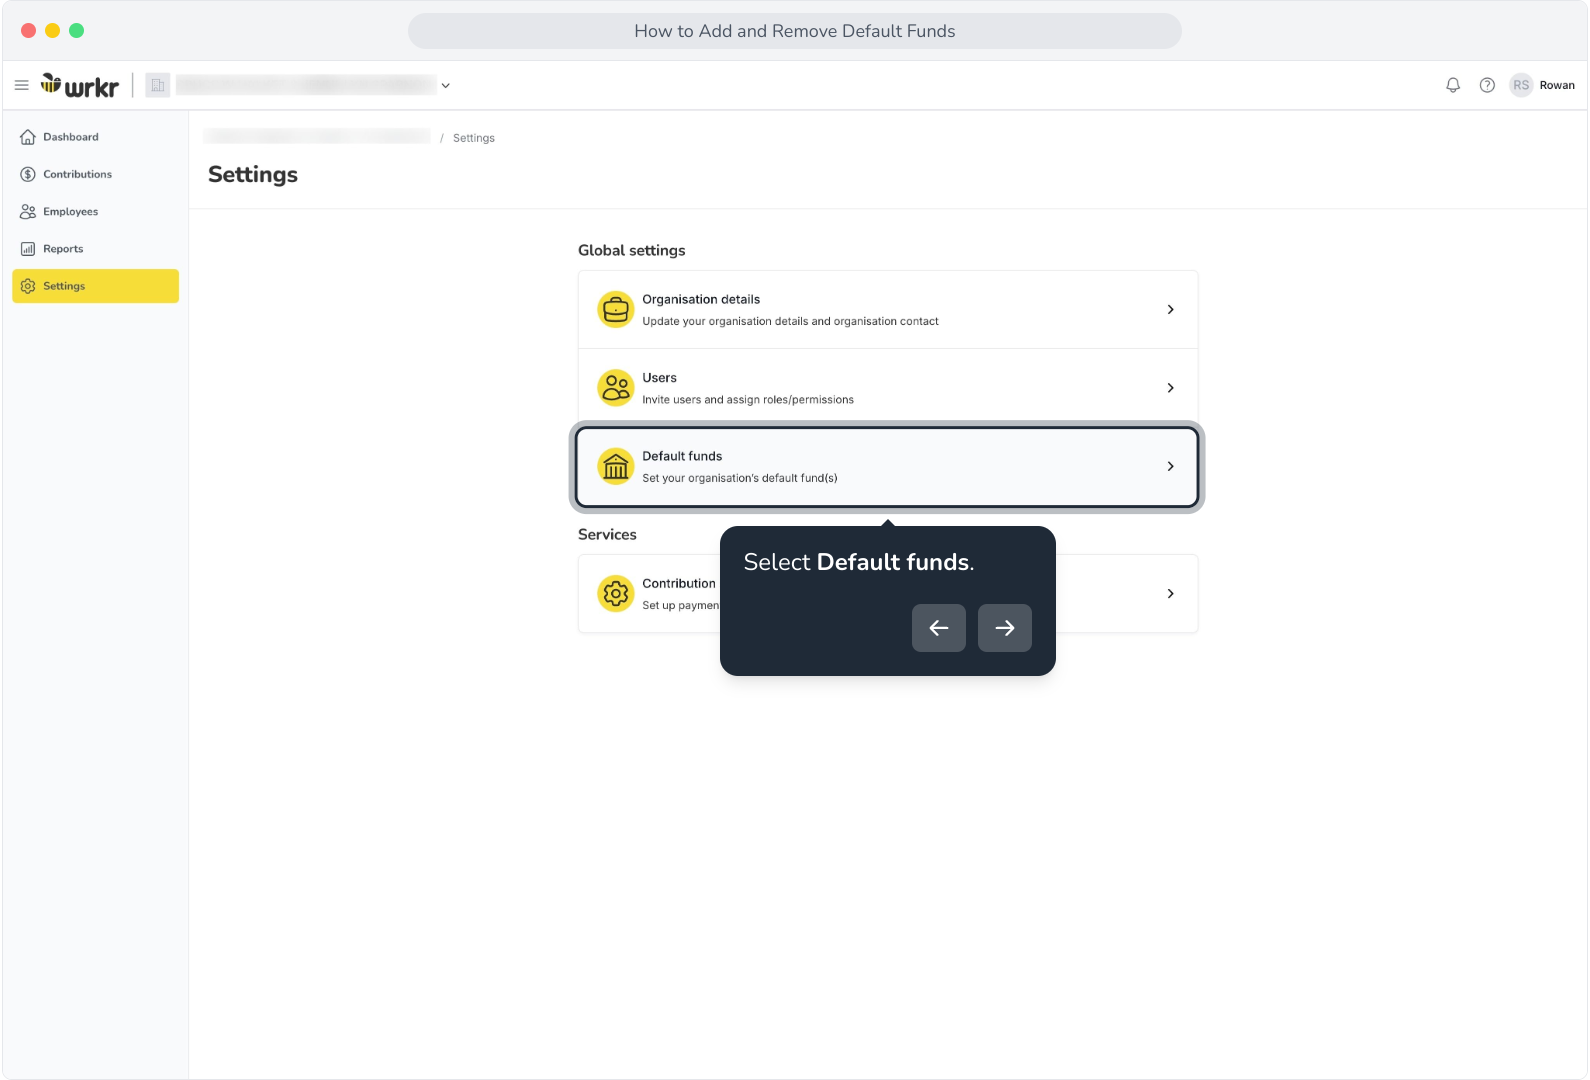
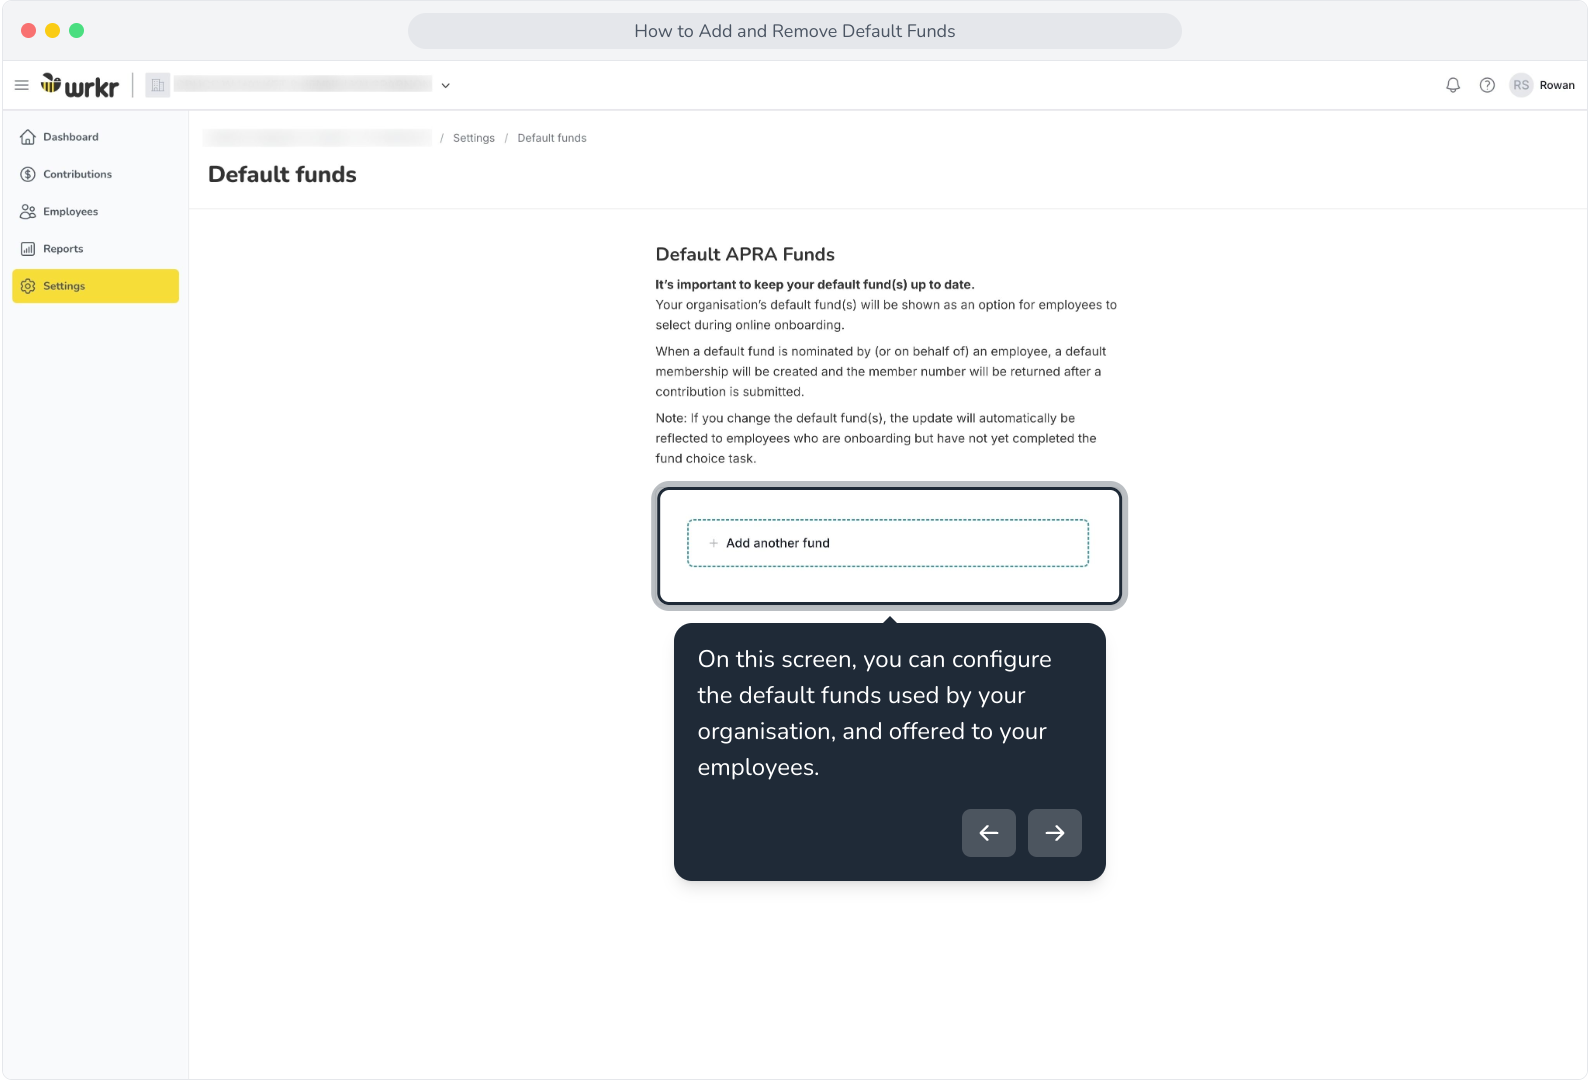
4. On this screen, you can configure the default funds used by your organisation, and offered to your employees.
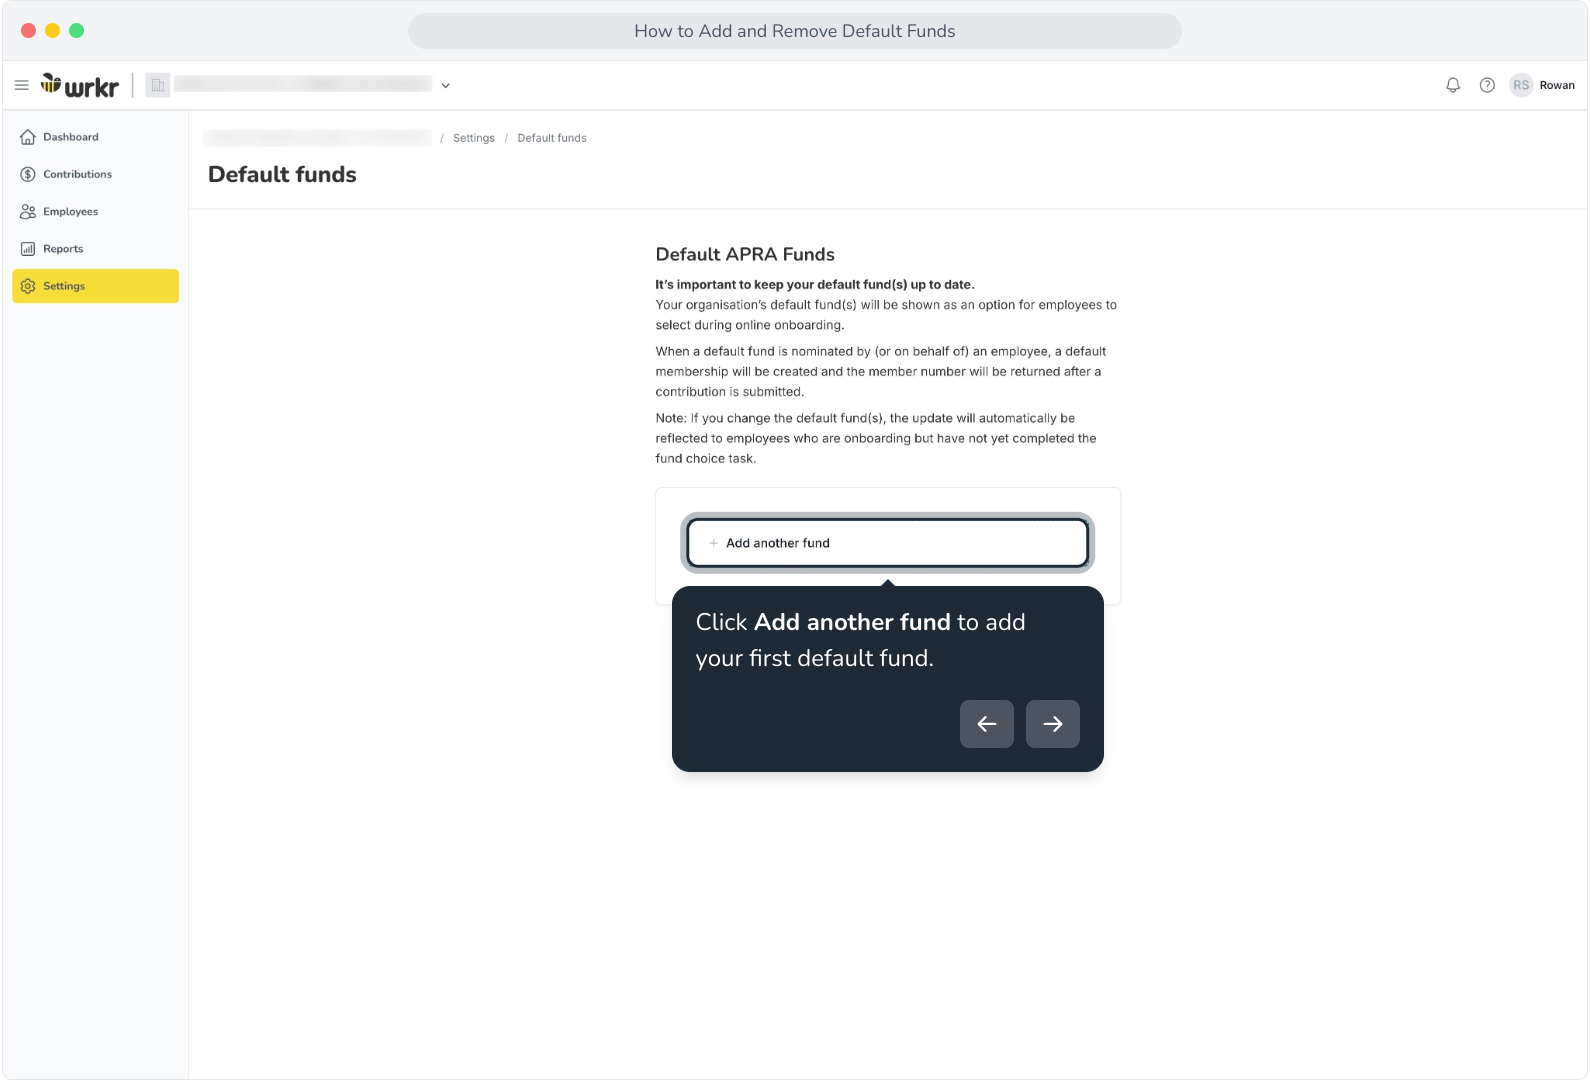
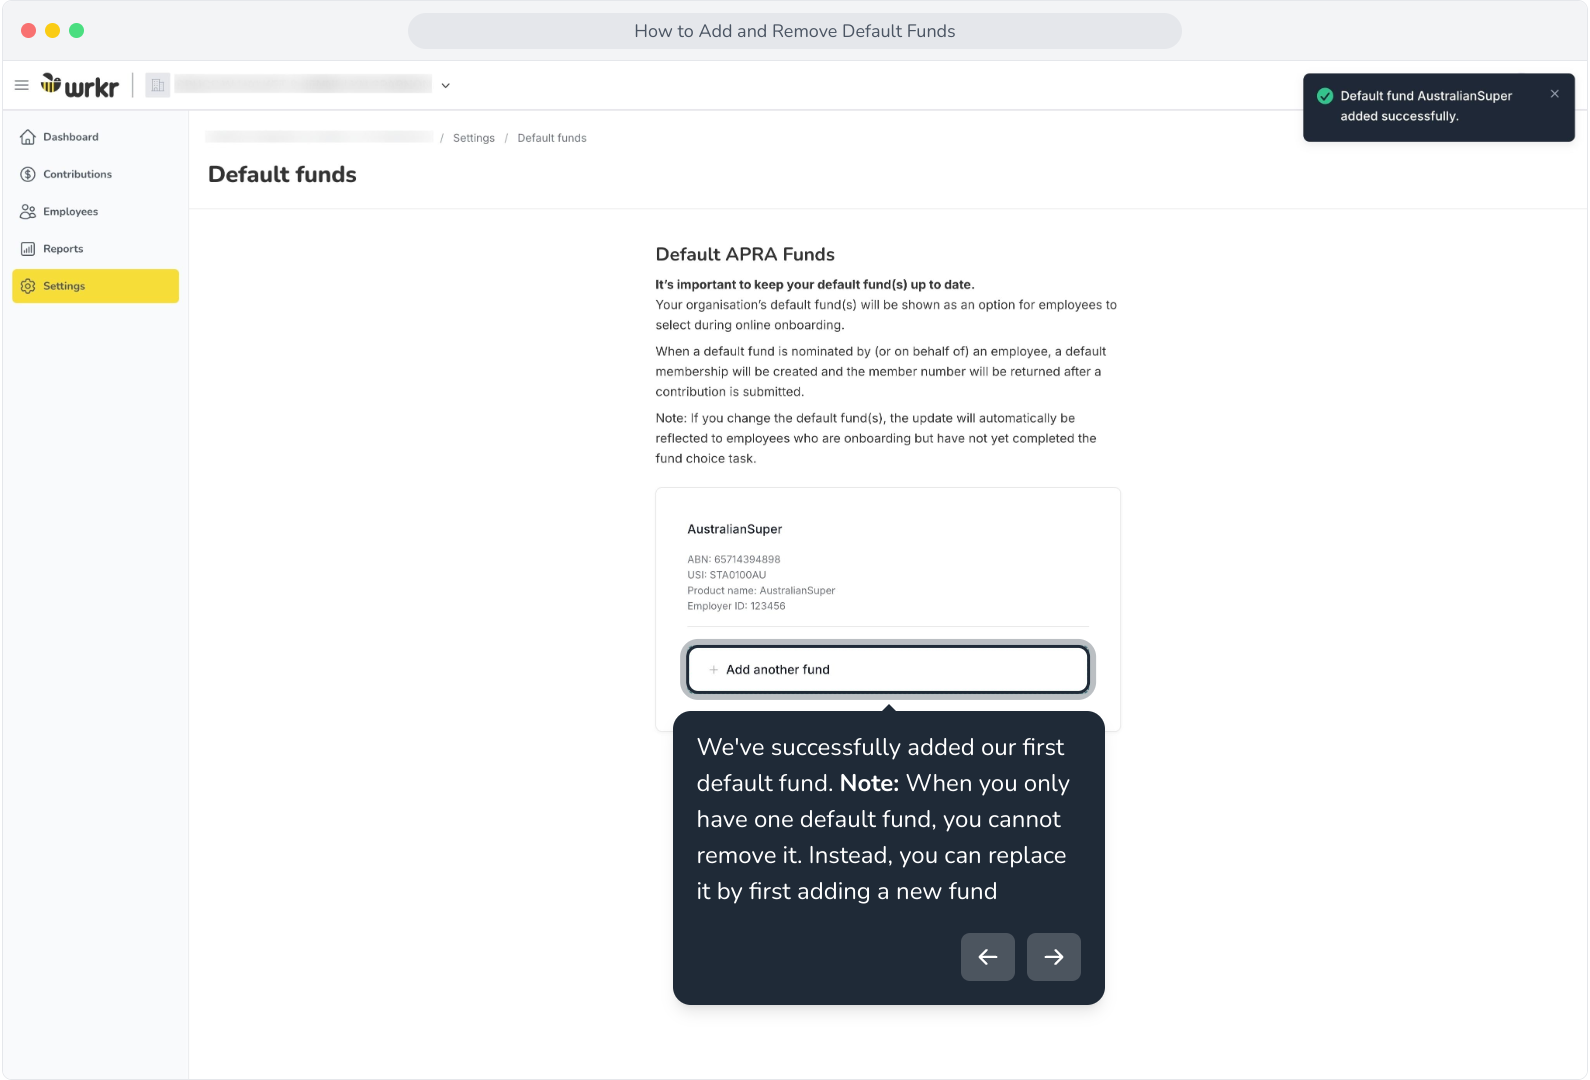
5. Click Add another fund to add your first default fund.
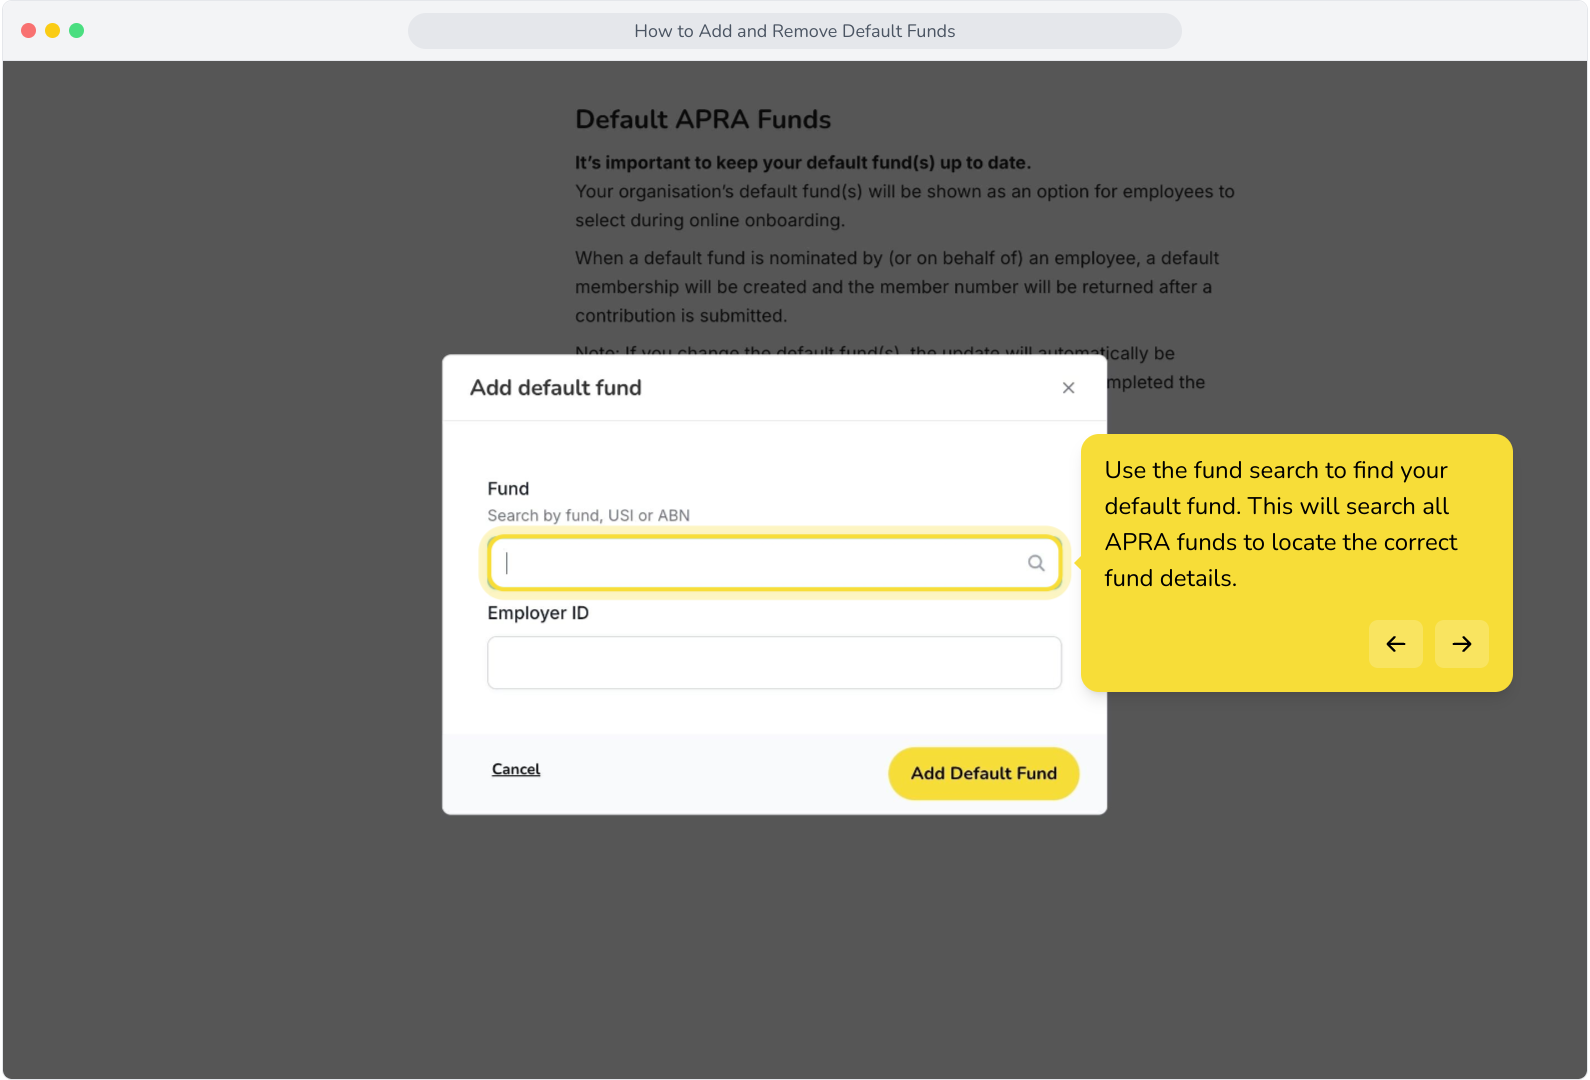
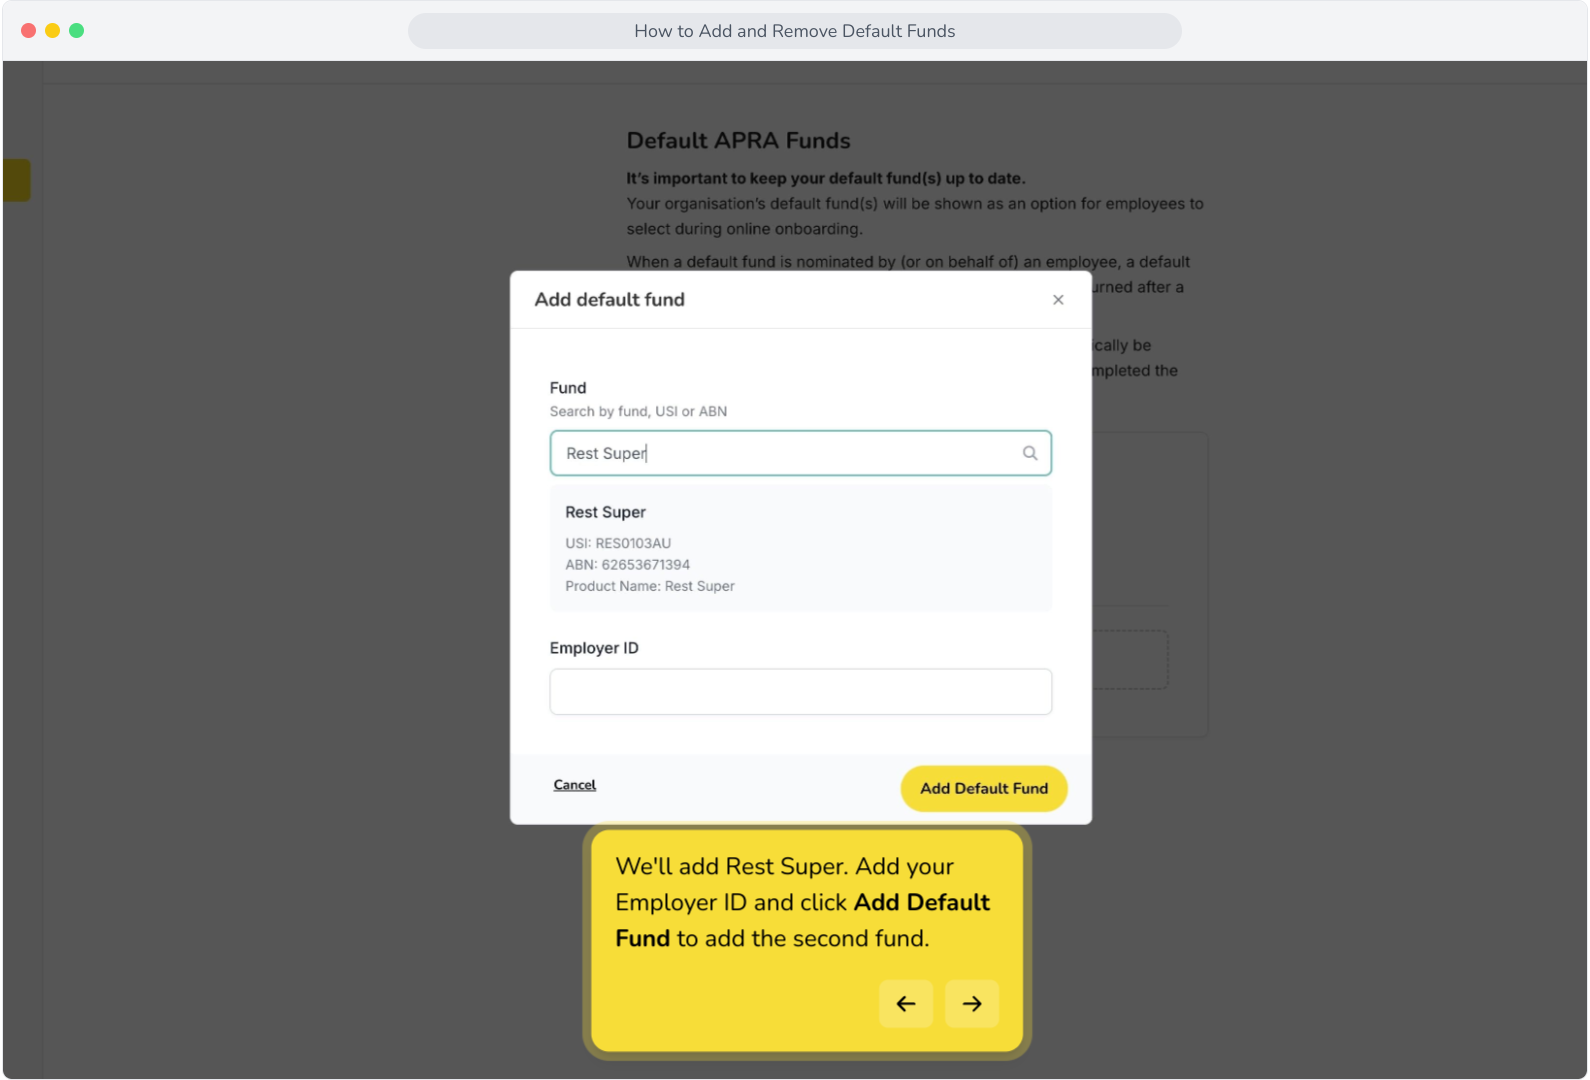
6. Use the fund search to find your default fund. This will search all APRA funds to locate the correct fund details.
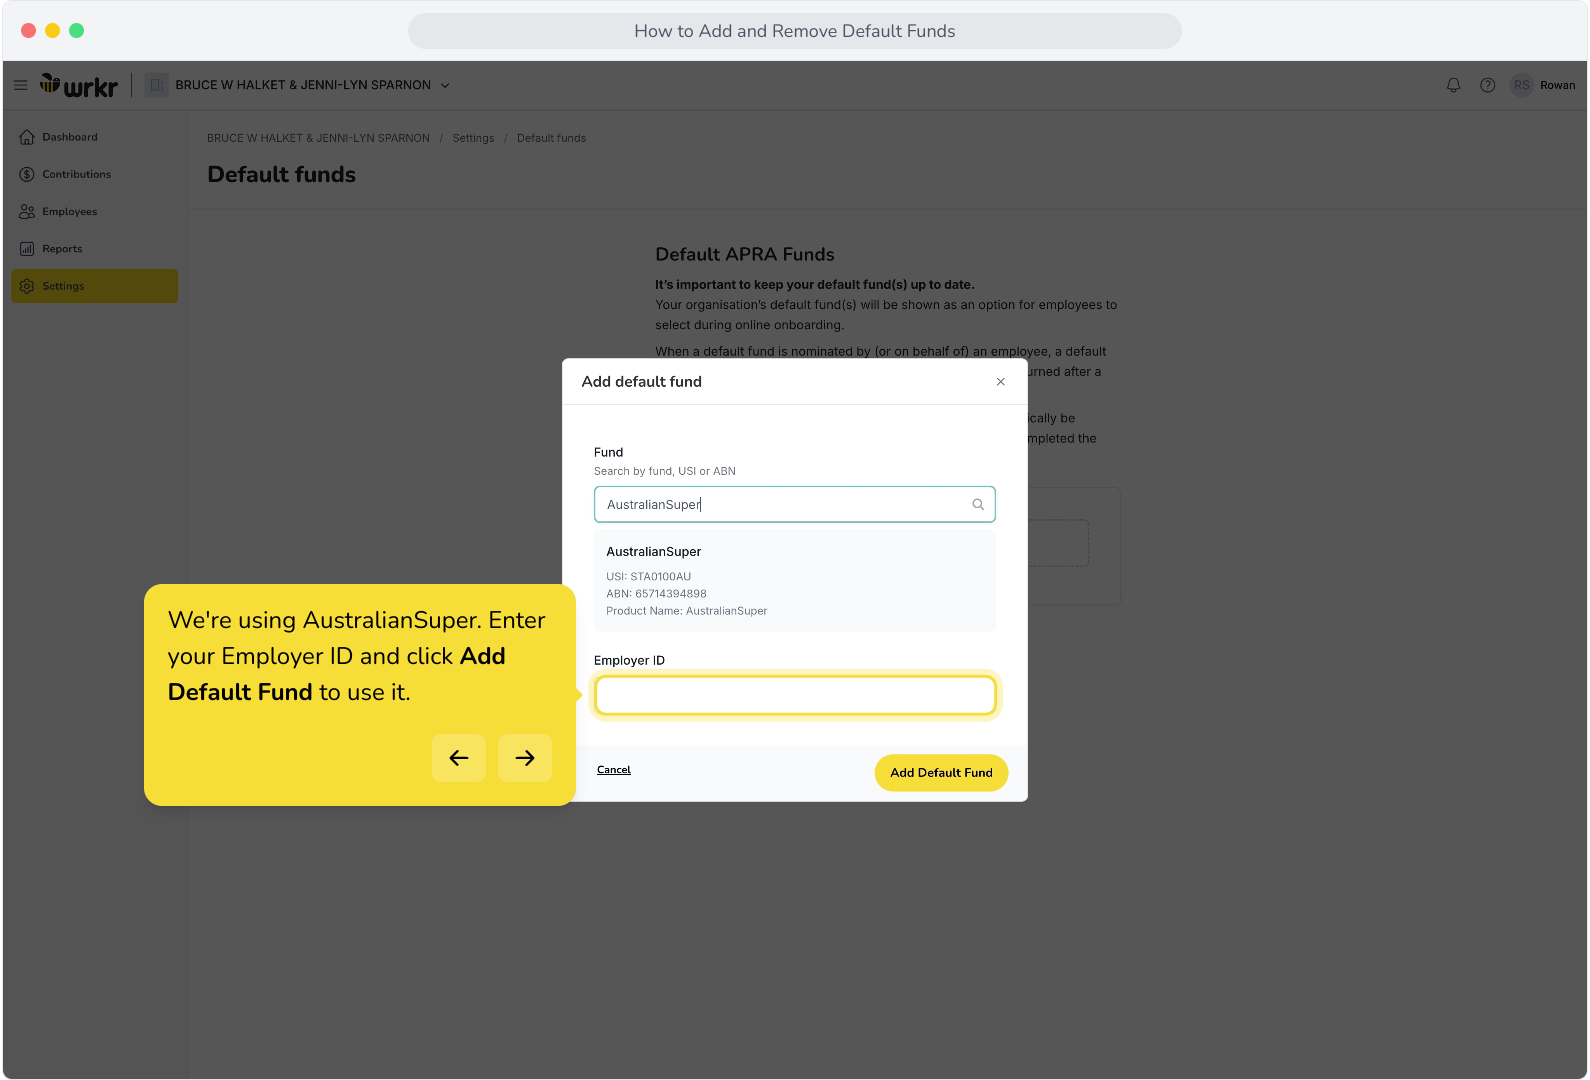
7. We're using AustralianSuper. Enter your Employer ID and click Add Default Fund to use it.
8. We've successfully added our first default fund. Note: When you only have one default fund, you cannot remove it. Instead, you can replace it by first adding a new fund
9. We'll add Rest Super. Add your Employer ID and click Add Default Fund to add the second fund.
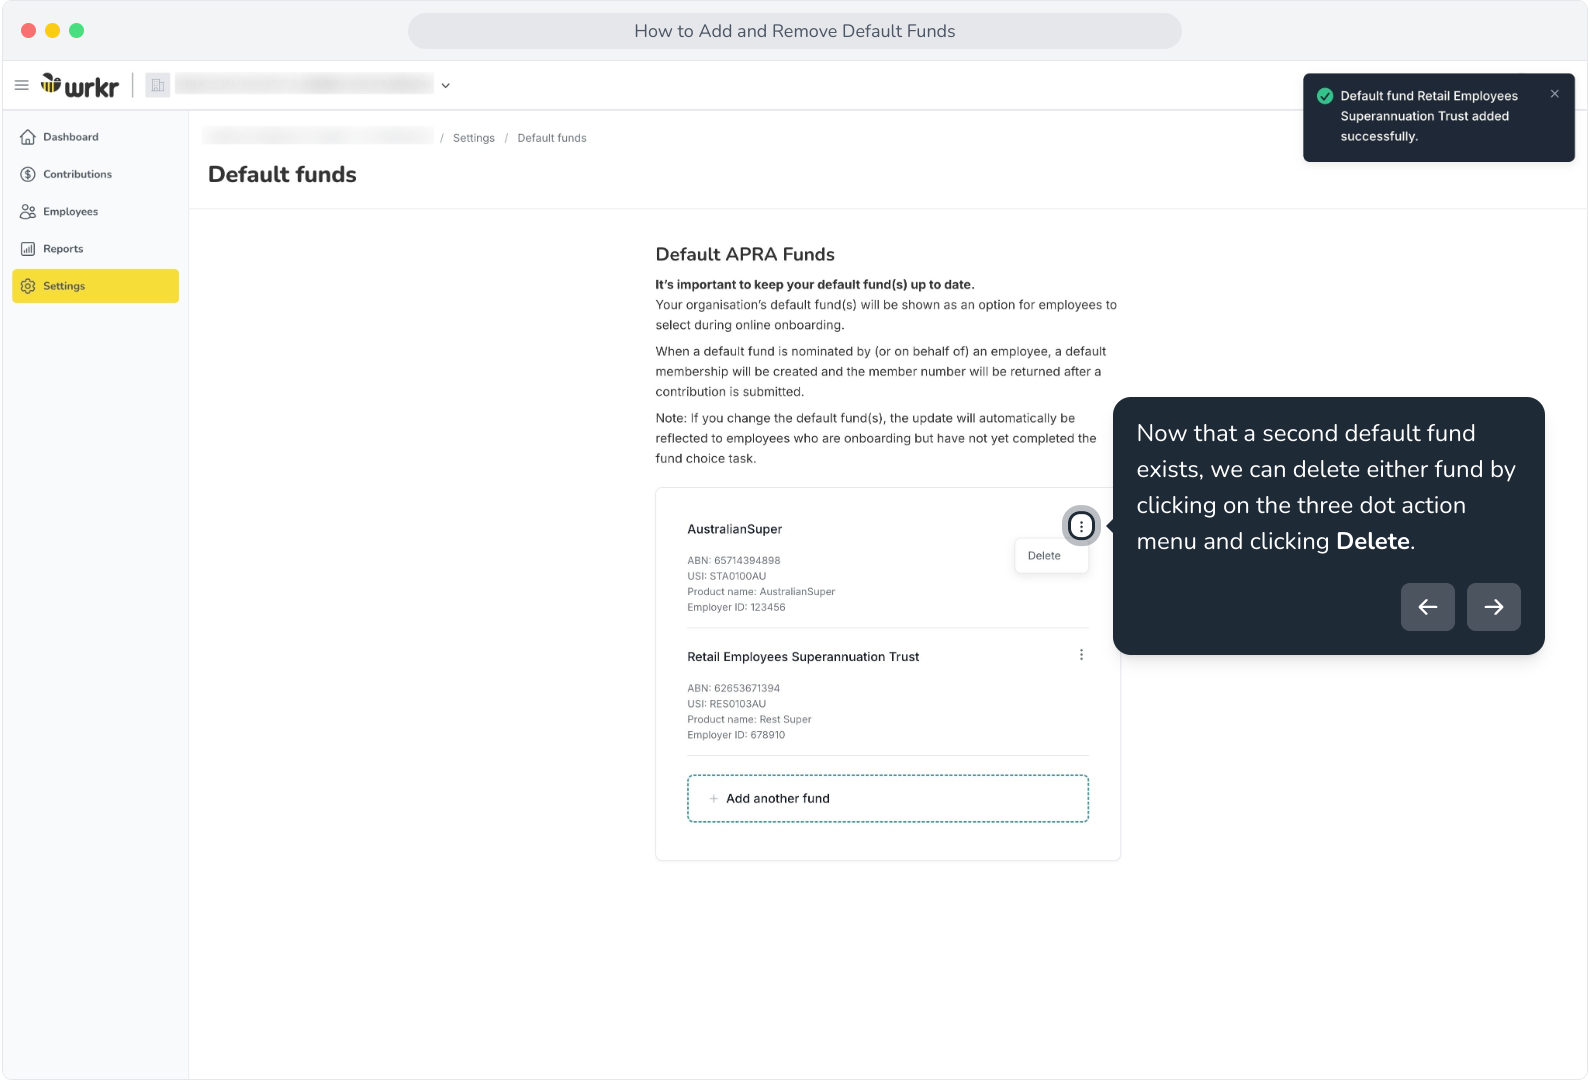
10. Now that a second default fund exists, we can delete either fund by clicking on the three dot action menu and clicking Delete.
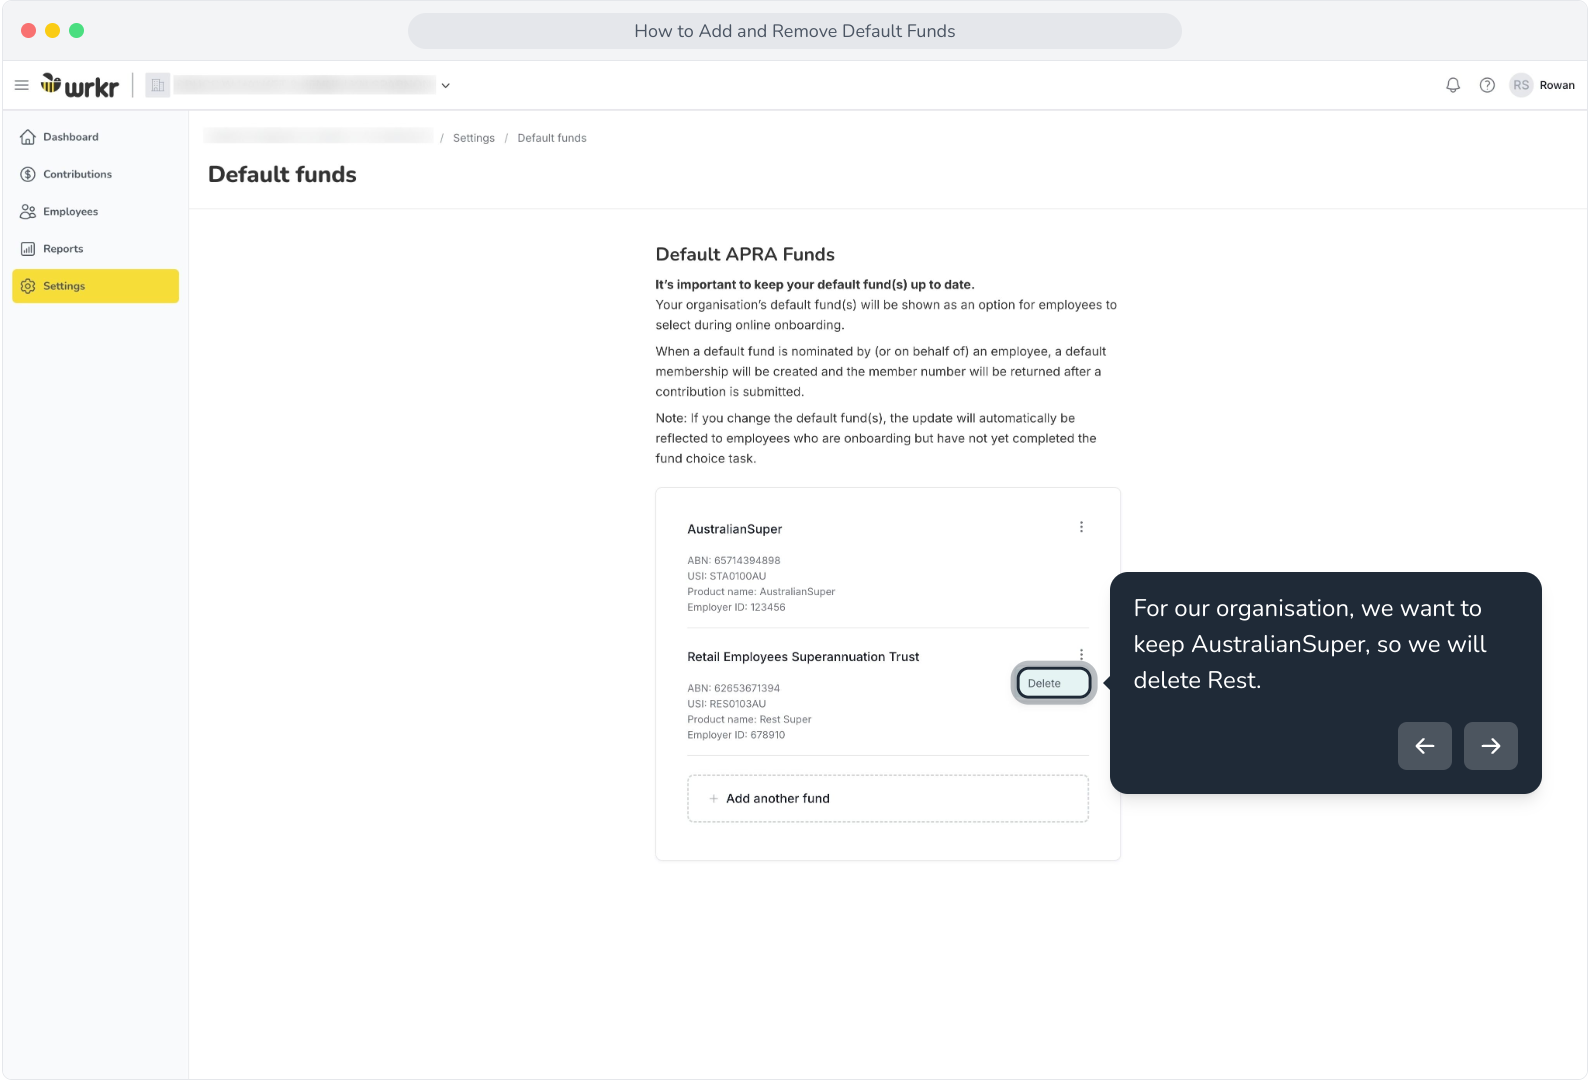
11. For our organisation, we want to keep AustralianSuper, so we will delete Rest.
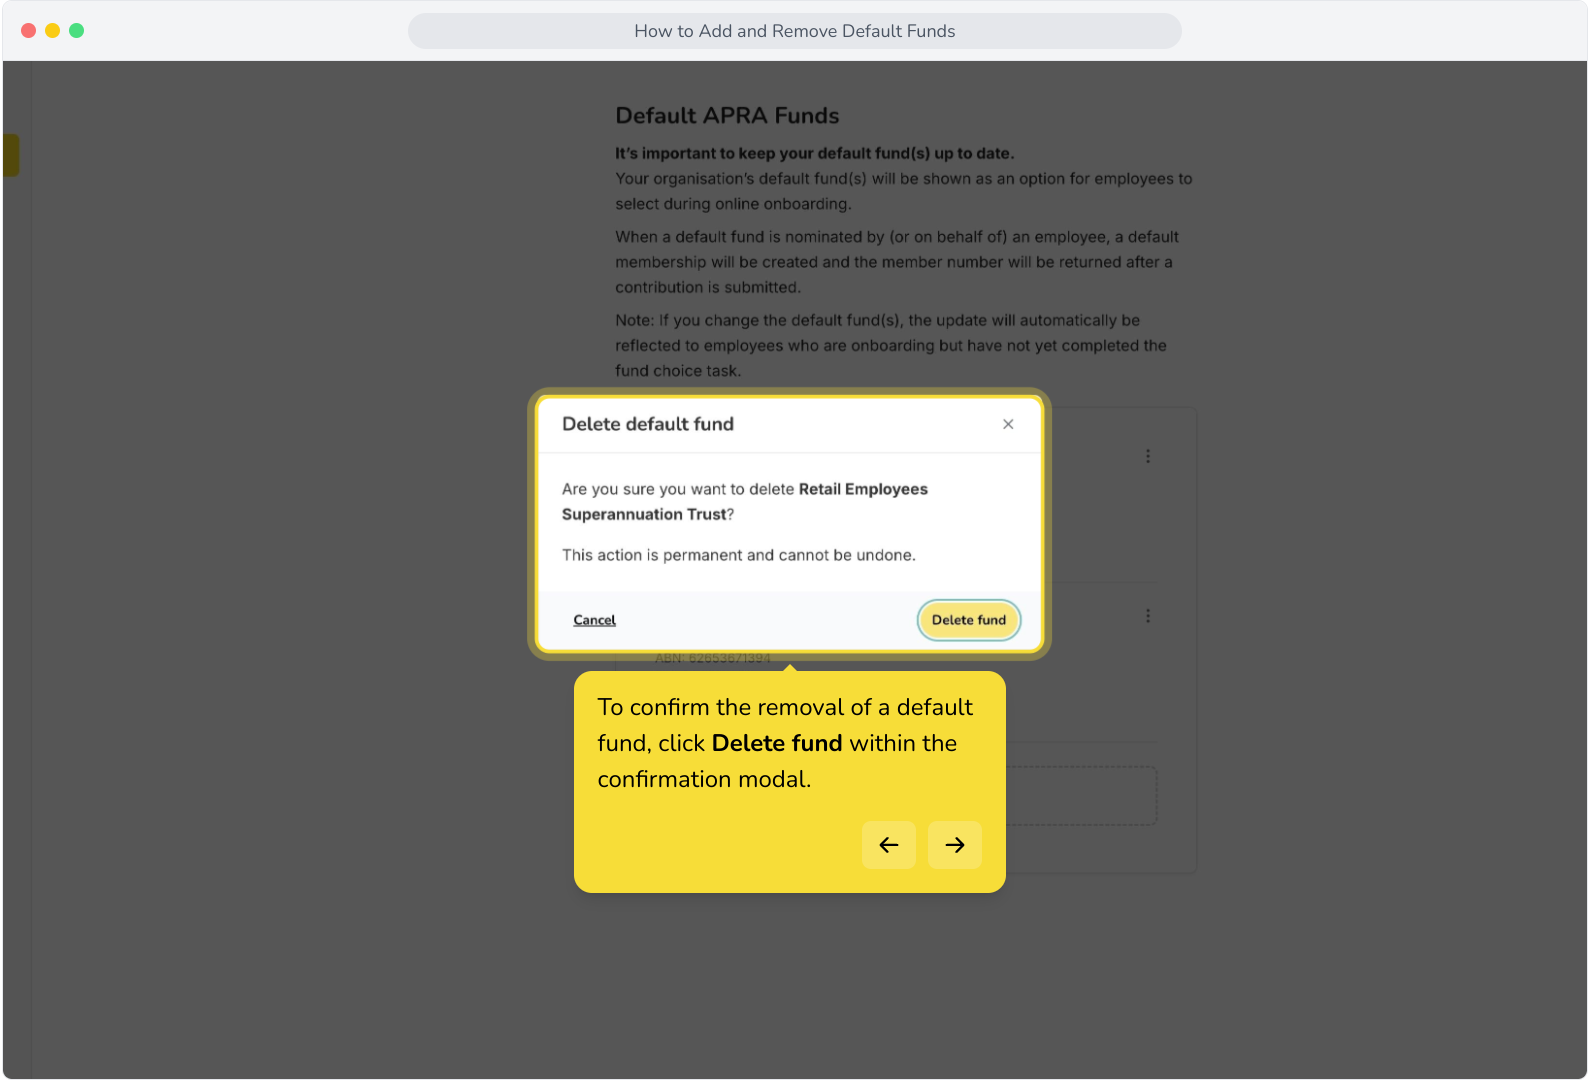
12. To confirm the removal of a default fund, click Delete fund within the confirmation modal.
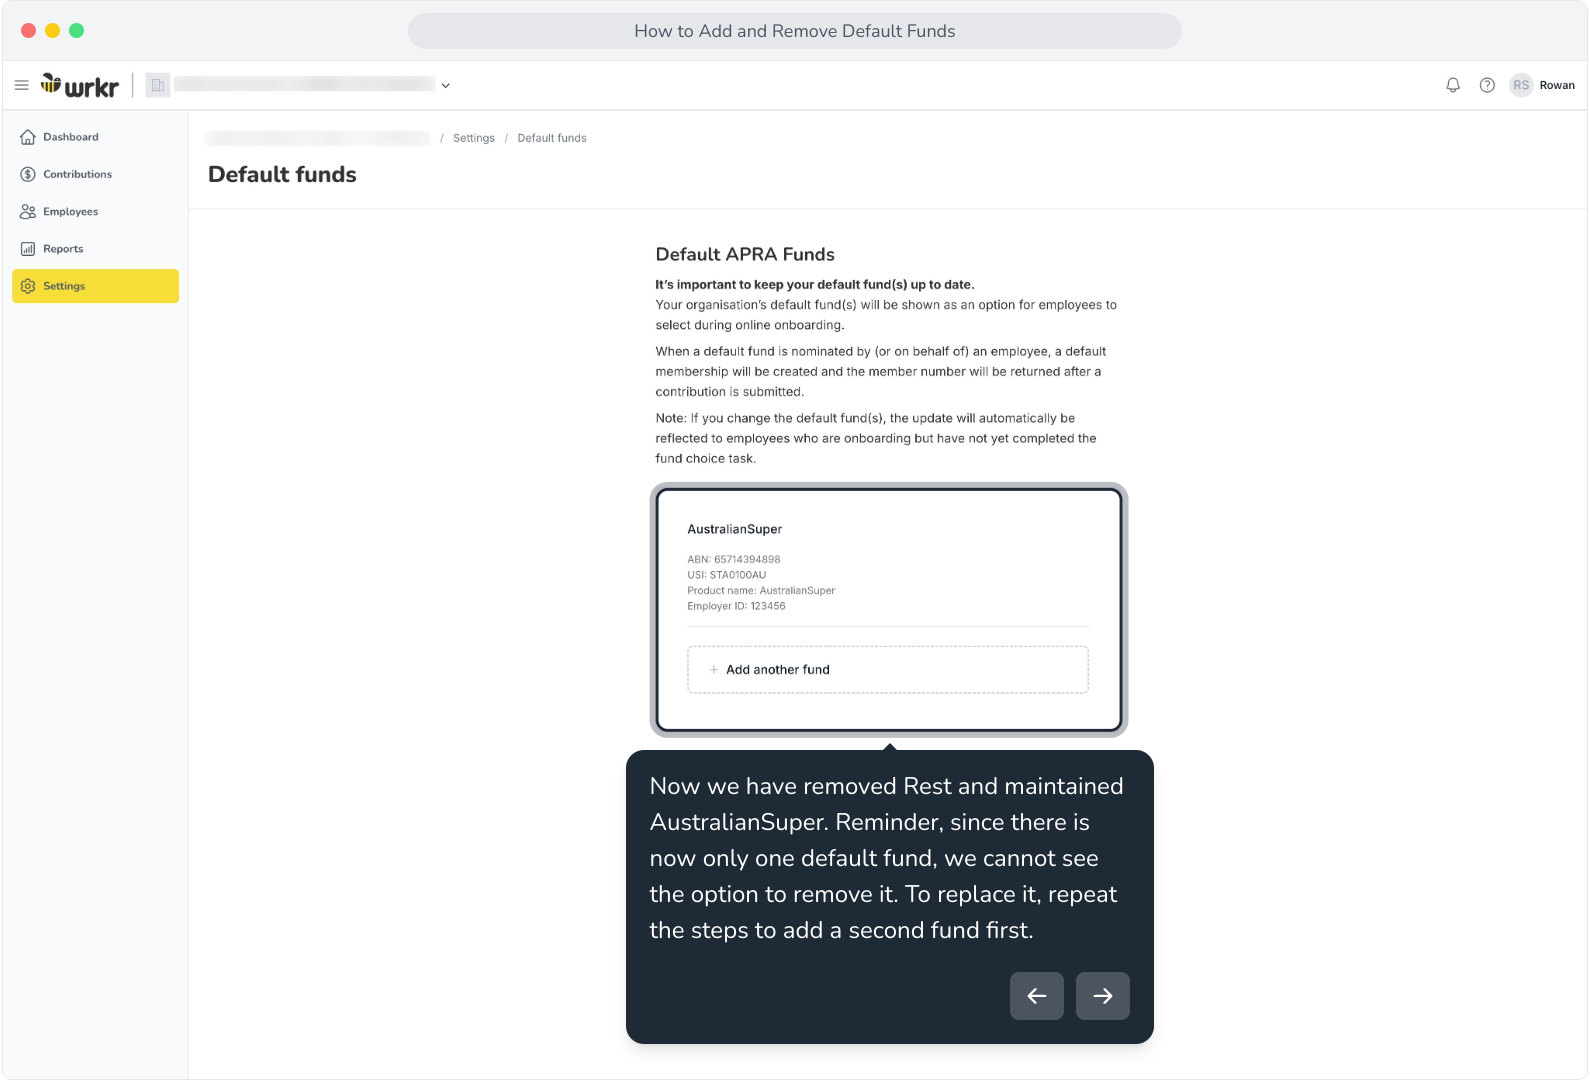
13. Now we have removed Rest and maintained AustralianSuper. Reminder, since there is now only one default fund, we cannot see the option to remove it. To replace it, repeat the steps to add a second fund first.